Visioneer XP220 Attach the USB Y-Cable to the Power Supply and Connect the Computer, Power Jack

Models: XP220

1 172
Download 172 pages 9.75 Kb
Page 20
Image 20
Attach the USB Y-Cable to the Power Supply and Connect the Computer

STEP 2: CONNECT THE POWER SUPPLY AND USB CABLE 13
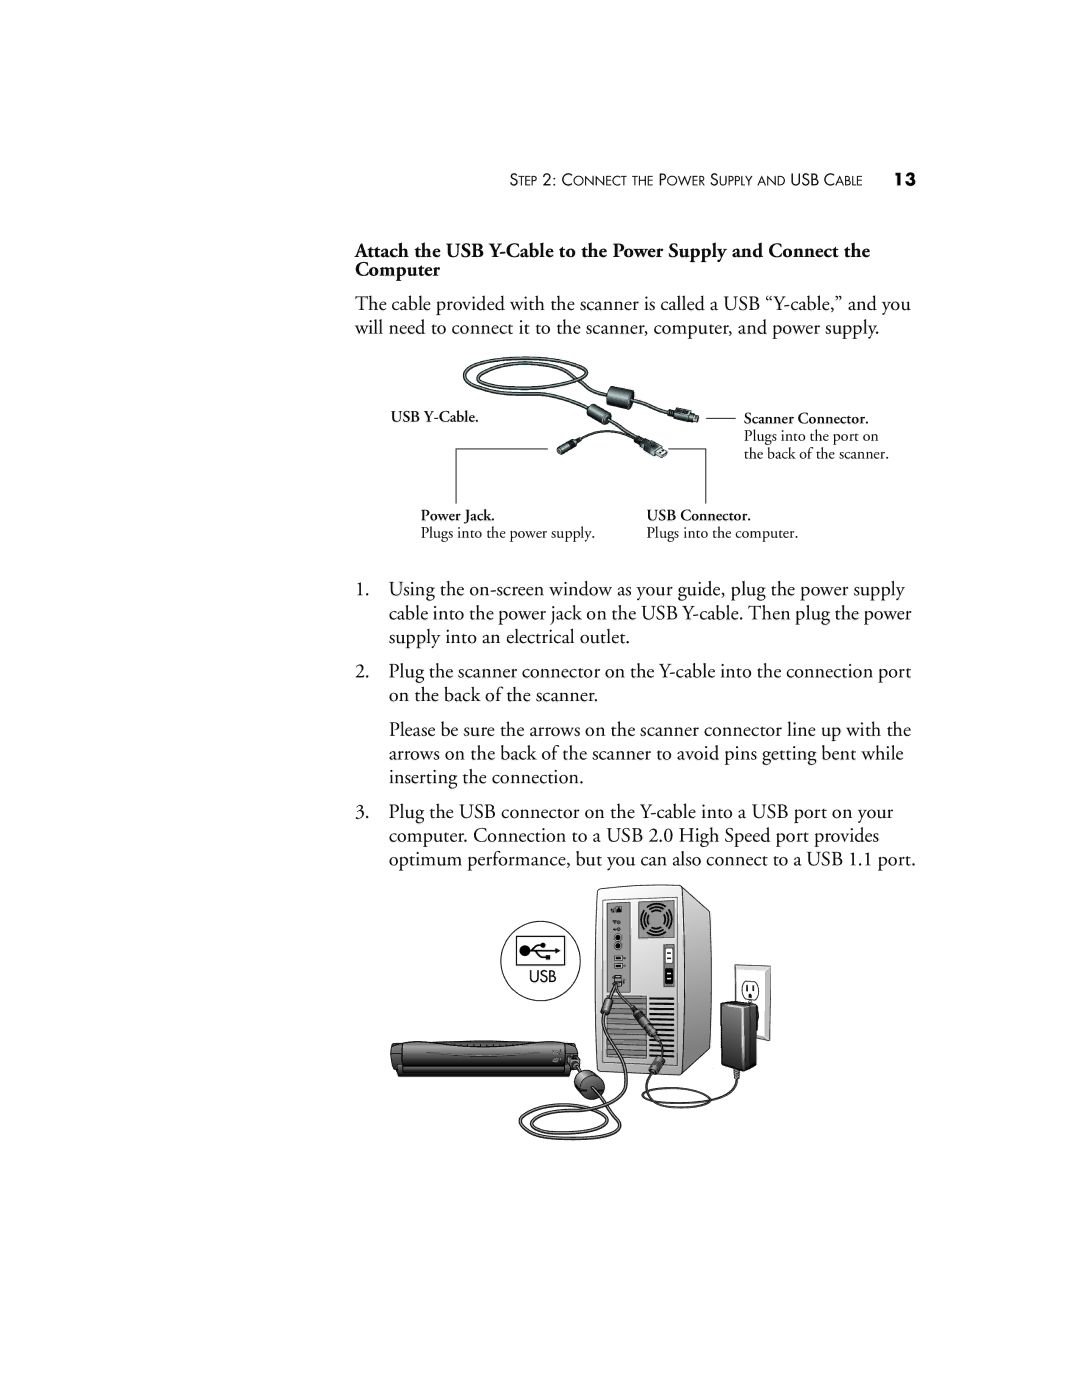
Attach the USB Y-Cable to the Power Supply and Connect the Computer

The cable provided with the scanner is called a USB “Y-cable,” and you will need to connect it to the scanner, computer, and power supply.

USB Y-Cable.


Scanner Connector.


Plugs into the port on


the back of the scanner.


Power Jack.

USB Connector.

Plugs into the power supply.

Plugs into the computer.

1.Using the on-screen window as your guide, plug the power supply cable into the power jack on the USB Y-cable. Then plug the power supply into an electrical outlet.

2.Plug the scanner connector on the Y-cable into the connection port on the back of the scanner.

Please be sure the arrows on the scanner connector line up with the arrows on the back of the scanner to avoid pins getting bent while inserting the connection.

3.Plug the USB connector on the Y-cable into a USB port on your computer. Connection to a USB 2.0 High Speed port provides optimum performance, but you can also connect to a USB 1.1 port.

USB

Page 20
Image 20
Visioneer XP220 manual Attach the USB Y-Cable to the Power Supply and Connect the Computer, Scanner Connector, Power Jack