Chapter 18: Access Control Configuration
4.Enter a number in the Profile Action ID field ranging from 0 to 72. This field is mandatory.
Note
This field must be
5.In the Deny/Permit field, use the pull down menu to select one of the following parameters:
Deny - This selection drops ingress packets that conform to the specified Profile Action ID.
Permit - This selection allows ingress packets that conform to the specified Profile Action ID to be processed by the switch.
Note
You must enter a selection for Deny/Permit field even if the Profile
Action ID that you have entered ignores both the
Policed-CoS fields.
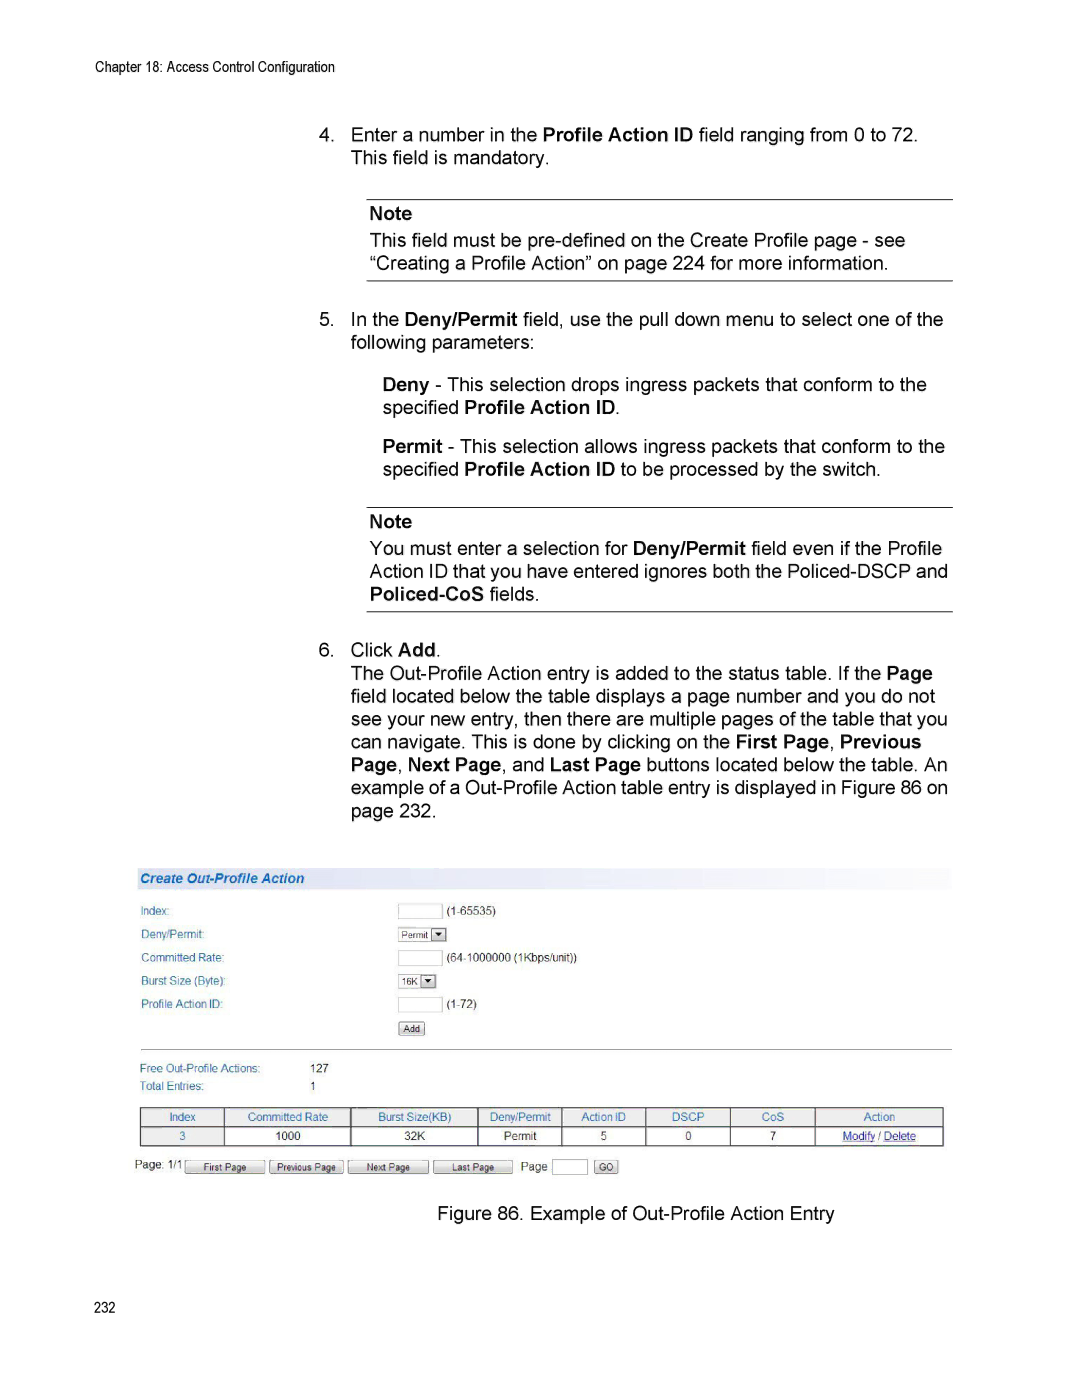
6.Click Add.
The
Figure 86. Example of Out-Profile Action Entry
232
