Installation and Setup
To connect an HDMI UTPro to a LAN:
1.Complete the installation of the HDMI UTPro including power up of the system.
2.Insert one end of the
3.Connect the other end of the
4.Check the indicator LEDs for the LAN 10/100 connector (see page 34).
5.Determine the IP address by accessing
3 minutes.
6.Complete the installation by testing the connection (see the instructions on page 36).
Note: The LAN 10/100 port can also be used to Telnet into the HDMI UTPro to determine its MAC Address (see page 131).
Workaround for Networks that Do Not Utilize DHCP
If the network does not utilize DHCP, you must connect either to a standalone router that supports DHCP or to a PC that is running DHCP emulation software. Once the router or PC assigns a DHCP IP address, that IP address is used to access the WebConsole from which you must then change the DHCP IP address to the static address provided by your Network Administrator before you connect the HDMI UTPro directly to the LAN.
Determining IP address for HDMI UTPro
The HDMI UTPro features a
To determine the DHCP IP address that the network assigned to the HDMI UTPro in Step 3 of the previous instructions, you can access the unit via NetLinx Studio.
NetLinx Studio version 3.0 (or higher) features a
Note: Refer to the NetLinx Studio online help for details on using
The following assumes that the WebConsole connection (LAN 10/100 port) is to the same LAN as the PC running NetLinx Studio and the NetLinx Master for the HDMI UTPro.
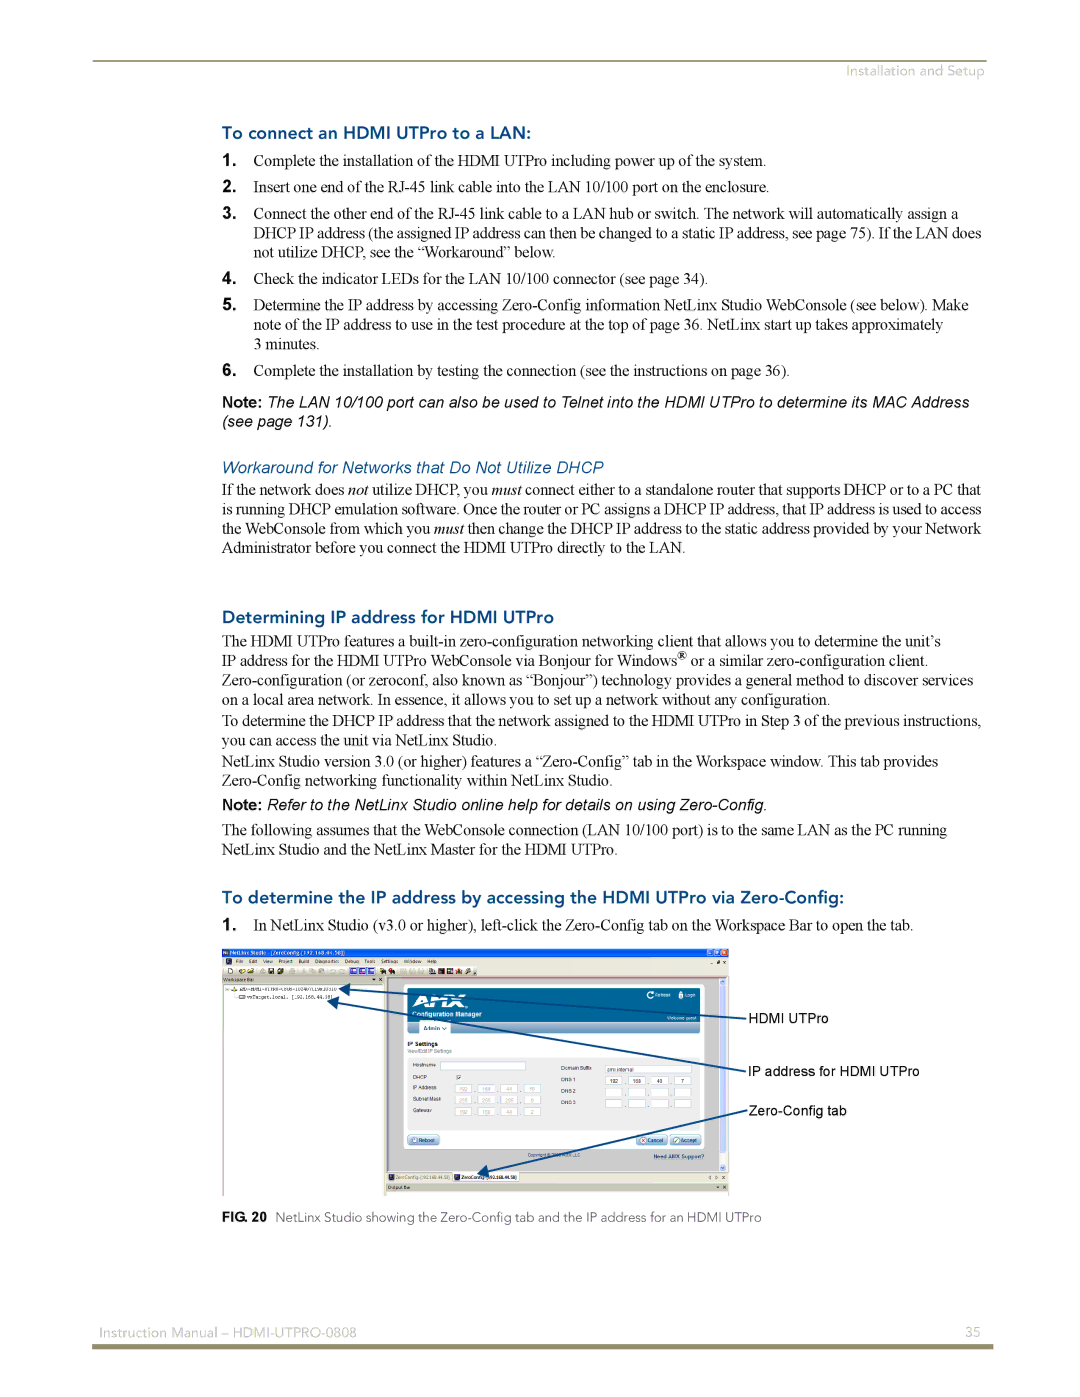
To determine the IP address by accessing the HDMI UTPro via
1.In NetLinx Studio (v3.0 or higher),
![]() HDMI UTPro
HDMI UTPro
IP address for HDMI UTPro
FIG. 20 NetLinx Studio showing the Zero-Config tab and the IP address for an HDMI UTPro
Instruction Manual – | 35 |
|
|