Creating Users
Table of Contents sections 1 2 3 4 5 6 7 8 9 10 11 12 13 14 15 16 17 18 19 20 21
6..5..3 Saving the new group
Click ![]() . The group’s details are now in the system.
. The group’s details are now in the system.
Repeat this process to add more groups. When finished,
click. All groups appear on the “User Groups” page; see Figure 23.
Tip! The allowed services appear as icons. To see which service the icon represents, hold the mouse over the icon and a tool tip appears with the name of the service.
You can create different access profiles. You can give permission to targets and define different access rights through the “Allowed Services”.
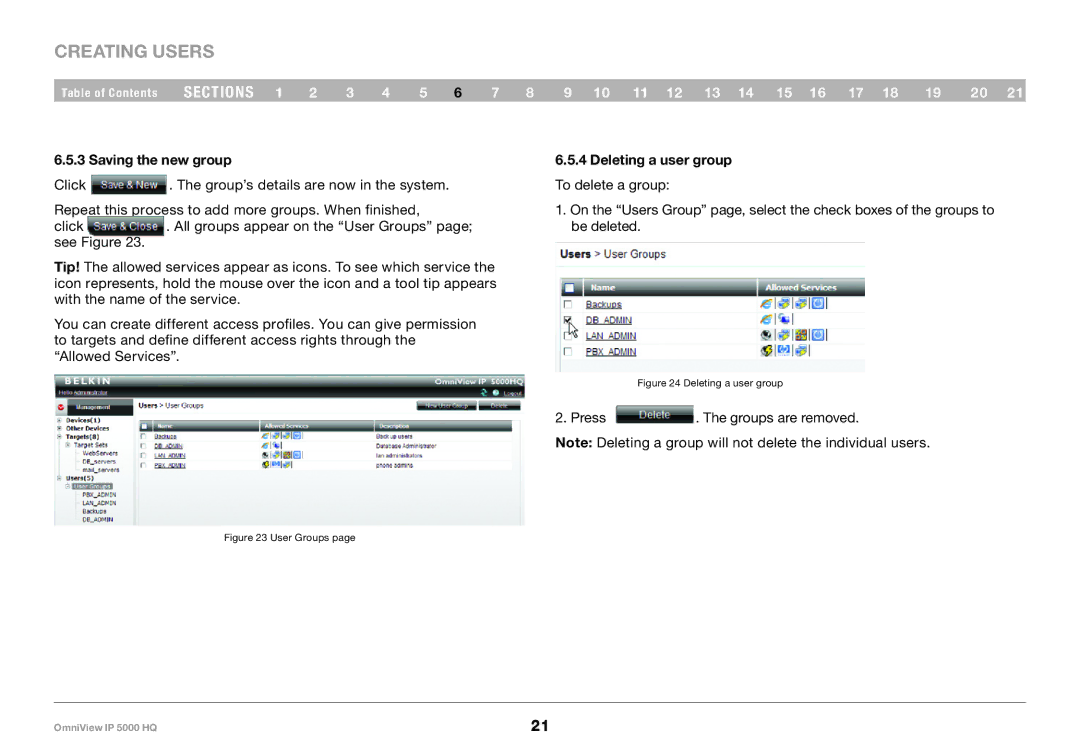
6..5..4 Deleting a user group
To delete a group:
1.On the “Users Group” page, select the check boxes of the groups to be deleted.
Figure 24 Deleting a user group
2. Press ![]() . The groups are removed.
. The groups are removed.
Note: Deleting a group will not delete the individual users.
Figure 23 User Groups page
OmniView IP 5000 HQ | 21 |