3.In the Managed Devices Tree, select the IP address of the Command View server that manages the
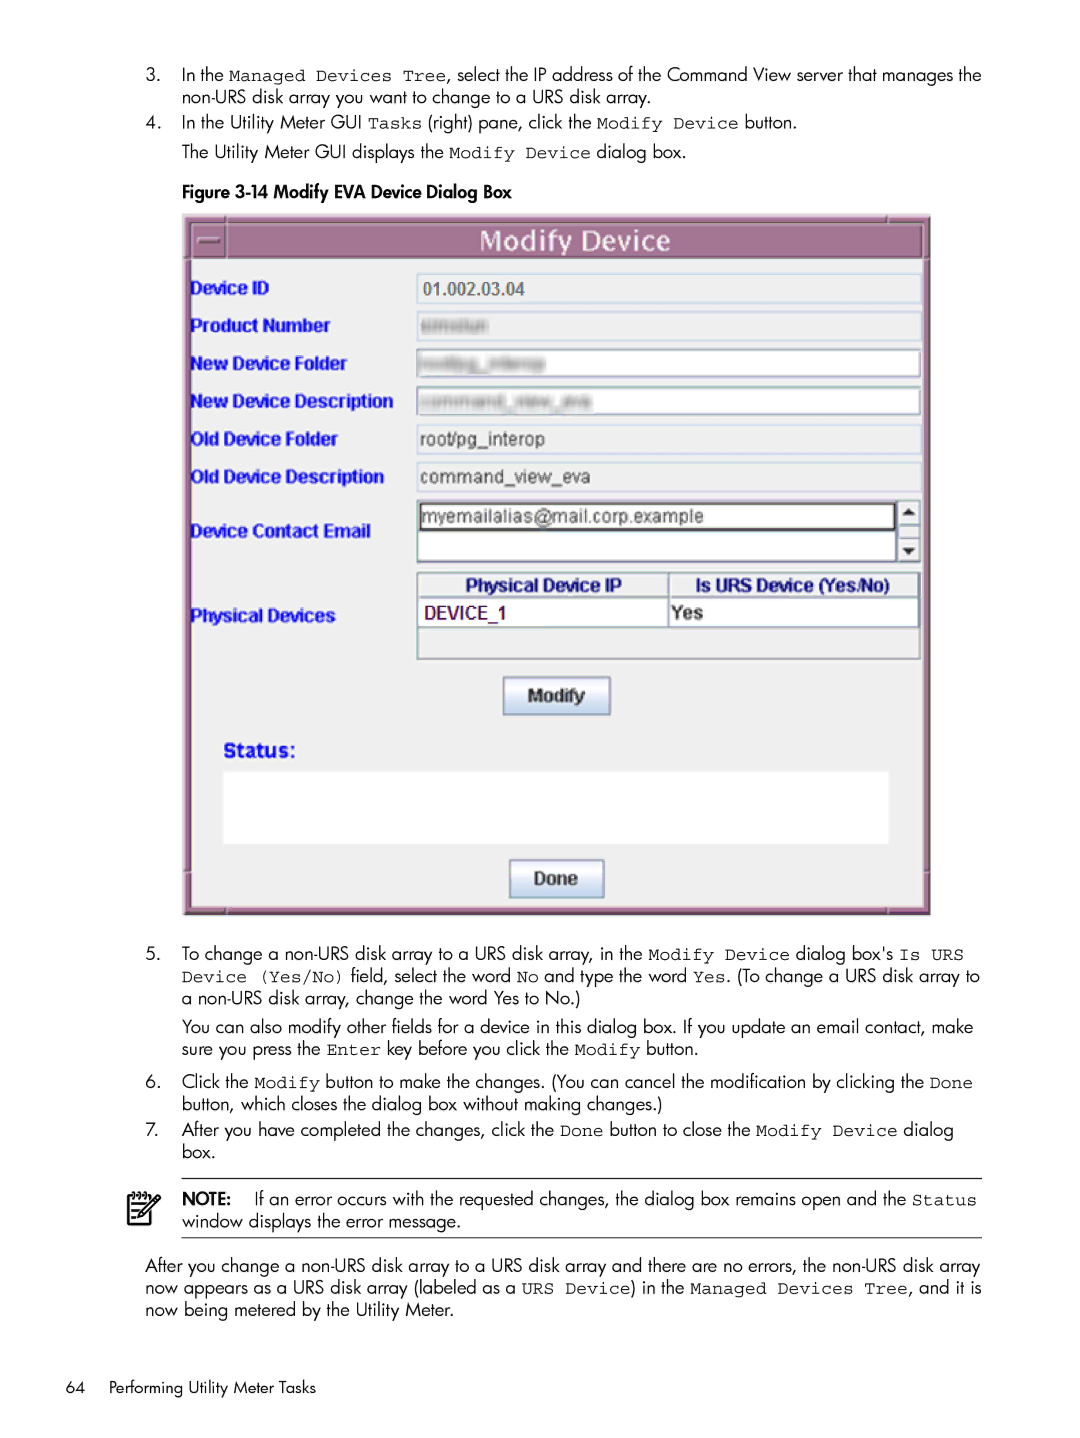
4.In the Utility Meter GUI Tasks (right) pane, click the Modify Device button. The Utility Meter GUI displays the Modify Device dialog box.
Figure 3-14 Modify EVA Device Dialog Box
5.To change a non-URS disk array to a URS disk array, in the Modify Device dialog box's Is URS Device (Yes/No) field, select the word No and type the word Yes. (To change a URS disk array to a non-URS disk array, change the word Yes to No.)
You can also modify other fields for a device in this dialog box. If you update an email contact, make sure you press the Enter key before you click the Modify button.
6.Click the Modify button to make the changes. (You can cancel the modification by clicking the Done button, which closes the dialog box without making changes.)
7.After you have completed the changes, click the Done button to close the Modify Device dialog box.
NOTE: If an error occurs with the requested changes, the dialog box remains open and the Status window displays the error message.
