1.# /opt/meter/bin/monitor stop
2.# /opt/meter/bin/monitor start
The Utility Meter GUI, provides the following main screens (tabs):
•GettingStarted — Provides help information about Utility Meter tasks — see Utility Meter Help Information
•Configure — Initially configure or modify the Utility Meter software parameters, copy the Utility Meter's current configuration to a file for backup or recovery purposes, and add a namespace configuration for a device — see Utility Meter Configure Tasks
•Devices — Manage (add, modify, view, and remove) and discover metered entities — see Utility Meter Devices Tasks
•Diagnose — Verify that the Utility Meter's data acquisition server (das_SERVER process) is running and test the connection to a device — see Utility Meter Diagnose Tasks
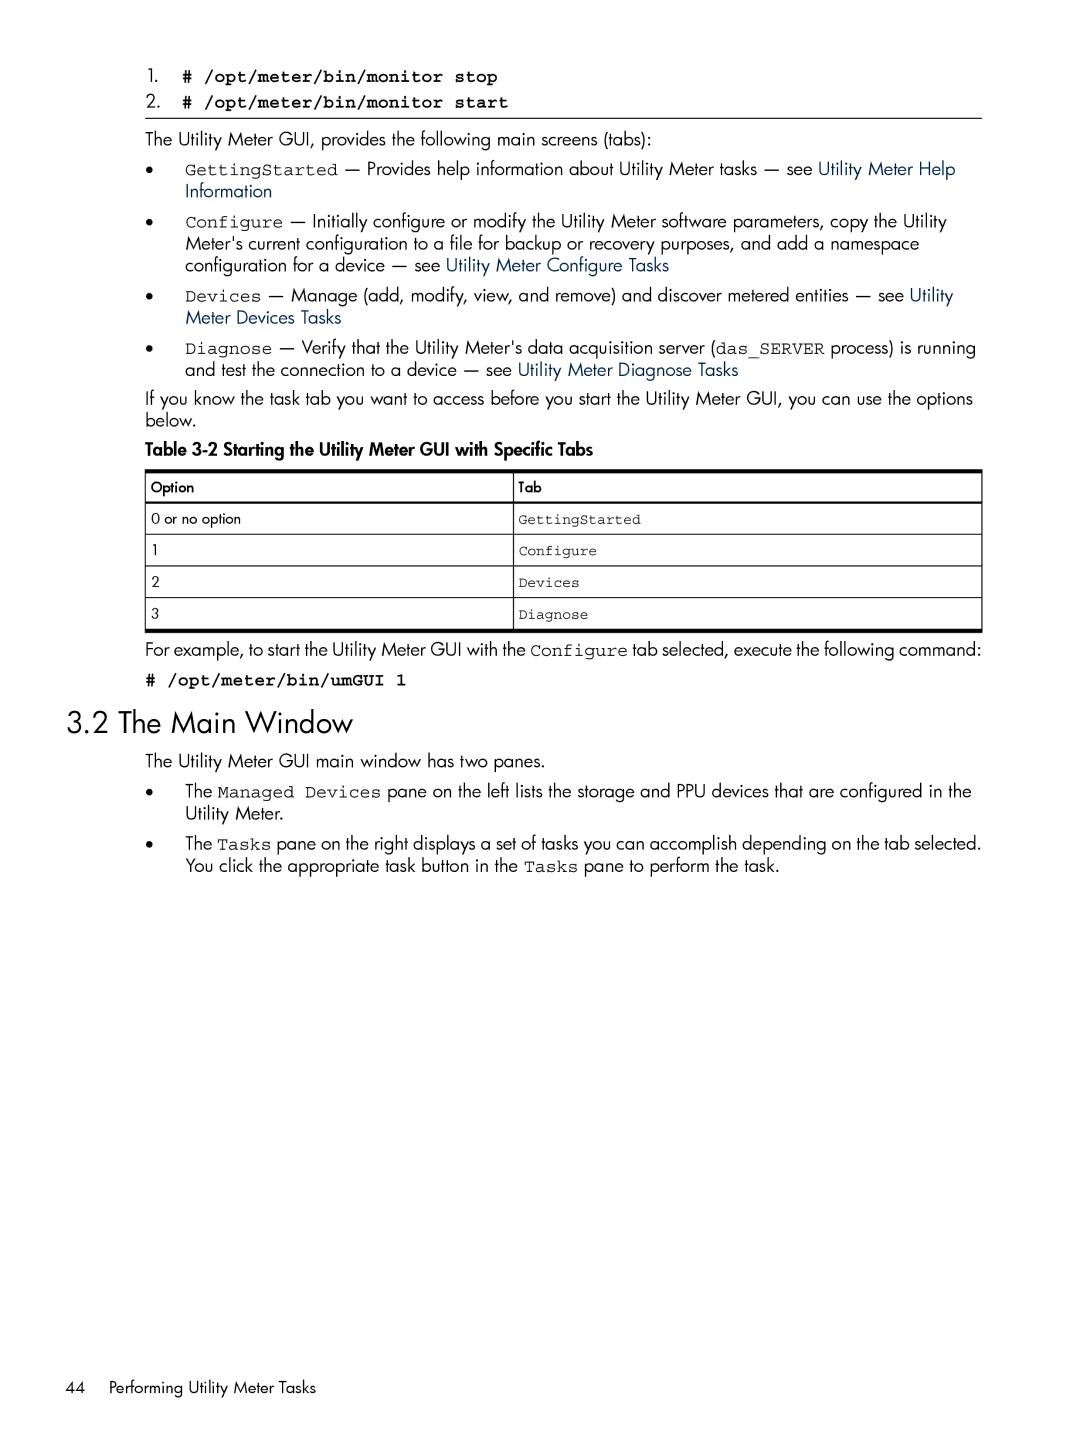
If you know the task tab you want to access before you start the Utility Meter GUI, you can use the options below.
Table
Option | Tab |
0 or no option | GettingStarted |
1 | Configure |
2 | Devices |
3 | Diagnose |
For example, to start the Utility Meter GUI with the Configure tab selected, execute the following command:
#/opt/meter/bin/umGUI 1
3.2The Main Window
The Utility Meter GUI main window has two panes.
•The Managed Devices pane on the left lists the storage and PPU devices that are configured in the Utility Meter.
•The Tasks pane on the right displays a set of tasks you can accomplish depending on the tab selected. You click the appropriate task button in the Tasks pane to perform the task.