|
|
|
|
|
|
|
| Backing Up Server Applications |
|
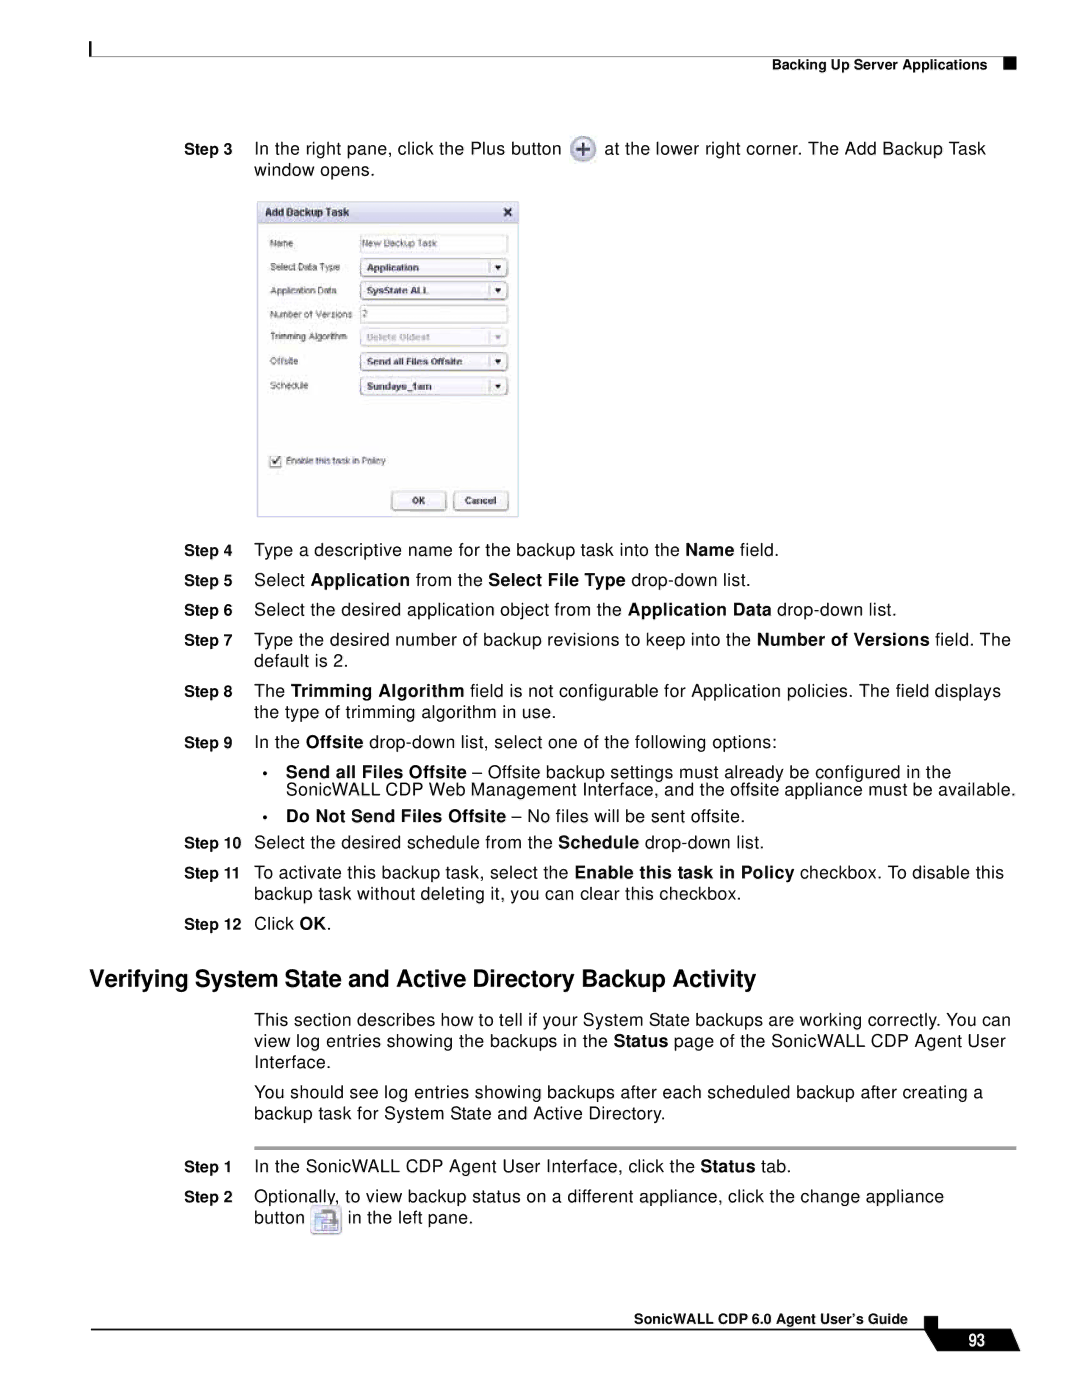
Step 3 In the right pane, click the Plus button | at the lower right corner. The Add Backup Task | |||
window opens. |
|
| ||
|
|
|
|
|
|
|
|
|
|
Step 4 Type a descriptive name for the backup task into the Name field. Step 5 Select Application from the Select File Type
Step 6 Select the desired application object from the Application Data
Step 7 Type the desired number of backup revisions to keep into the Number of Versions field. The default is 2.
Step 8 The Trimming Algorithm field is not configurable for Application policies. The field displays the type of trimming algorithm in use.
Step 9 In the Offsite
•Send all Files Offsite – Offsite backup settings must already be configured in the SonicWALL CDP Web Management Interface, and the offsite appliance must be available.
•Do Not Send Files Offsite – No files will be sent offsite.
Step 10 Select the desired schedule from the Schedule
Step 11 To activate this backup task, select the Enable this task in Policy checkbox. To disable this backup task without deleting it, you can clear this checkbox.
Step 12 Click OK.
Verifying System State and Active Directory Backup Activity
This section describes how to tell if your System State backups are working correctly. You can view log entries showing the backups in the Status page of the SonicWALL CDP Agent User Interface.
You should see log entries showing backups after each scheduled backup after creating a backup task for System State and Active Directory.
Step 1 In the SonicWALL CDP Agent User Interface, click the Status tab.
Step 2 Optionally, to view backup status on a different appliance, click the change appliance
button ![]() in the left pane.
in the left pane.
SonicWALL CDP 6.0 Agent User’s Guide
93