Part V | Disk Drive |
Saving data
The recorded data and panel settings of this instrument can be saved on a disk.
Disks
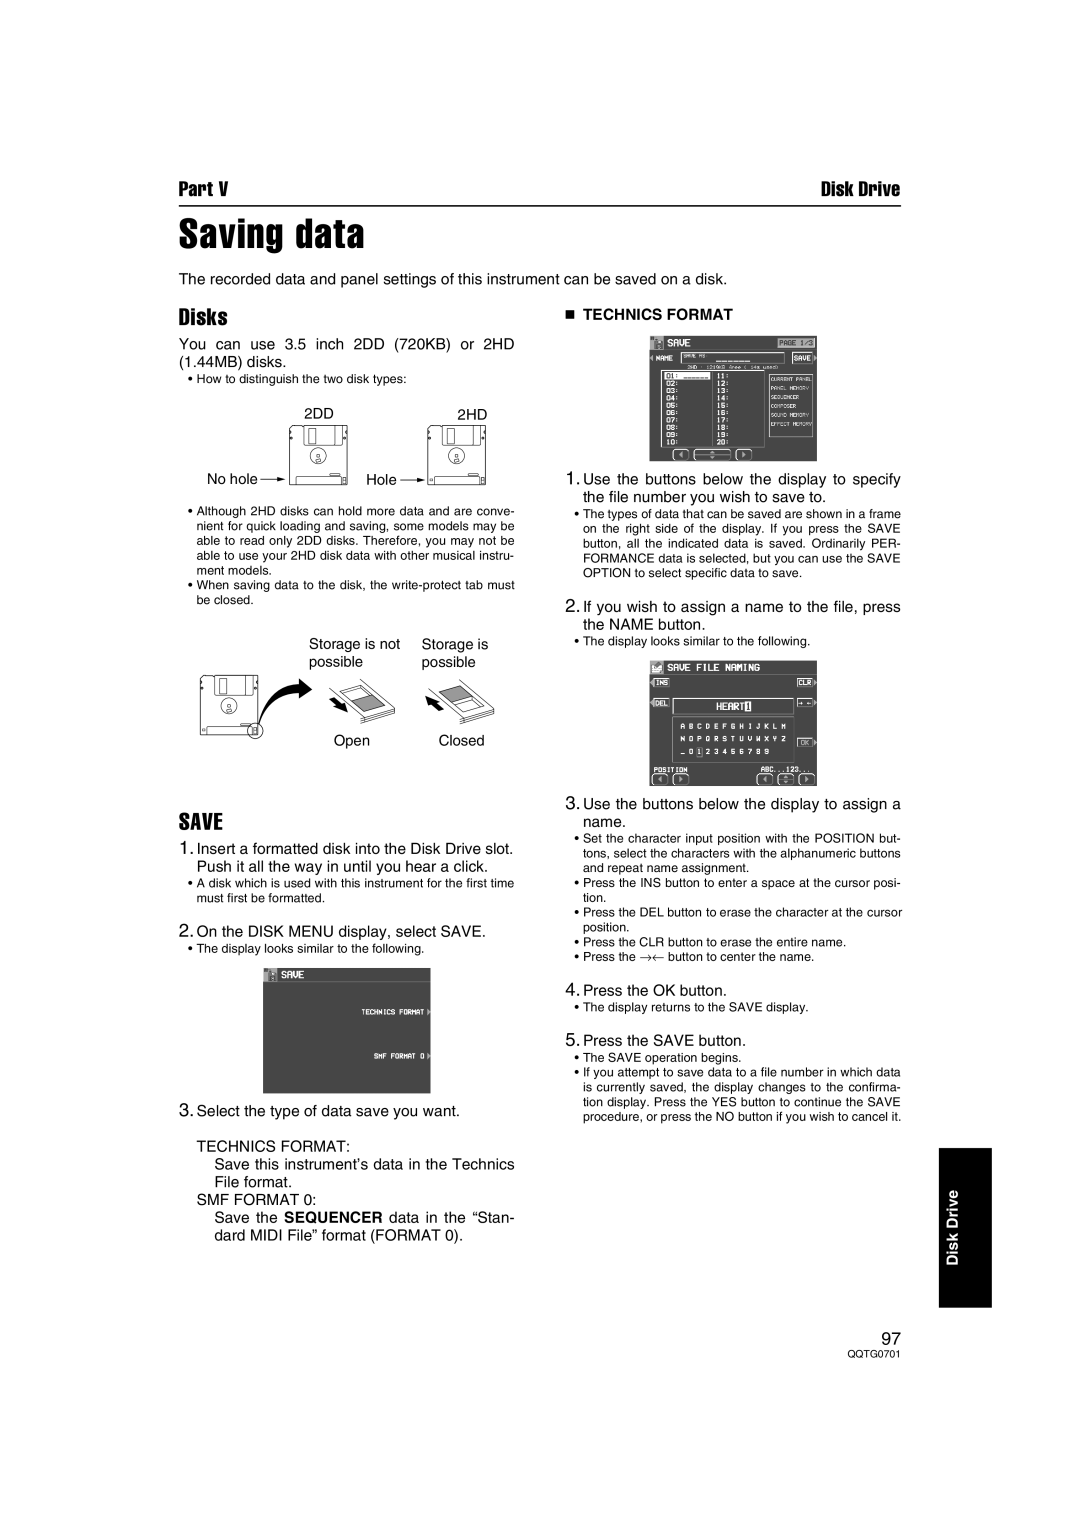
You can use 3.5 inch 2DD (720KB) or 2HD (1.44MB) disks.
•How to distinguish the two disk types:
2DD2HD
No hole | Hole |
•Although 2HD disks can hold more data and are conve- nient for quick loading and saving, some models may be able to read only 2DD disks. Therefore, you may not be able to use your 2HD disk data with other musical instru- ment models.
•When saving data to the disk, the
Storage is not | Storage is |
possible | possible |
■TECHNICS FORMAT
1.Use the buttons below the display to specify
the file number you wish to save to.
•The types of data that can be saved are shown in a frame on the right side of the display. If you press the SAVE button, all the indicated data is saved. Ordinarily PER- FORMANCE data is selected, but you can use the SAVE OPTION to select specific data to save.
2.If you wish to assign a name to the file, press
the NAME button.
•The display looks similar to the following.
OpenClosed
SAVE
1.Insert a formatted disk into the Disk Drive slot.
Push it all the way in until you hear a click.
•A disk which is used with this instrument for the first time must first be formatted.
2.On the DISK MENU display, select SAVE.
•The display looks similar to the following.
3.Use the buttons below the display to assign a
name.
•Set the character input position with the POSITION but- tons, select the characters with the alphanumeric buttons and repeat name assignment.
•Press the INS button to enter a space at the cursor posi- tion.
•Press the DEL button to erase the character at the cursor position.
•Press the CLR button to erase the entire name.
•Press the →← button to center the name.
3.Select the type of data save you want.
TECHNICS FORMAT:
Save this instrument’s data in the Technics File format.
SMF FORMAT 0:
Save the SEQUENCER data in the “Stan- dard MIDI File” format (FORMAT 0).
4.Press the OK button.
•The display returns to the SAVE display.
5.Press the SAVE button.
•The SAVE operation begins.
•If you attempt to save data to a file number in which data is currently saved, the display changes to the confirma- tion display. Press the YES button to continue the SAVE procedure, or press the NO button if you wish to cancel it.
Disk Drive
97
