Performance Verification
Setting Up Limit Testing
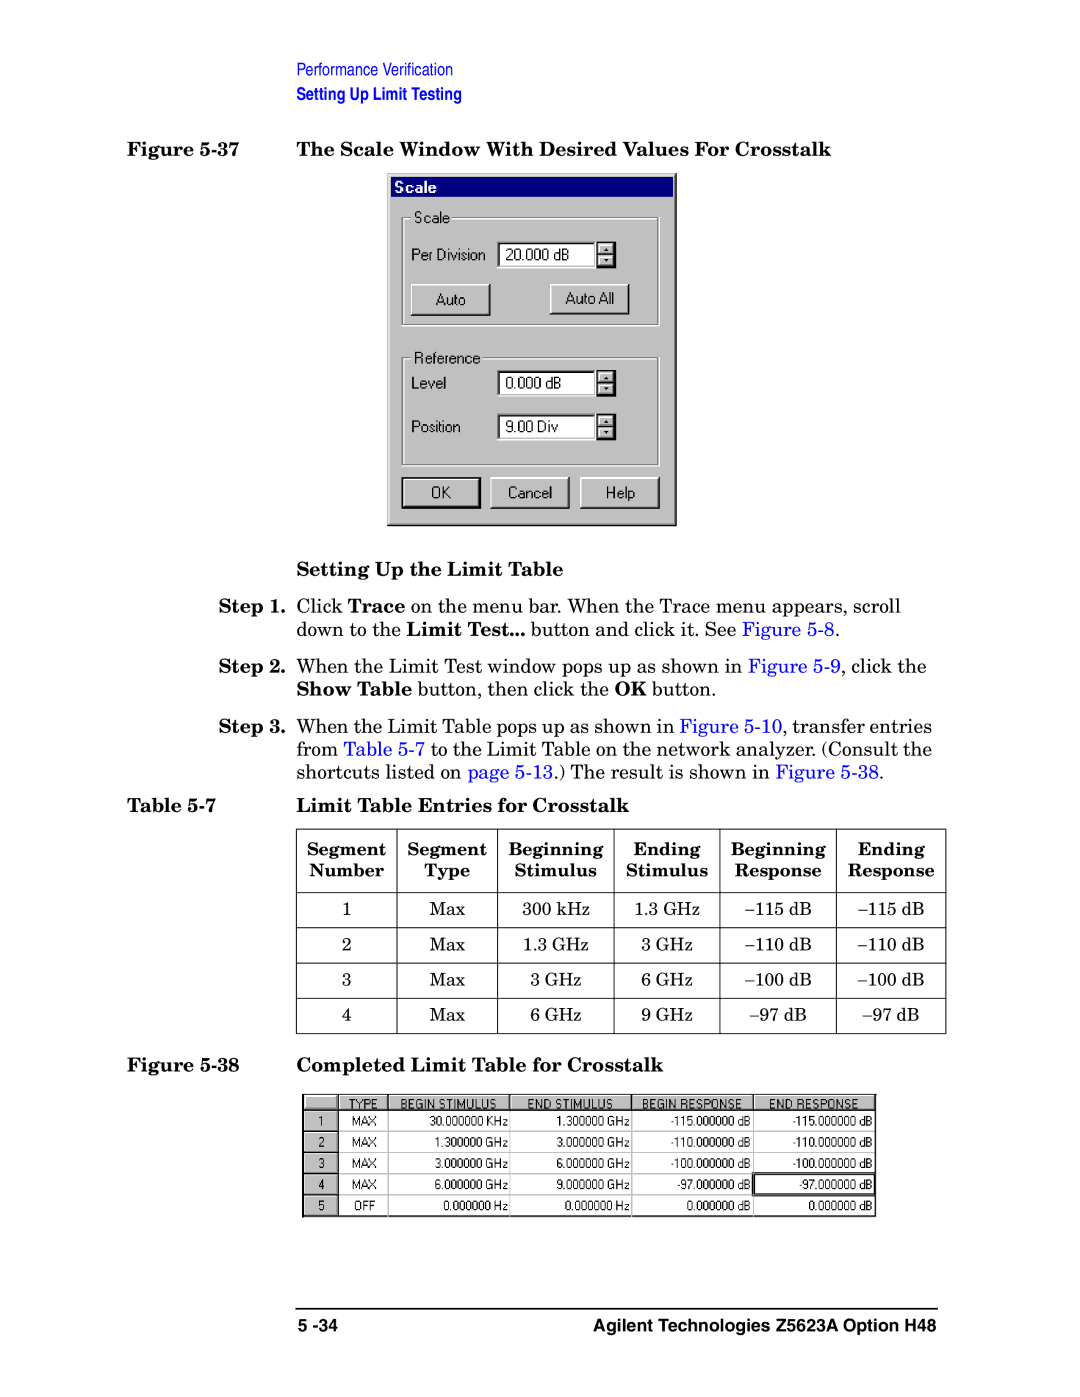
Figure 5-37 The Scale Window With Desired Values For Crosstalk
Setting Up the Limit Table
Step 1. Click Trace on the menu bar. When the Trace menu appears, scroll down to the Limit Test... button and click it. See Figure
Step 2. When the Limit Test window pops up as shown in Figure
Step 3. When the Limit Table pops up as shown in Figure
Table | Limit Table Entries for Crosstalk |
|
| |||
|
|
|
|
|
|
|
| Segment | Segment | Beginning | Ending | Beginning | Ending |
| Number | Type | Stimulus | Stimulus | Response | Response |
|
|
|
|
|
|
|
| 1 | Max | 300 kHz | 1.3 GHz | −115 dB | −115 dB |
|
|
|
|
|
|
|
| 2 | Max | 1.3 GHz | 3 GHz | −110 dB | −110 dB |
|
|
|
|
|
|
|
| 3 | Max | 3 GHz | 6 GHz | −100 dB | −100 dB |
|
|
|
|
|
|
|
| 4 | Max | 6 GHz | 9 GHz | −97 dB | −97 dB |
|
|
|
|
|
|
|
Figure 5-38 Completed Limit Table for Crosstalk
5 | Agilent Technologies Z5623A Option H48 |
