Parameter | Description |
|
User Name | Enter an alphanumeric string of up to 32 characters.This is used to identify the SNMP user. | |
Group Name | This name is used to specify the SNMP group created can request SNMP messages. | |
SNMP Version | V1 – Specifies that SNMP version 1 will be used. | |
| V2 – Specifies that SNMP version 2 will be used. | |
| V3 – Specifies that SNMP version 3 will be used. | |
MD5 – Specifies that the | ||
| selected in the SNMP Version field and the Encryption field has been checked.This field will require the | |
| user to enter a password. | |
| SHA – Specifies that the | |
| selected in the SNMP Version field and the Encryption field has been checked.This field will require the | |
| user to enter a password. | |
None – Specifies that no authorization protocol is in use. | ||
| DES – Specifies that DES | |
| only operable when V3 is selected in the SNMP Version field and the Encryption field has been checked. | |
Encrypted | This field will require the user to enter a password between 8 and 16 alphanumeric characters. | |
Checking the corresponding box will enable encryption for SNMP V3 and is only operable in SNMP V3 mode. | ||
|
|
|
To implement changes made, click Apply.To return to the SNMP User Table, click the Show All SNMP User Table Entries link.
SNMP View Table
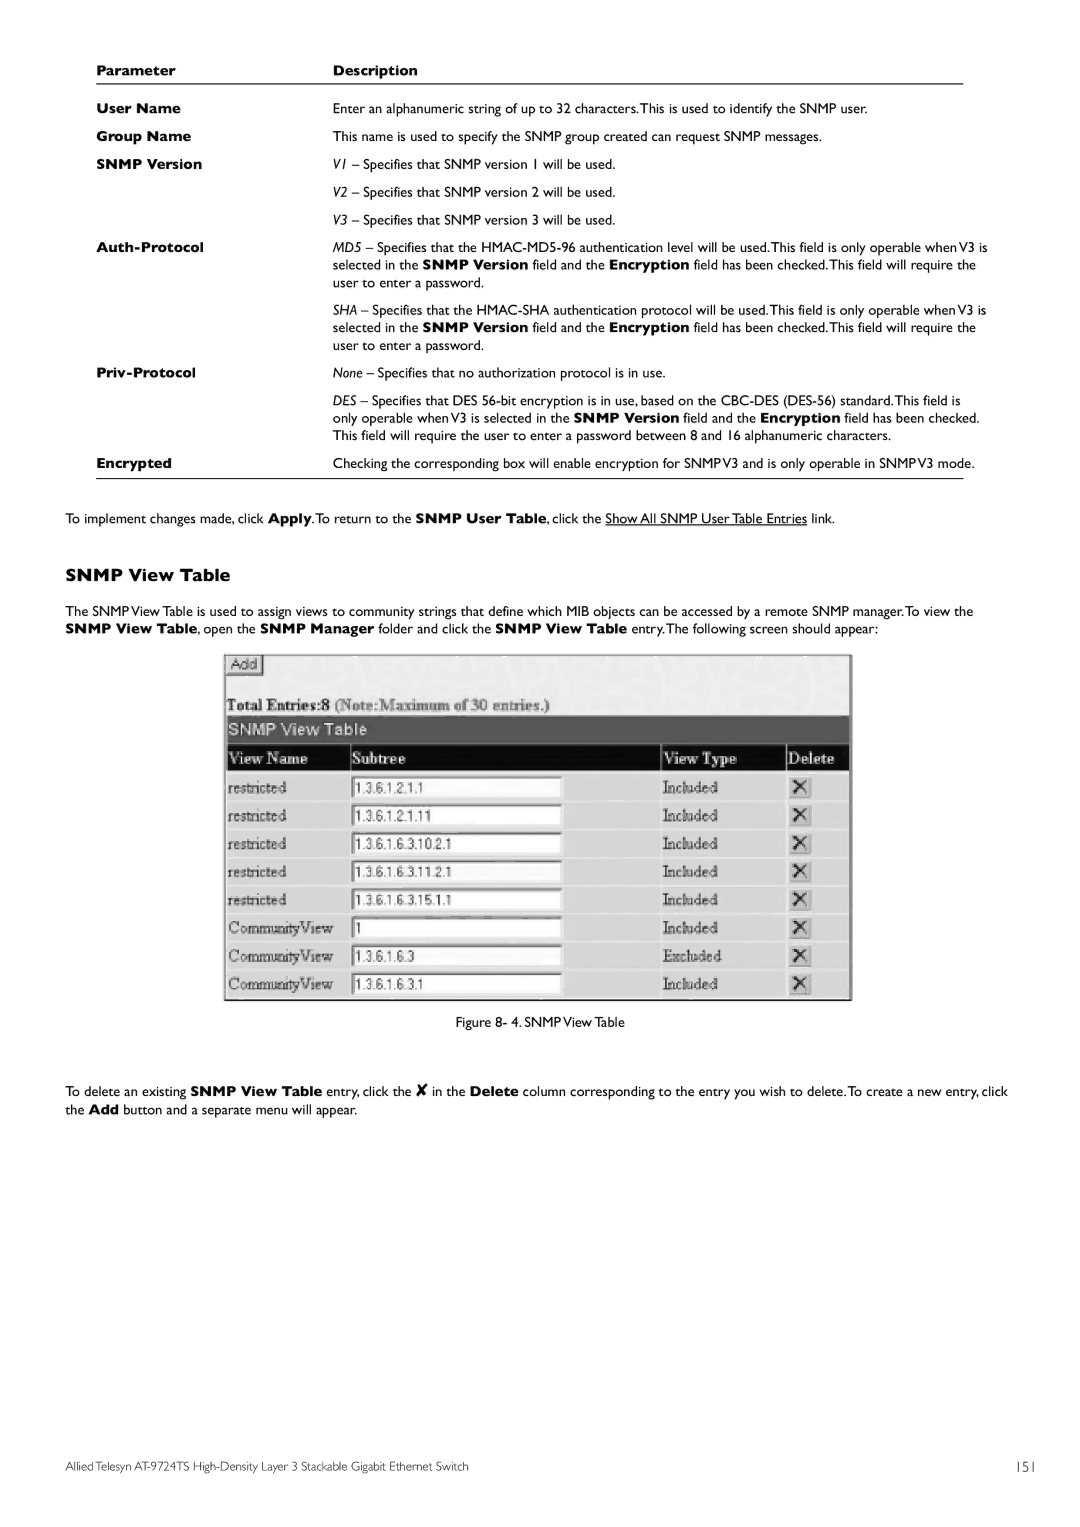
The SNMP View Table is used to assign views to community strings that define which MIB objects can be accessed by a remote SNMP manager.To view the SNMP View Table, open the SNMP Manager folder and click the SNMP View Table entry.The following screen should appear:
Figure 8- 4. SNMP View Table
To delete an existing SNMP View Table entry, click the ✘ in the Delete column corresponding to the entry you wish to delete.To create a new entry, click the Add button and a separate menu will appear.
Allied Telesyn | 151 |
