VLAN Name | This allows the entry of a VLAN Name from which a management station will be allowed to manage the Switch | |
| using TCP/IP | |
| entered here will not be able to manage the Switch | |
| Security IP Management menu. If VLANs have not yet been configured for the Switch, the default VLAN contains | |
| all of the Switch's ports.There are no entries in the Security IP Management table, by default, so any | |
| management station that can connect to the Switch can access the Switch until a management VLAN is | |
| specified or Management Station IP Addresses are assigned. |
|
Click Apply to let your changes take effect.
Setting the Switch's IP Address using the Console Interface
Each Switch must be assigned its own IP Address, which is used for communication with an SNMP network manager or other TCP/IP application (for example BOOTP,TFTP).The Switch's default IP address is 10.0.0.1.You can change the default Switch IP address to meet the specification of your networking address scheme.
The IP address for the Switch must be set before it can be managed with the
Starting at the command line prompt, enter the commands config ipif System ipaddress xxx.xxx.xxx.xxx/yyy.yyy.yyy.yyy.Where the x's represent the IP address to be assigned to the IP interface named System and the y's represent the corresponding subnet mask.
Alternatively, you can enter config ipif System ipaddress xxx.xxx.xxx.xxx/z.Where the x's represent the IP address to be assigned to the IP interface named System and the z represents the corresponding number of subnets in CIDR notation.
The IP interface named System on the Switch can be assigned an IP address and subnet mask which can then be used to connect a management station to the Switch's Telnet or
The system message Success indicates that the command was executed successfully.The Switch can now be configured and managed via Telnet and the CLI or via the
Advanced Settings
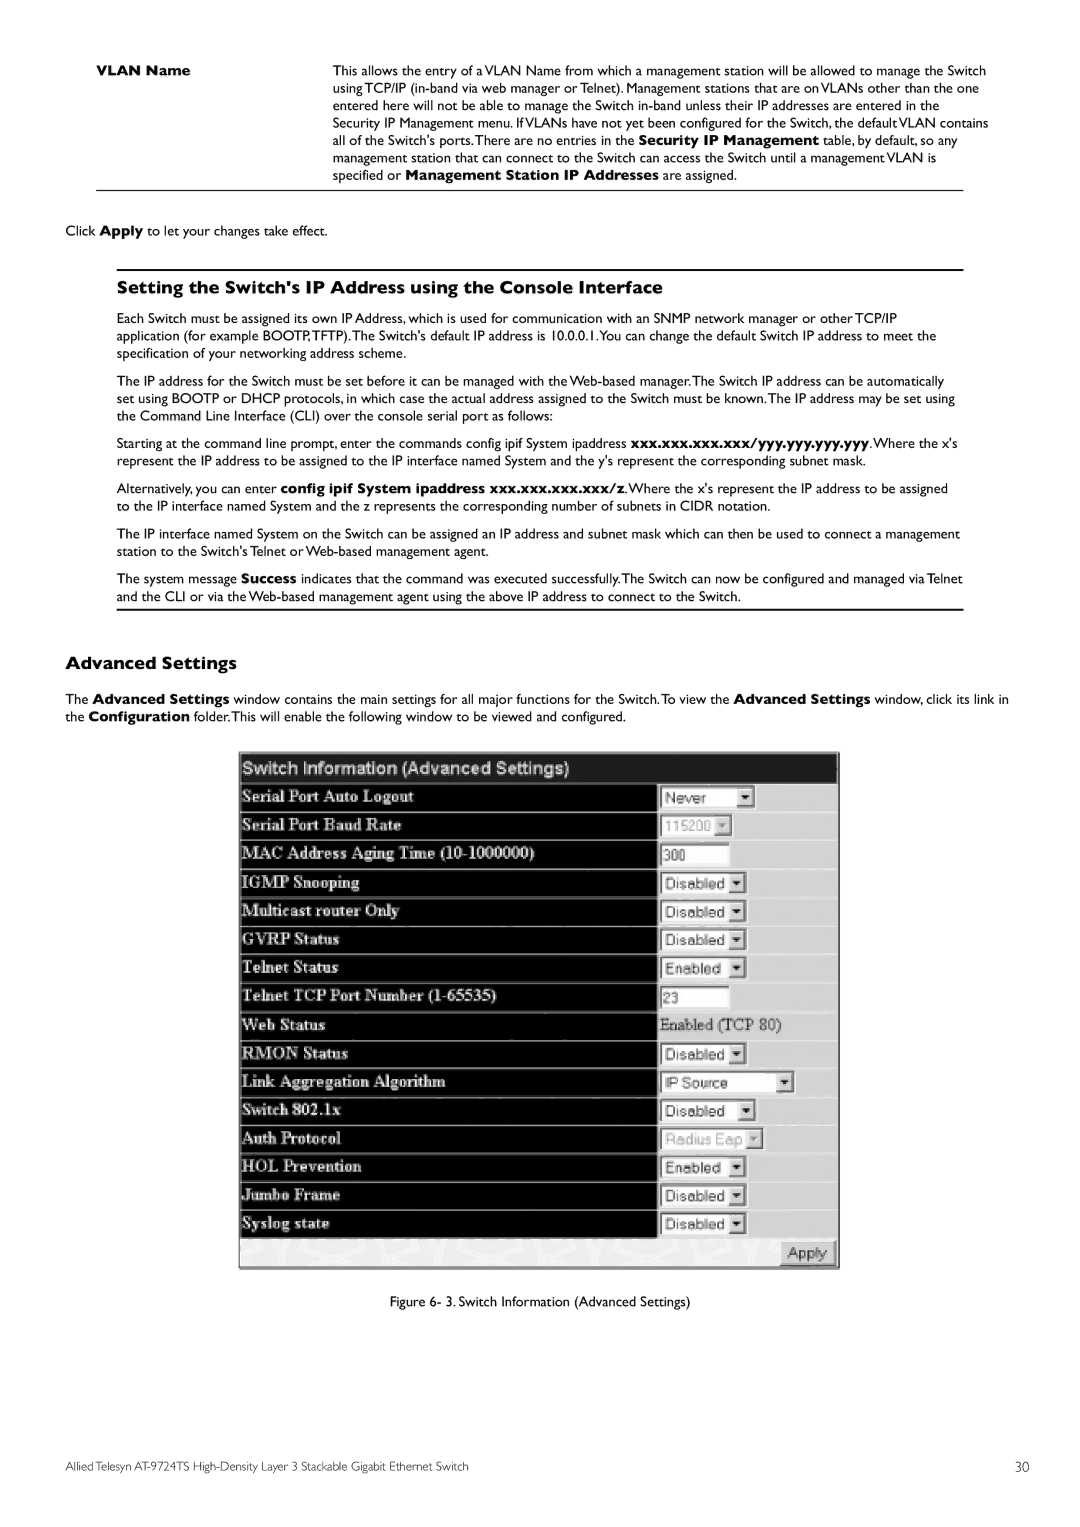
The Advanced Settings window contains the main settings for all major functions for the Switch.To view the Advanced Settings window, click its link in the Configuration folder.This will enable the following window to be viewed and configured.
Figure 6- 3. Switch Information (Advanced Settings)
Allied Telesyn | 30 |
