Installing the ink tanks
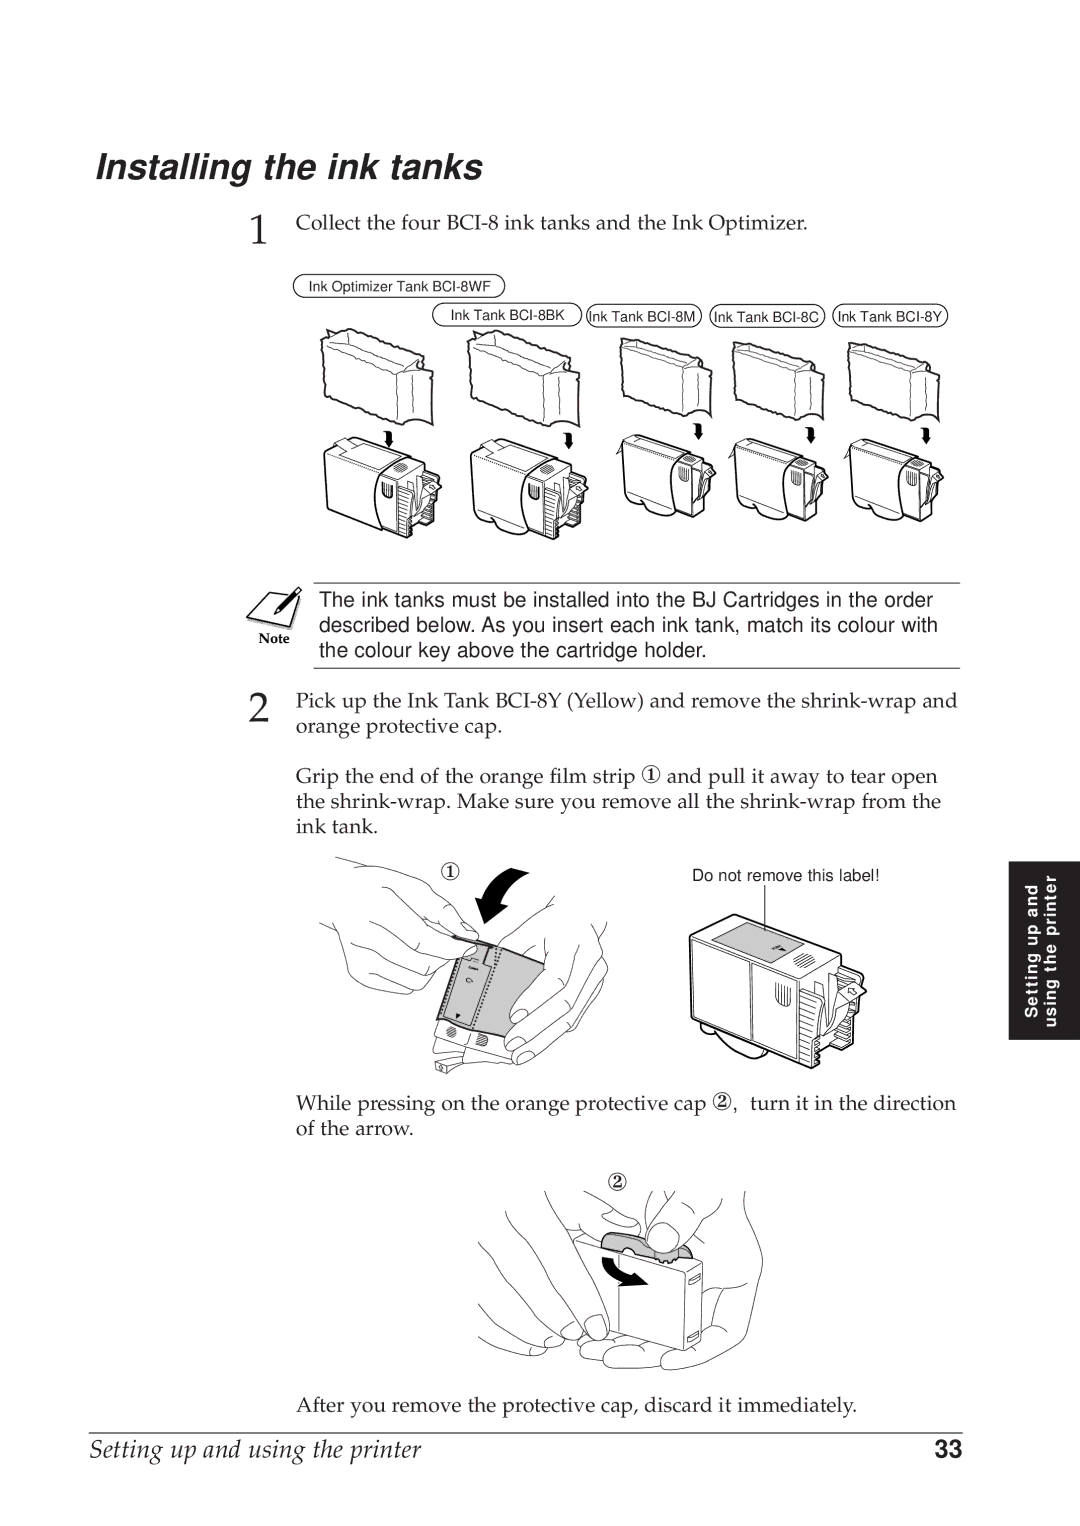
1 Collect the four BCI-8 ink tanks and the Ink Optimizer.
Ink Optimizer Tank
Ink Tank
|
| The ink tanks must be installed into the BJ Cartridges in the order | ||||
|
| described below. As you insert each ink tank, match its colour with | ||||
|
| the colour key above the cartridge holder. | ||||
2 |
|
|
|
|
| |
Pick up the Ink Tank | ||||||
orange protective cap. |
|
| ||||
| Grip the end of the orange film strip ① and pull it away to tear open | |||||
| the | |||||
| ink tank. |
|
| |||
|
|
|
|
|
|
|
|
|
| ① | Do not remove this label! | ||
|
|
|
|
|
|
|
While pressing on the orange protective cap ②, turn it in the direction of the arrow.
②
After you remove the protective cap, discard it immediately.
Setting up and using the printer
Setting up and using the printer | 33 |