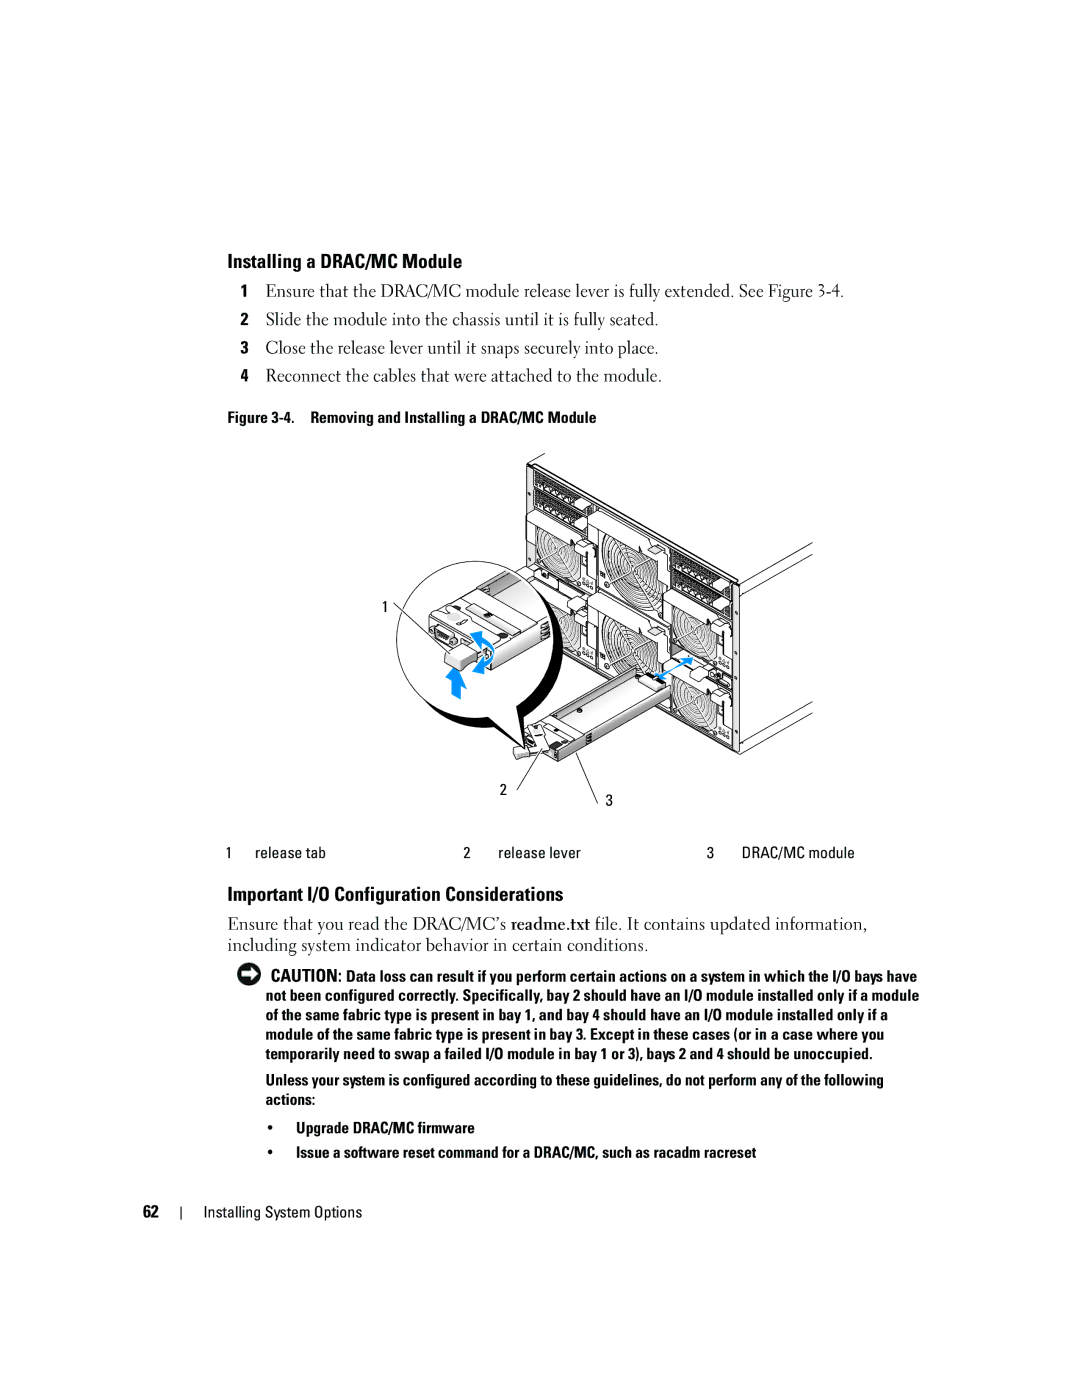
Installing a DRAC/MC Module
1Ensure that the DRAC/MC module release lever is fully extended. See Figure
2Slide the module into the chassis until it is fully seated.
3Close the release lever until it snaps securely into place.
4Reconnect the cables that were attached to the module.
Figure 3-4. Removing and Installing a DRAC/MC Module
1
2
3
1 release tab | 2 | release lever | 3 | DRAC/MC module |
Important I/O Configuration Considerations
Ensure that you read the DRAC/MC’s readme.txt file. It contains updated information, including system indicator behavior in certain conditions.
![]() CAUTION: Data loss can result if you perform certain actions on a system in which the I/O bays have not been configured correctly. Specifically, bay 2 should have an I/O module installed only if a module of the same fabric type is present in bay 1, and bay 4 should have an I/O module installed only if a module of the same fabric type is present in bay 3. Except in these cases (or in a case where you temporarily need to swap a failed I/O module in bay 1 or 3), bays 2 and 4 should be unoccupied.
CAUTION: Data loss can result if you perform certain actions on a system in which the I/O bays have not been configured correctly. Specifically, bay 2 should have an I/O module installed only if a module of the same fabric type is present in bay 1, and bay 4 should have an I/O module installed only if a module of the same fabric type is present in bay 3. Except in these cases (or in a case where you temporarily need to swap a failed I/O module in bay 1 or 3), bays 2 and 4 should be unoccupied.
Unless your system is configured according to these guidelines, do not perform any of the following actions:
•Upgrade DRAC/MC firmware
•Issue a software reset command for a DRAC/MC, such as racadm racreset
62