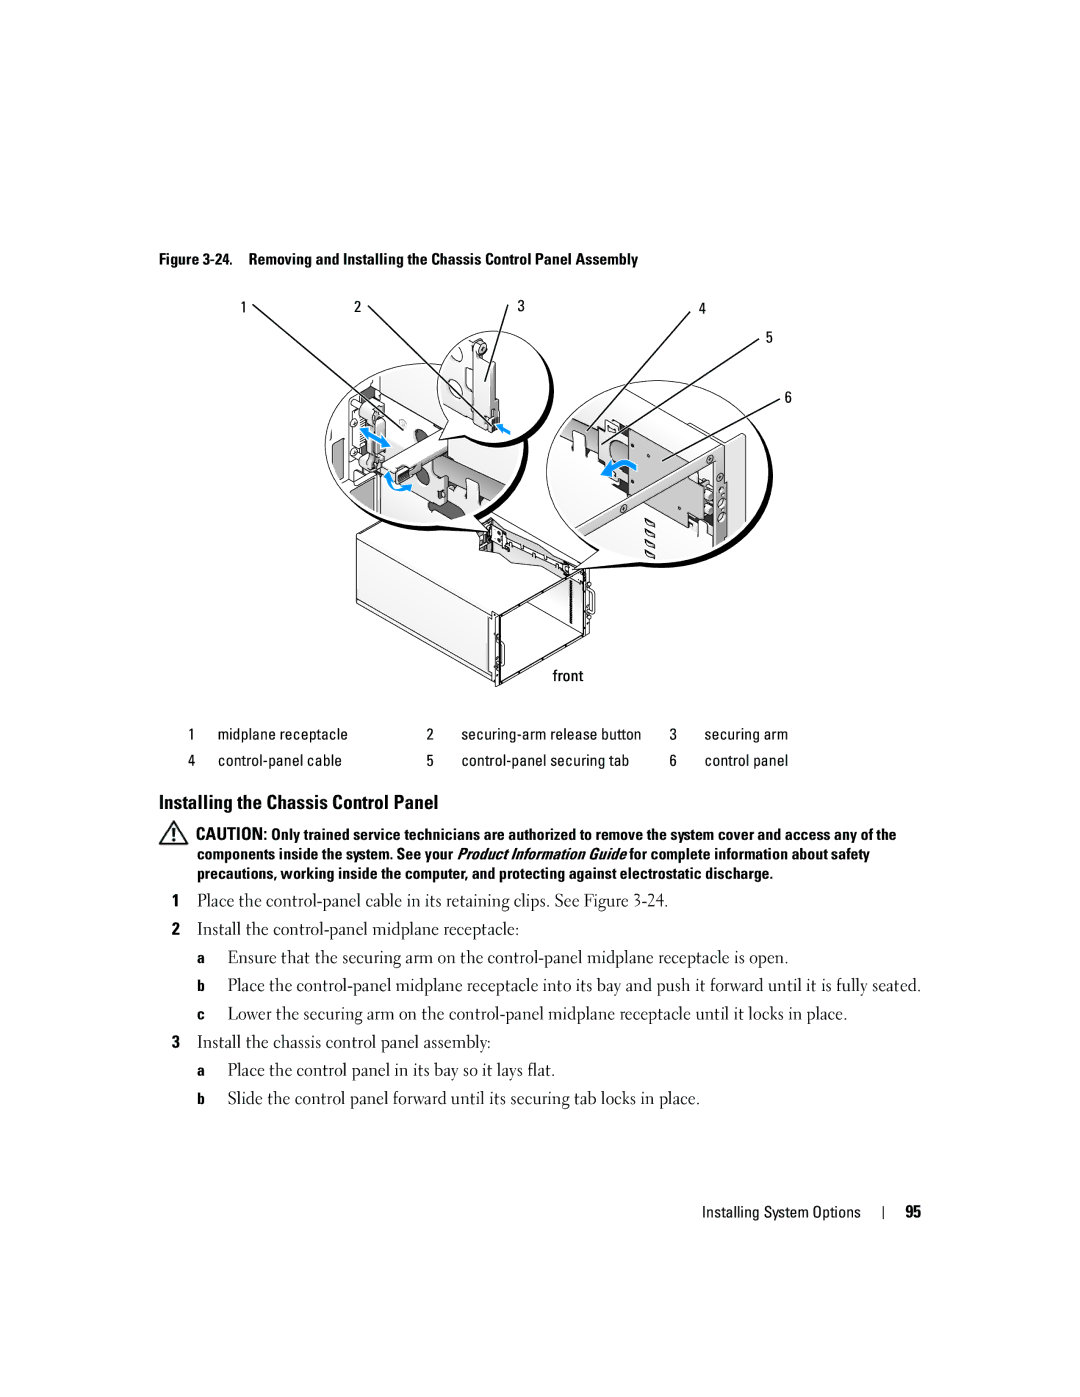
Figure 3-24. Removing and Installing the Chassis Control Panel Assembly
1 | 2 | 3 | 4 |
5
![]() 6
6
|
|
| front |
|
|
1 | midplane receptacle | 2 | 3 | securing arm | |
4 |
| 5 |
| 6 | control panel |
Installing the Chassis Control Panel
![]() CAUTION: Only trained service technicians are authorized to remove the system cover and access any of the components inside the system. See your Product Information Guide for complete information about safety precautions, working inside the computer, and protecting against electrostatic discharge.
CAUTION: Only trained service technicians are authorized to remove the system cover and access any of the components inside the system. See your Product Information Guide for complete information about safety precautions, working inside the computer, and protecting against electrostatic discharge.
1Place the
2Install the
a Ensure that the securing arm on the
b Place the
3Install the chassis control panel assembly:
a Place the control panel in its bay so it lays flat.
b Slide the control panel forward until its securing tab locks in place.
Installing System Options
95