CHAPTER 3: Replacing notebook components
10Remove the screws on the top that secure the LCD panel hinge to the chassis.
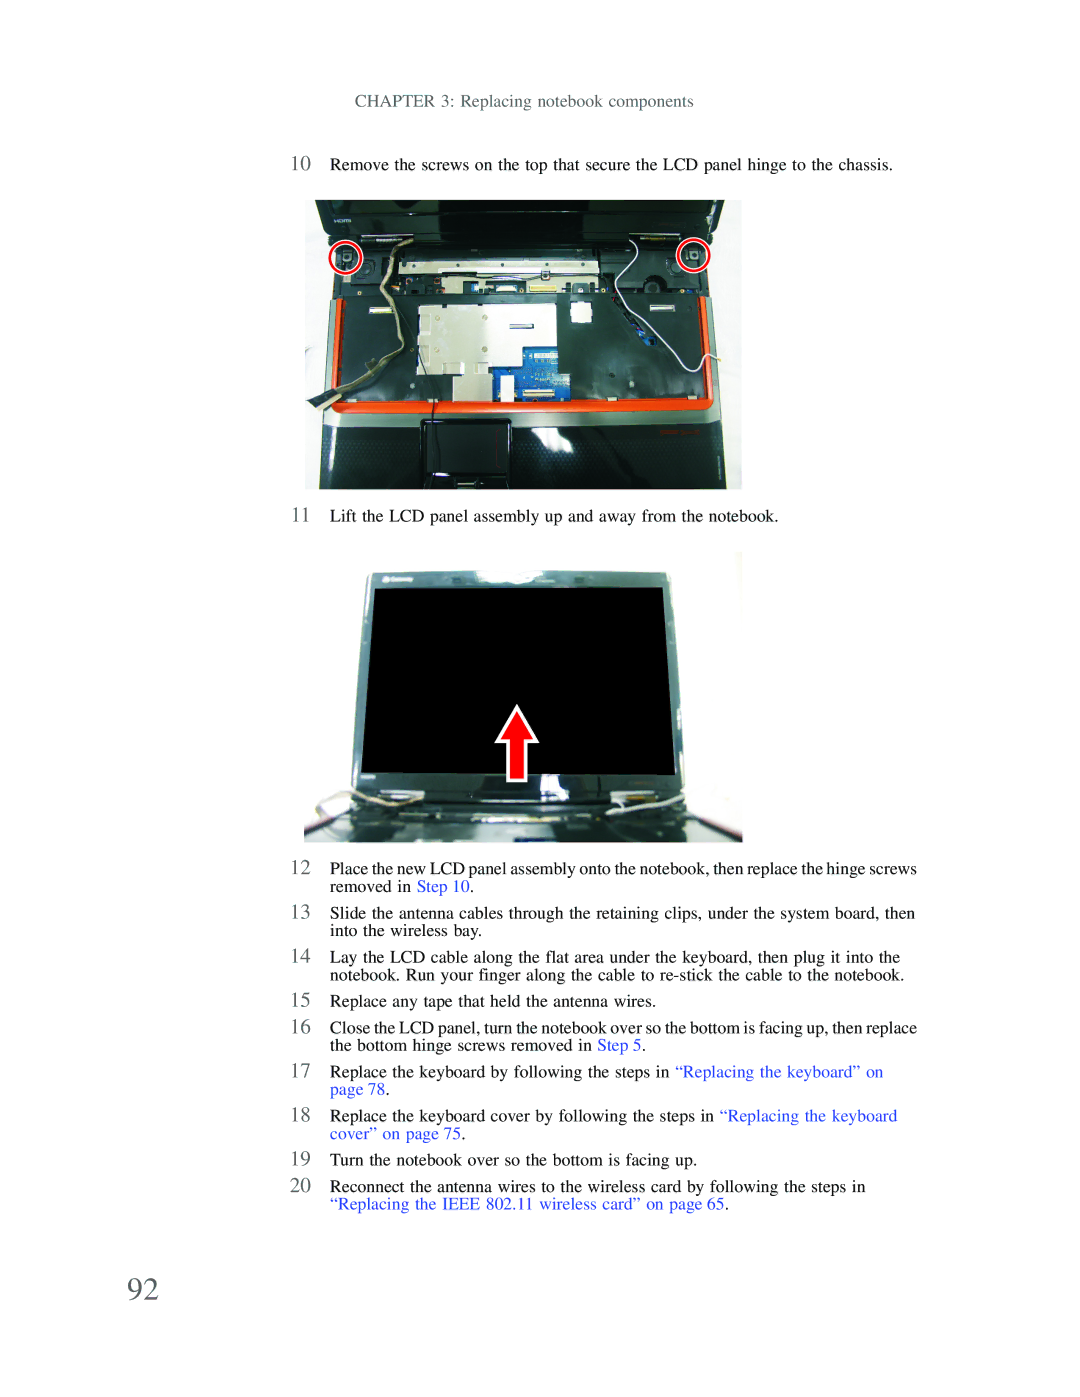
11Lift the LCD panel assembly up and away from the notebook.
12Place the new LCD panel assembly onto the notebook, then replace the hinge screws removed in Step 10.
13Slide the antenna cables through the retaining clips, under the system board, then into the wireless bay.
14Lay the LCD cable along the flat area under the keyboard, then plug it into the notebook. Run your finger along the cable to
15Replace any tape that held the antenna wires.
16Close the LCD panel, turn the notebook over so the bottom is facing up, then replace the bottom hinge screws removed in Step 5.
17Replace the keyboard by following the steps in “Replacing the keyboard” on page 78.
18Replace the keyboard cover by following the steps in “Replacing the keyboard cover” on page 75.
19Turn the notebook over so the bottom is facing up.
20Reconnect the antenna wires to the wireless card by following the steps in “Replacing the IEEE 802.11 wireless card” on page 65.
92