CHAPTER 3: Replacing notebook components
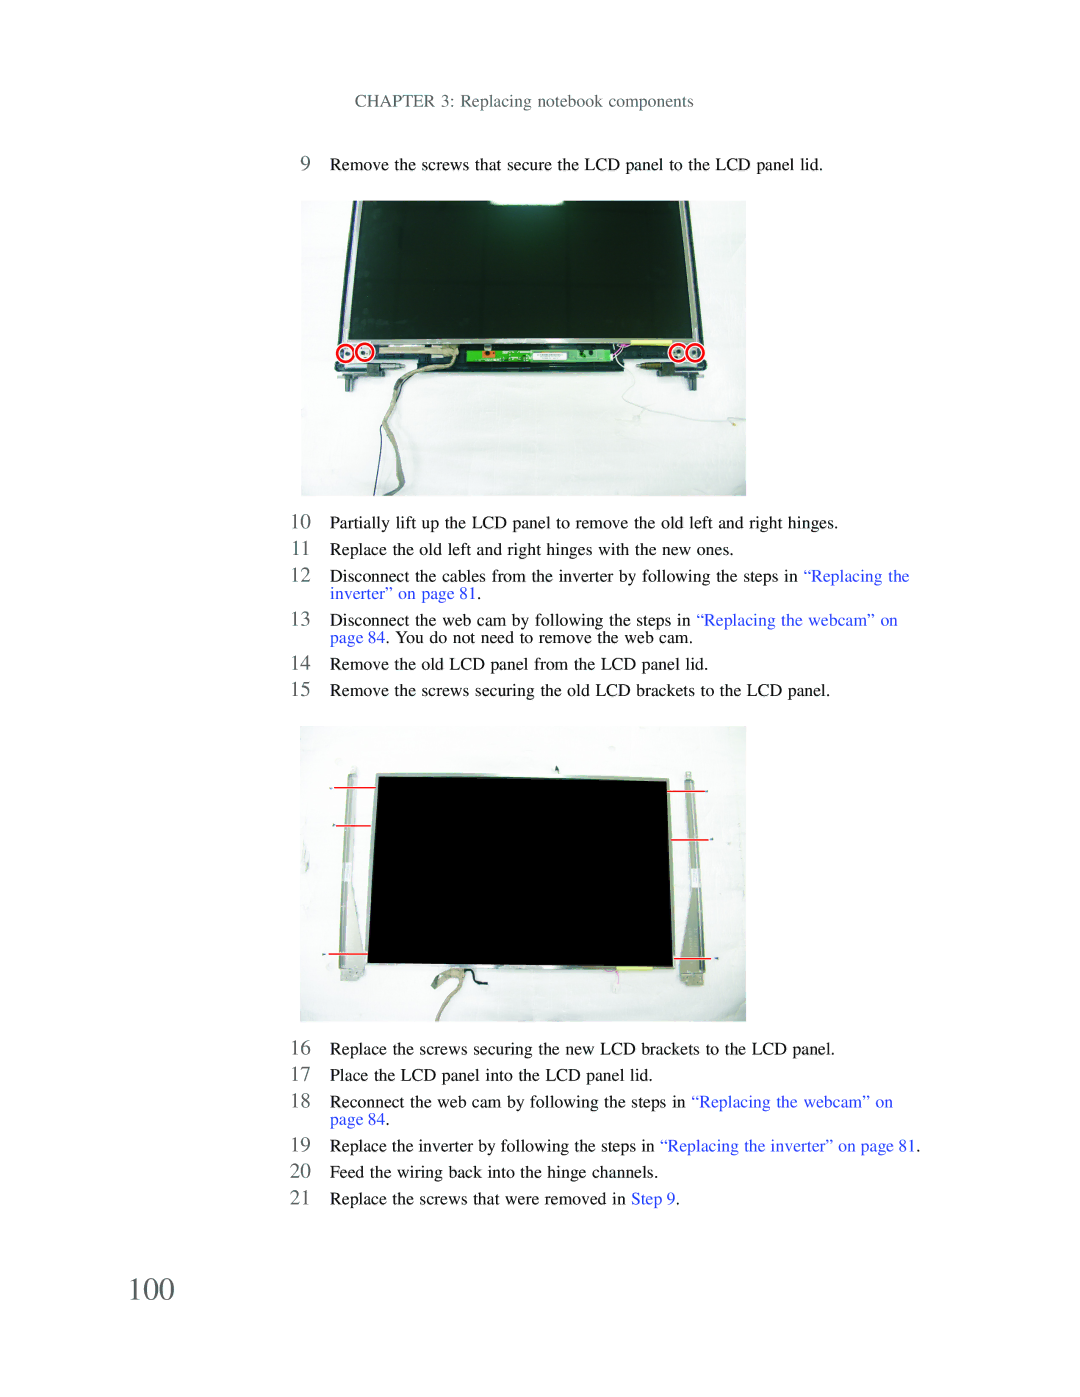
9Remove the screws that secure the LCD panel to the LCD panel lid.
10Partially lift up the LCD panel to remove the old left and right hinges.
11Replace the old left and right hinges with the new ones.
12Disconnect the cables from the inverter by following the steps in “Replacing the inverter” on page 81.
13Disconnect the web cam by following the steps in “Replacing the webcam” on page 84. You do not need to remove the web cam.
14Remove the old LCD panel from the LCD panel lid.
15Remove the screws securing the old LCD brackets to the LCD panel.
16Replace the screws securing the new LCD brackets to the LCD panel.
17Place the LCD panel into the LCD panel lid.
18Reconnect the web cam by following the steps in “Replacing the webcam” on page 84.
19Replace the inverter by following the steps in “Replacing the inverter” on page 81.
20Feed the wiring back into the hinge channels.
21Replace the screws that were removed in Step 9.