Caution
When tightening the main cooling assembly’s screws into the numbered holes, tighten them in numerical order.
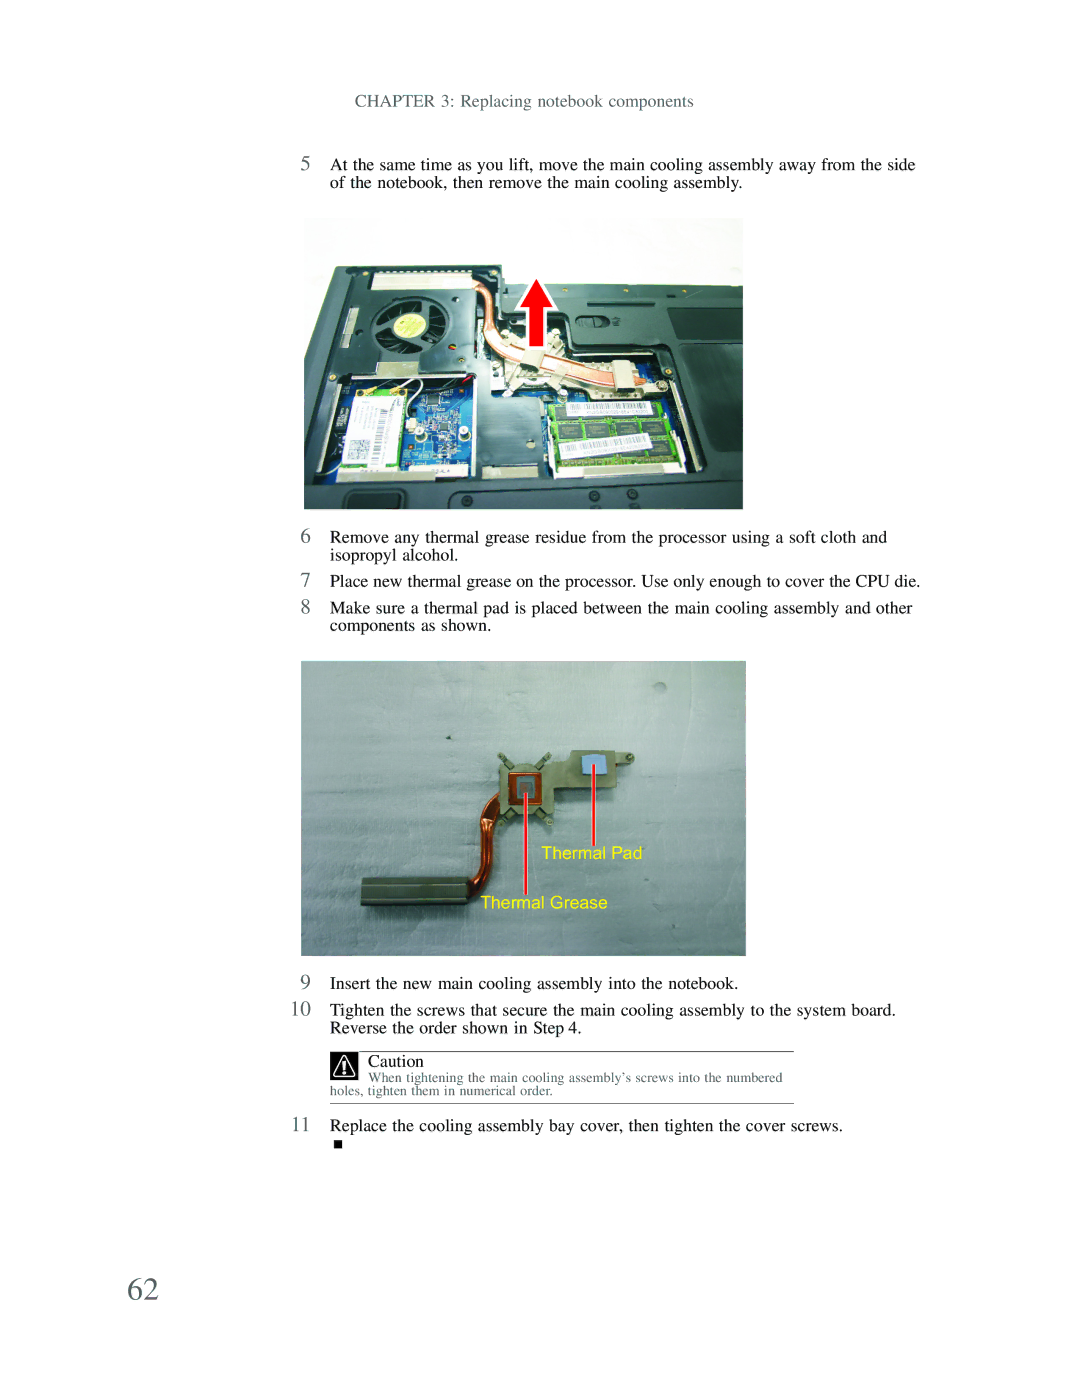
Thermal Pad
Thermal Grease
CHAPTER 3: Replacing notebook components
5At the same time as you lift, move the main cooling assembly away from the side of the notebook, then remove the main cooling assembly.
6Remove any thermal grease residue from the processor using a soft cloth and isopropyl alcohol.
7Place new thermal grease on the processor. Use only enough to cover the CPU die.
8Make sure a thermal pad is placed between the main cooling assembly and other components as shown.
9Insert the new main cooling assembly into the notebook.
10Tighten the screws that secure the main cooling assembly to the system board. Reverse the order shown in Step 4.
11Replace the cooling assembly bay cover, then tighten the cover screws.
62