Return to Section TOC Return to Master TOC
Return to Section TOC Return to Master TOC
TROUBLESHOOTING AND REPAIR |
MONITOR AND PEDESTAL REMOVAL AND REPLACEMENT PROCEDURE
(continued)
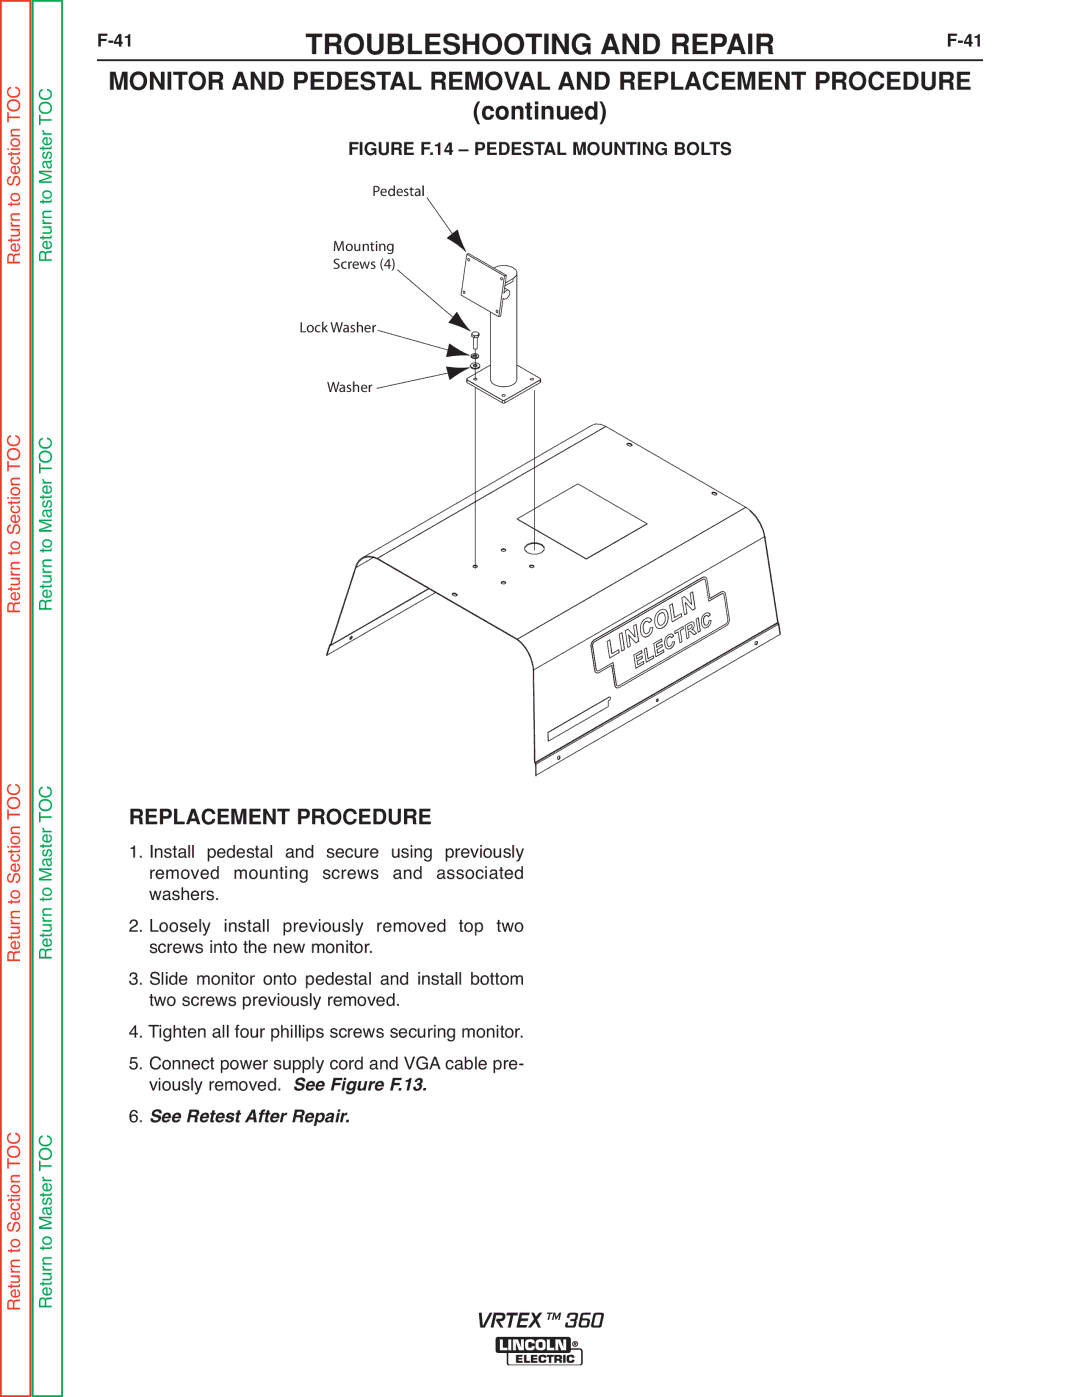
FIGURE F.14 – PEDESTAL MOUNTING BOLTS
Pedestal
Mounting
Screws (4)
Lock Washer
Washer ![]()
Return to Section TOC Return to Master TOC
Return to Section TOC Return to Master TOC
REPLACEMENT PROCEDURE
1. Install pedestal and secure using previously removed mounting screws and associated washers.
2. Loosely install previously removed top two screws into the new monitor.
3. Slide monitor onto pedestal and install bottom two screws previously removed.
4. Tighten all four phillips screws securing monitor.
5. Connect power supply cord and VGA cable pre- viously removed. See Figure F.13.
6. See Retest After Repair.
VRTEX TM 360