Using the Main Menu
Record
The Record menu allows you to configure recording settings, such as the recording resolution,
recording schedule, and audio recording.
Configuring Pre-recording Settings
1Select the Rec Para tab.
2In the Channel
3In the PreRecord
4Click Apply to save your settings.
Configuring Backup File Duration (Pack Duration)
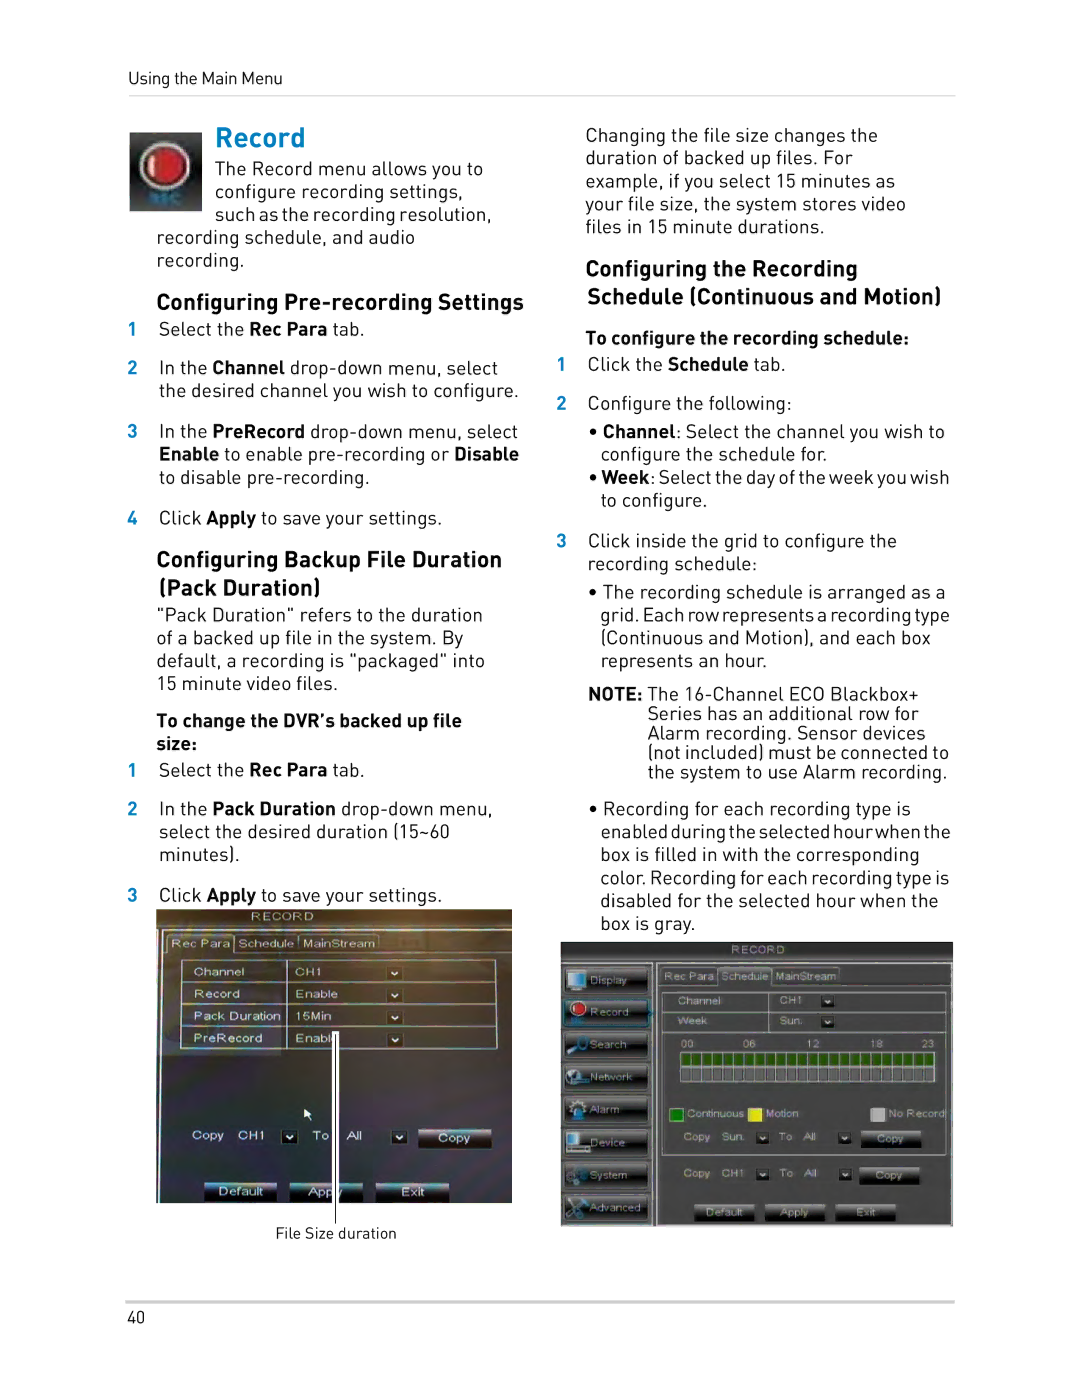
"Pack Duration" refers to the duration of a backed up file in the system. By default, a recording is "packaged" into 15 minute video files.
To change the DVR’s backed up file size:
1Select the Rec Para tab.
2In the Pack Duration
3Click Apply to save your settings.
Changing the file size changes the duration of backed up files. For example, if you select 15 minutes as your file size, the system stores video files in 15 minute durations.
Configuring the Recording Schedule (Continuous and Motion)
To configure the recording schedule:
1Click the Schedule tab.
2Configure the following:
•Channel: Select the channel you wish to configure the schedule for.
•Week: Select the day of the week you wish to configure.
3Click inside the grid to configure the recording schedule:
•The recording schedule is arranged as a grid.Eachrowrepresentsarecordingtype (Continuous and Motion), and each box represents an hour.
NOTE: The
•Recording for each recording type is enabledduringtheselectedhourwhenthe box is filled in with the corresponding color. Recording for each recording type is disabled for the selected hour when the box is gray.
File Size duration
40
