Setting up your DVR for Remote Connectivity
Accessing your DVR within a Local Network (LAN)
You can connect to your DVR through Internet Explorer through the local area network (LAN). It is recommended to confirm connectivity over a local network before setting up your DVR for Internet connectivity.
NOTE: To complete the steps below, your computer must be on the same network as your DVR.
NOTE: Except where noted, the instructions below are the same for PC and Mac.
Step 1 of 3: Connect your DVR to the Local Area Network
1Power off your DVR by disconnecting the power adapter.
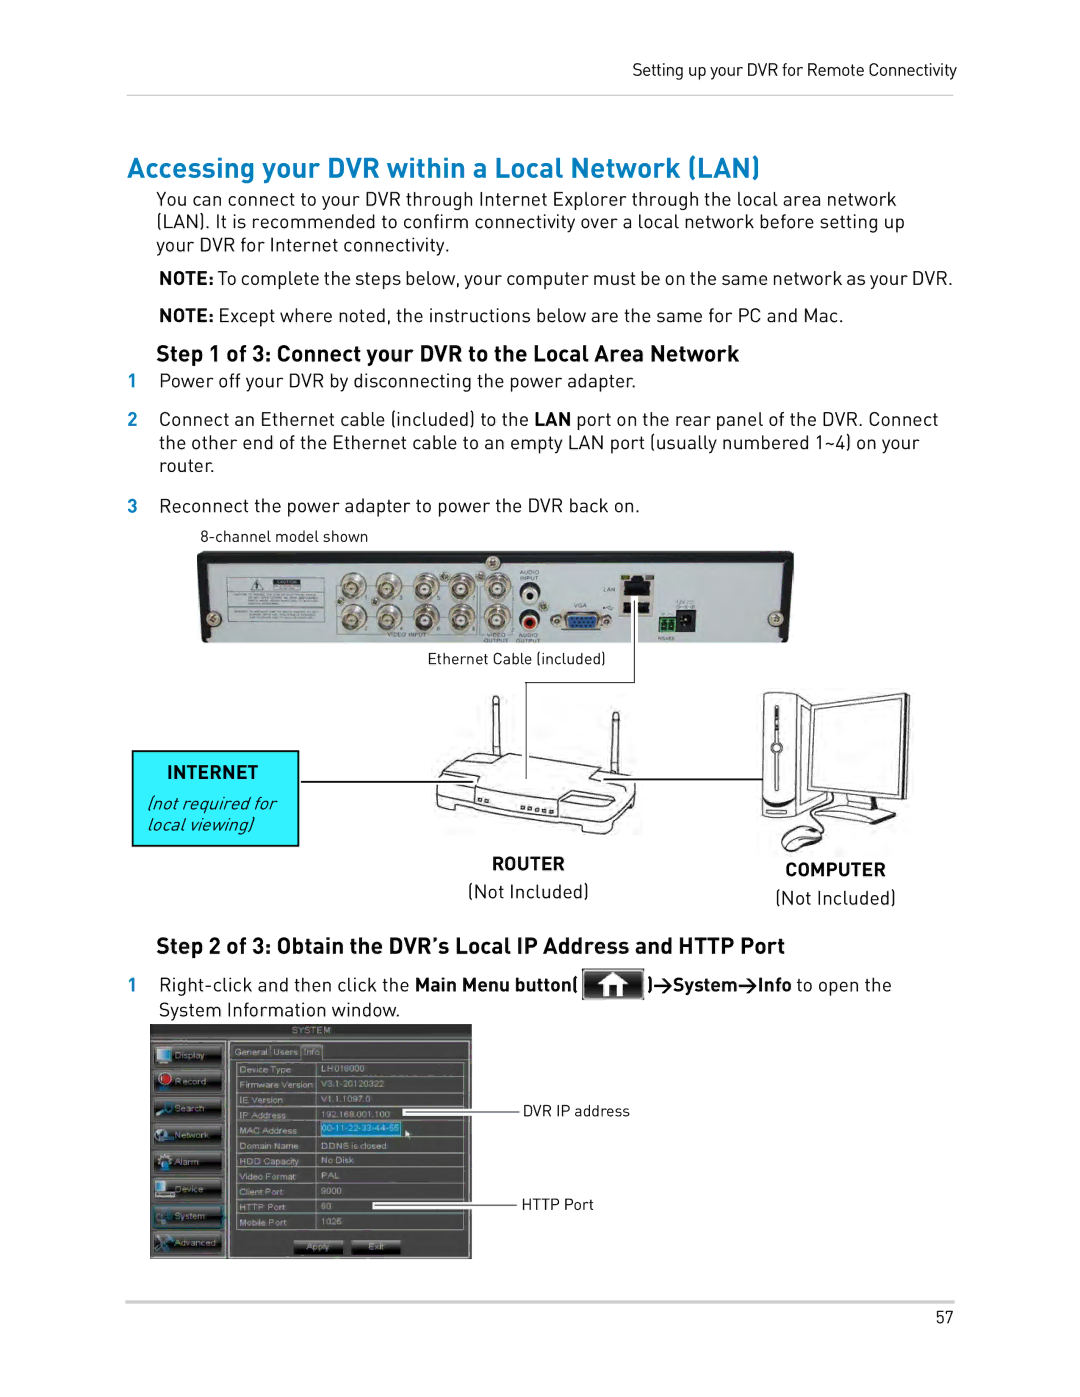
2Connect an Ethernet cable (included) to the LAN port on the rear panel of the DVR. Connect the other end of the Ethernet cable to an empty LAN port (usually numbered 1~4) on your router.
3Reconnect the power adapter to power the DVR back on.
Ethernet Cable (included)
INTERNET
(not required for local viewing)
ROUTER | COMPUTER | |
(Not Included) | ||
(Not Included) | ||
|
Step 2 of 3: Obtain the DVR’s Local IP Address and HTTP Port
1![]() )>System>Info to open the System Information window.
)>System>Info to open the System Information window.
DVR IP address
HTTP Port
57