Setting the Date and Time
It is highly recommended to set the date and time when first setting up your system.
Inaccurate time stamps may render your footage unusable for court evidence.
To set the date and time:
1
the Main Menu button (![]() ).
).
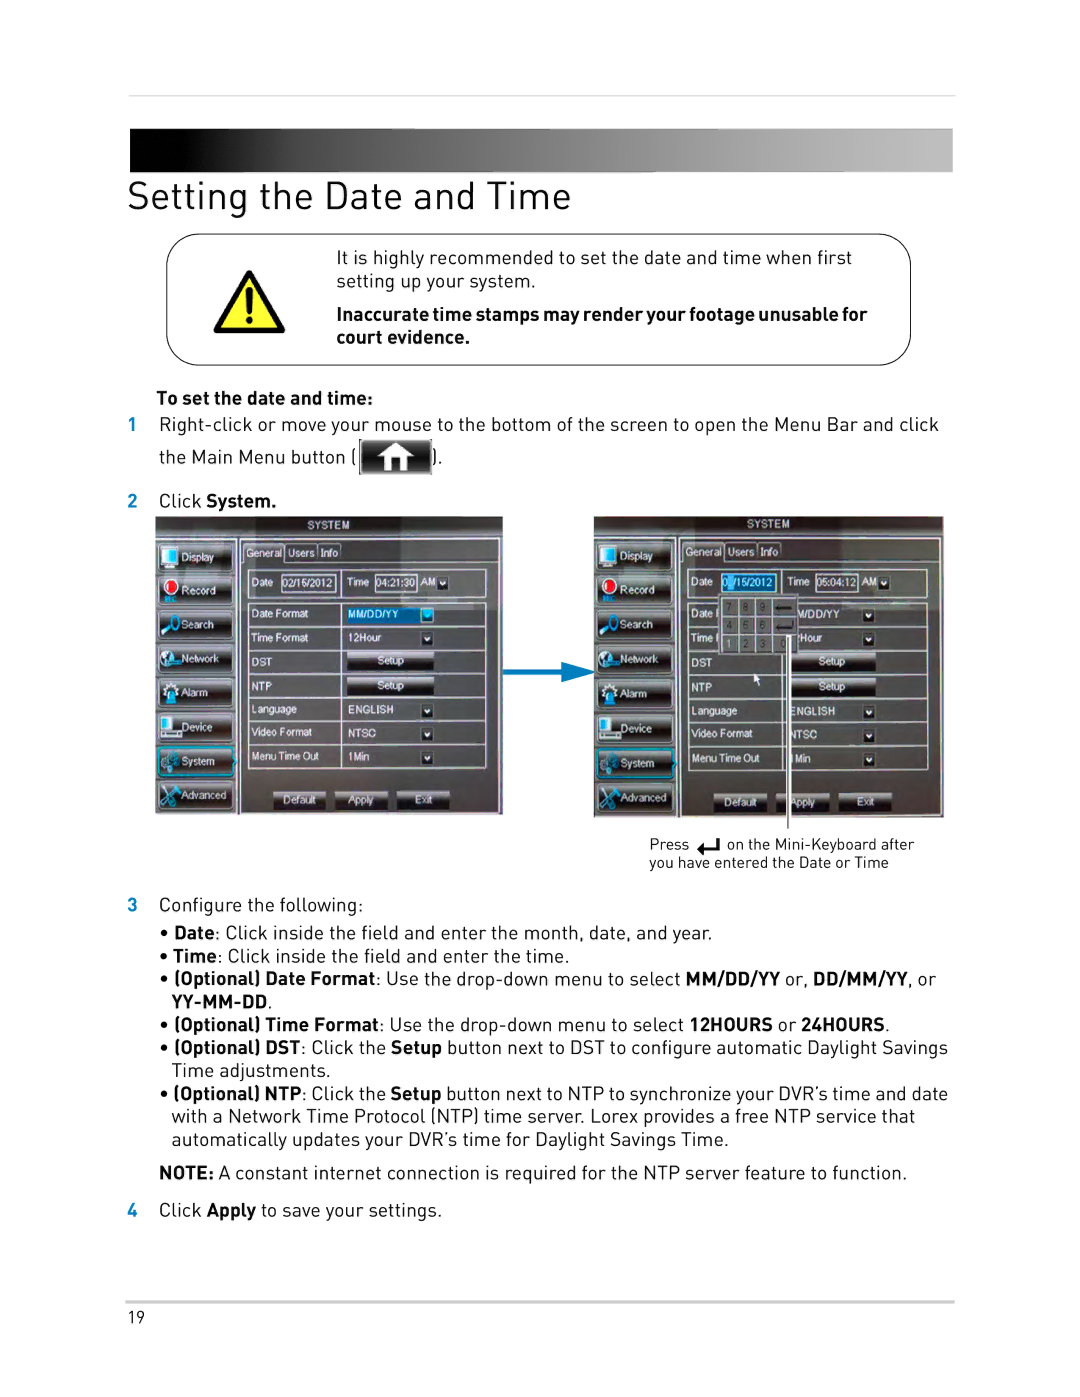
2Click System.
Press ![]() on the
on the
3Configure the following:
•Date: Click inside the field and enter the month, date, and year.
•Time: Click inside the field and enter the time.
•(Optional) Date Format: Use the
•(Optional) Time Format: Use the
•(Optional) DST: Click the Setup button next to DST to configure automatic Daylight Savings Time adjustments.
•(Optional) NTP: Click the Setup button next to NTP to synchronize your DVR’s time and date with a Network Time Protocol (NTP) time server. Lorex provides a free NTP service that automatically updates your DVR’s time for Daylight Savings Time.
NOTE: A constant internet connection is required for the NTP server feature to function.
4Click Apply to save your settings.
19