Using the Main Menu
Upgrading the System Firmware
Firmware upgrades can provide improved functionality to your DVR. When firmware upgrades become available, you can download them for free from www.lorextechnology.com.
To upgrade the system firmware:
1In your web browser, visit www.lorextechnology.com and search for the model number of your DVR (check the label underneath your DVR for the model number). Download the free firmware upgrade if one is available.
2Extract the firmware into a blank USB flash drive. The firmware should be in a folder named dvrupgrade. Ensure that this is the only folder in the USB drive.
3Insert the flash drive into one of the USB ports on your DVR.
4![]() ).
).
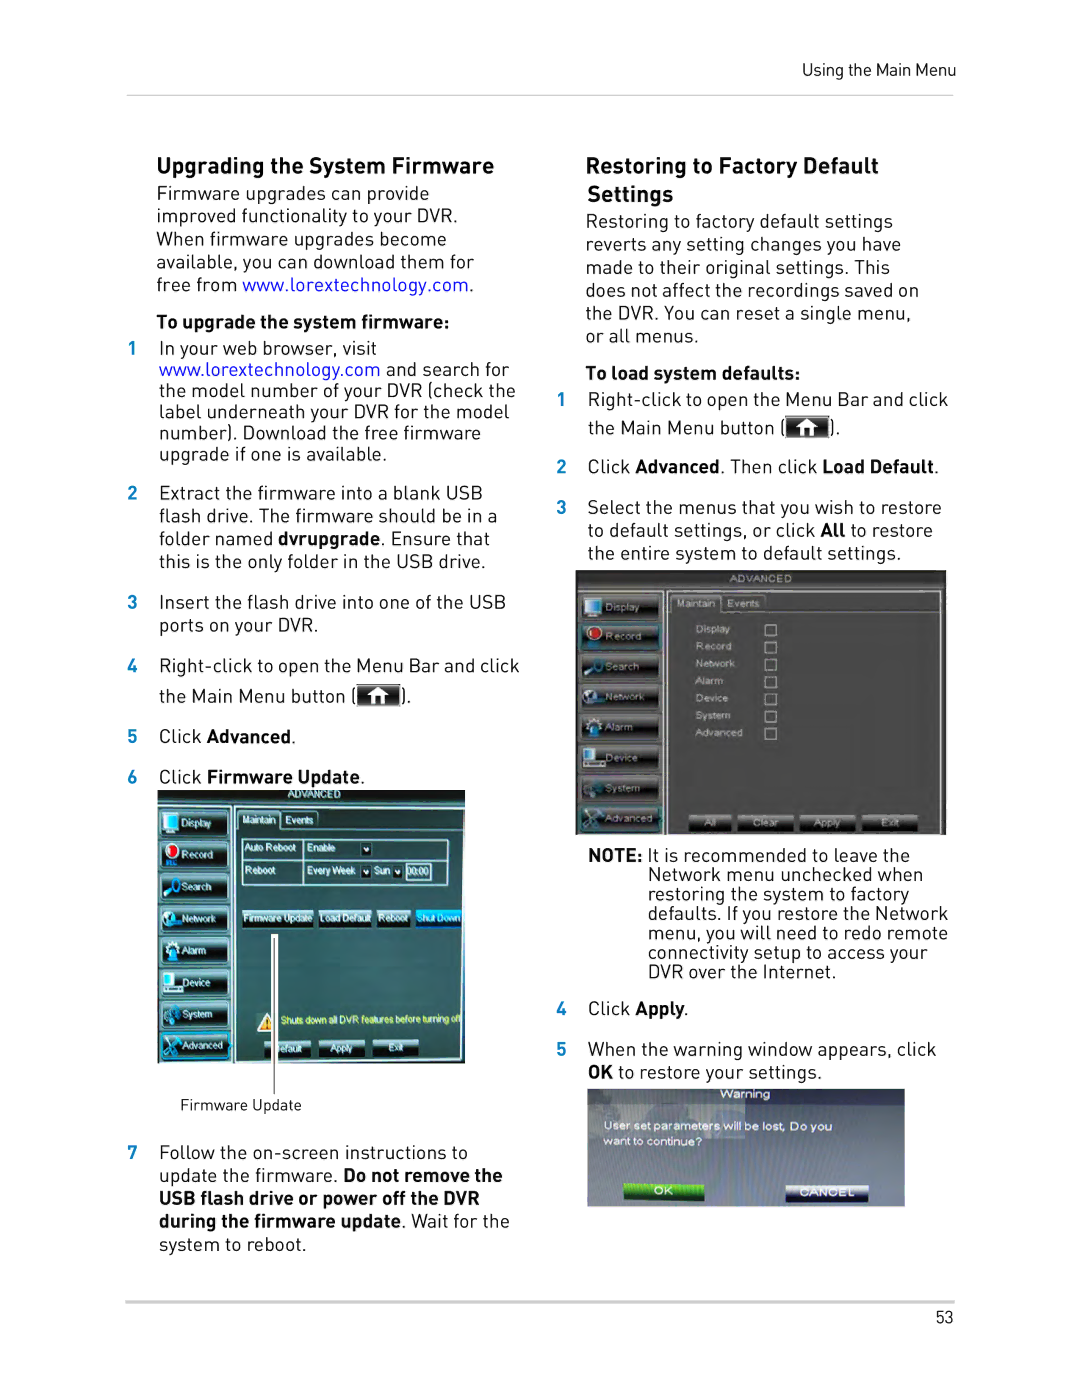
5Click Advanced.
6Click Firmware Update.
Restoring to Factory Default
Settings
Restoring to factory default settings reverts any setting changes you have made to their original settings. This does not affect the recordings saved on the DVR. You can reset a single menu, or all menus.
To load system defaults:
1![]() ).
).
2Click Advanced. Then click Load Default.
3Select the menus that you wish to restore to default settings, or click All to restore the entire system to default settings.
4
5
Firmware Update
7Follow the
USB flash drive or power off the DVR during the firmware update. Wait for the system to reboot.
NOTE: It is recommended to leave the Network menu unchecked when restoring the system to factory defaults. If you restore the Network menu, you will need to redo remote connectivity setup to access your DVR over the Internet.
Click Apply.
When the warning window appears, click OK to restore your settings.
53