Chapter 5 – RouteFinder Manager
IP Mapping - Virtual Server Mapping
How to Access This Screen
1.On the RouteFinder Manager main screen, click the General Settings button.
2.On the General Settings screen, check the Enable IP Mapping box.
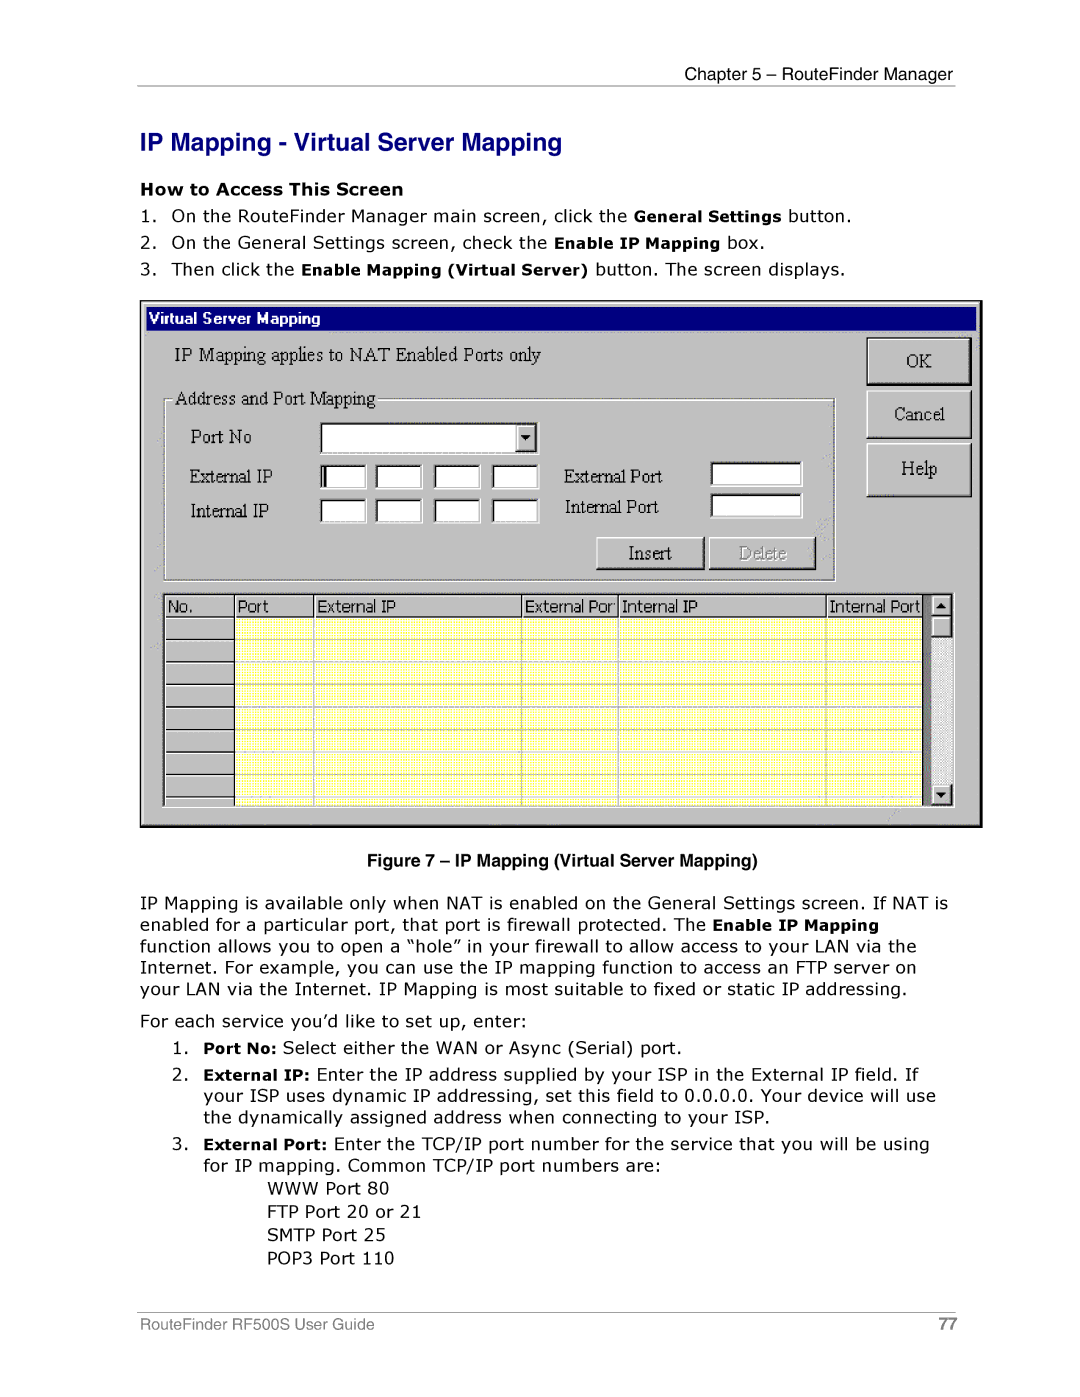
3.Then click the Enable Mapping (Virtual Server) button. The screen displays.
Figure 7 – IP Mapping (Virtual Server Mapping)
IP Mapping is available only when NAT is enabled on the General Settings screen. If NAT is enabled for a particular port, that port is firewall protected. The Enable IP Mapping function allows you to open a “hole” in your firewall to allow access to your LAN via the Internet. For example, you can use the IP mapping function to access an FTP server on your LAN via the Internet. IP Mapping is most suitable to fixed or static IP addressing.
For each service you’d like to set up, enter:
1.Port No: Select either the WAN or Async (Serial) port.
2.External IP: Enter the IP address supplied by your ISP in the External IP field. If your ISP uses dynamic IP addressing, set this field to 0.0.0.0. Your device will use the dynamically assigned address when connecting to your ISP.
3.External Port: Enter the TCP/IP port number for the service that you will be using for IP mapping. Common TCP/IP port numbers are:
WWW Port 80
FTP Port 20 or 21
SMTP Port 25
POP3 Port 110
RouteFinder RF500S User Guide | 77 |