Dye sublimation upgrade kit
The Dye Sublimation Upgrade Kit enables your OKI
Installing the upgrade
To install the
1.Turn off the computer and printer, and then dis- connect the printer cable (or SCSI cable for the Macintosh) and power cord from the printer.
2.Remove the rectangular plastic connector cover located to the right of the printer connector on the back of the printer. Locate the black tab at the bottom of the connector cover, pull it up and twist it until it breaks free, revealing the accessory con- nector beneath.
3.If using Apple Macintosh remove SCSI interface module from the back of the printer to reveal the accessory connector just to the right of the printer connector.
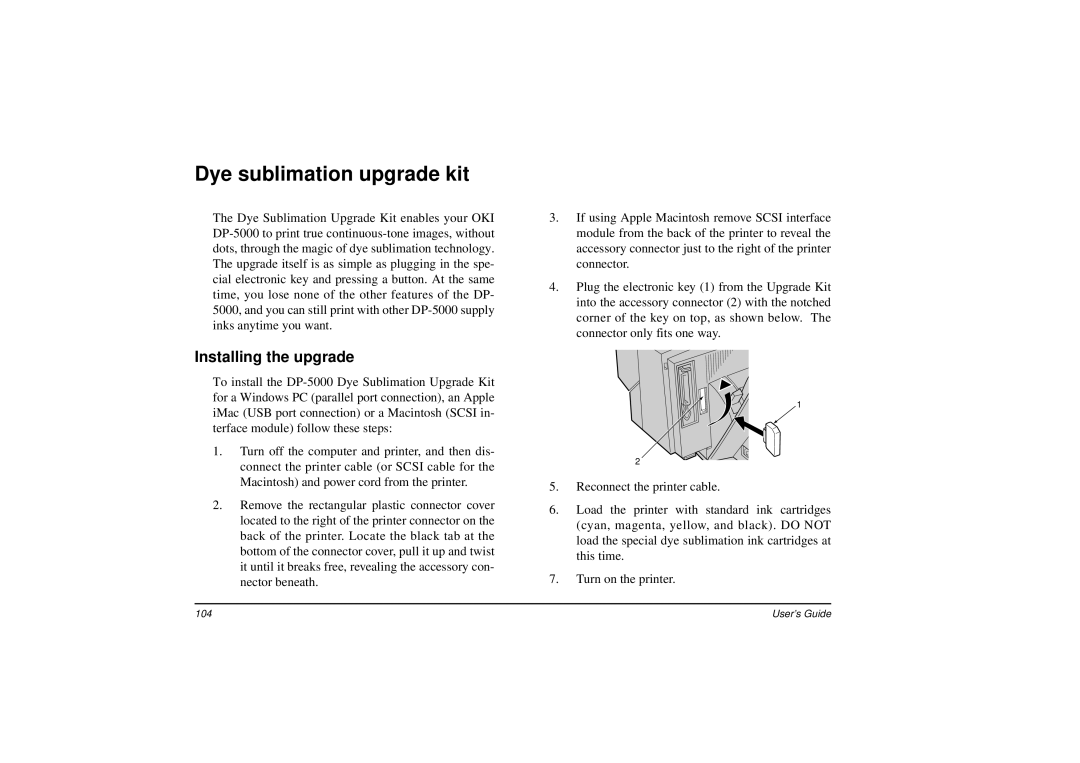
4.Plug the electronic key (1) from the Upgrade Kit into the accessory connector (2) with the notched corner of the key on top, as shown below. The connector only fits one way.
1
2
5.Reconnect the printer cable.
6.Load the printer with standard ink cartridges (cyan, magenta, yellow, and black). DO NOT load the special dye sublimation ink cartridges at this time.
7.Turn on the printer.
104 | User’s Guide |