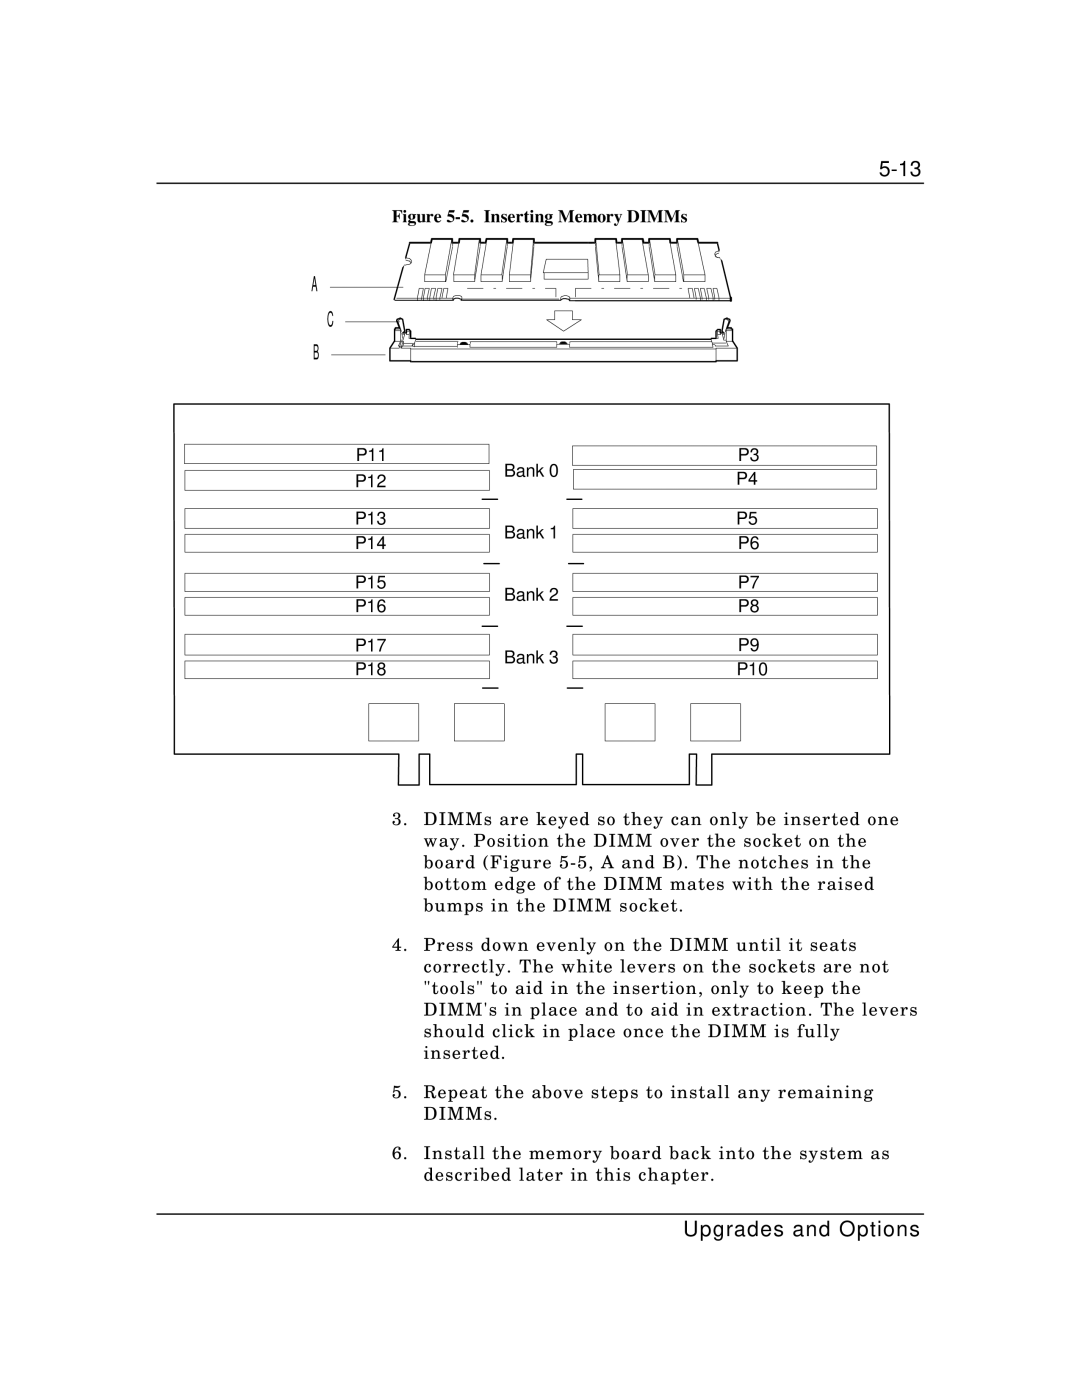
Figure 5-5. Inserting Memory DIMMs
A
C
B
P11
P12
P13
P14
P15
P16
P17
P18
Bank 0
Bank 1
Bank 2
Bank 3
P3
P4
P5
P6
P7
P8
P9
P10
3.DIMMs are keyed so they can only be inserted one way. Position the DIMM over the socket on the board (Figure
4.Press down evenly on the DIMM until it seats correctly. The white levers on the sockets are not "tools" to aid in the insertion, only to keep the DIMM's in place and to aid in extraction. The levers should click in place once the DIMM is fully inserted.
5.Repeat the above steps to install any remaining DIMMs.
6.Install the memory board back into the system as described later in this chapter.