To remove the board support panel:
1.Observe the safety and ESD precautions listed at the beginning of this chapter.
2.Remove the left side panel (as viewed from front).
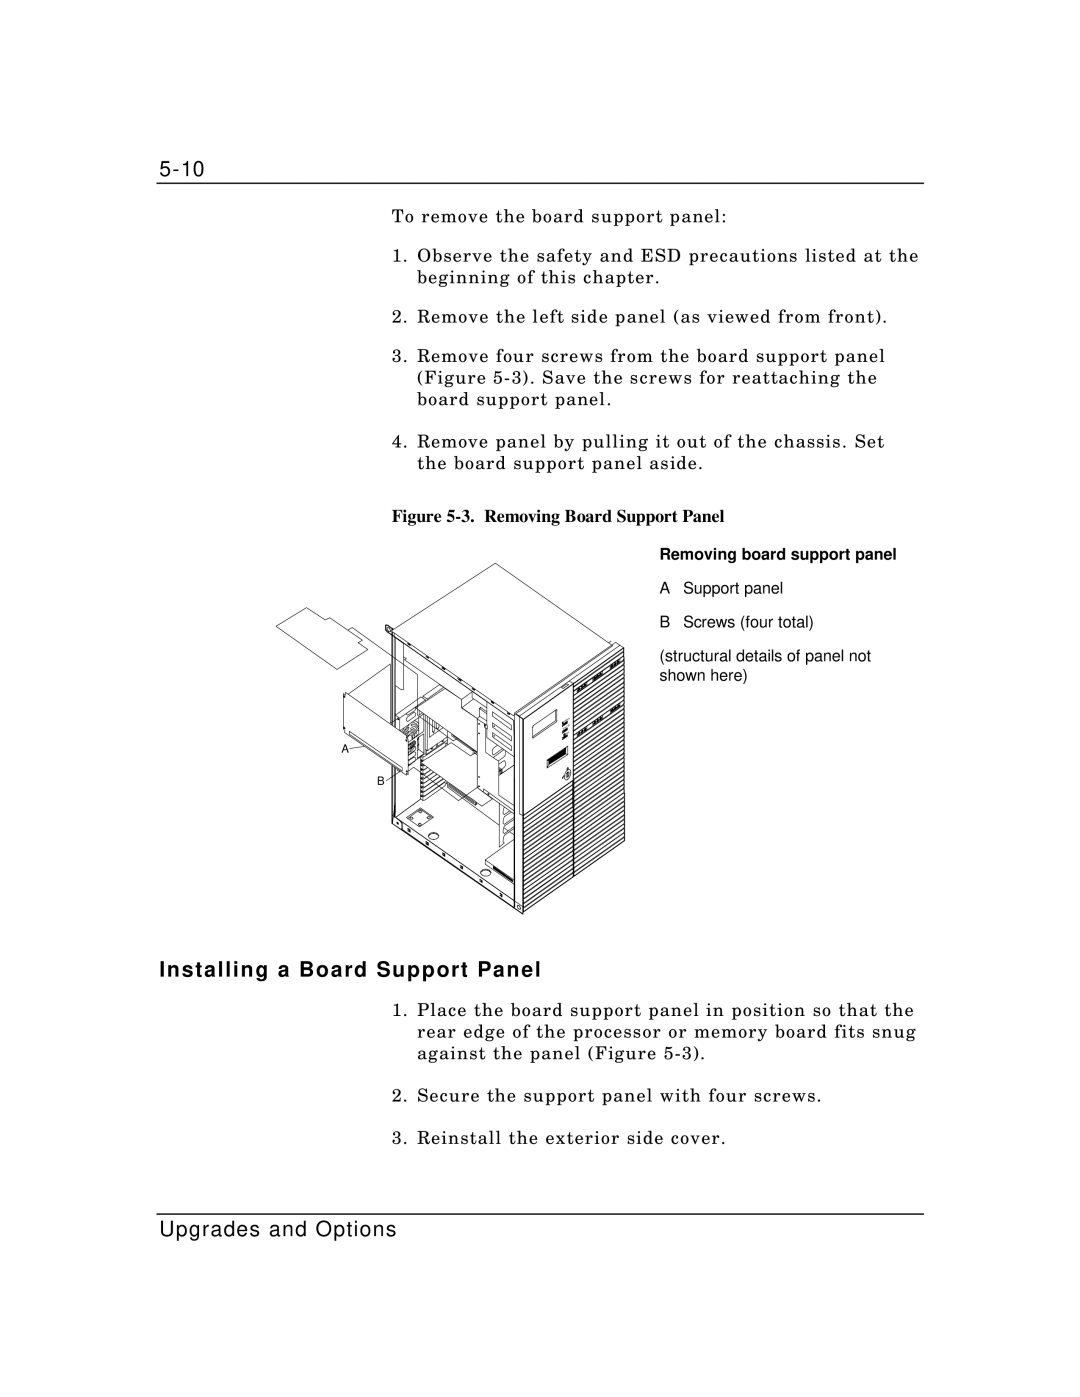
3.Remove four screws from the board support panel (Figure
4.Remove panel by pulling it out of the chassis. Set the board support panel aside.
Figure 5-3. Removing Board Support Panel
Removing board support panel
A Support panel
B Screws (four total)
(structural details of panel not shown here)
A
B ![]()
Installing a Board Support Panel
1.Place the board support panel in position so that the rear edge of the processor or memory board fits snug against the panel (Figure
2.Secure the support panel with four screws.
3.Reinstall the exterior side cover.