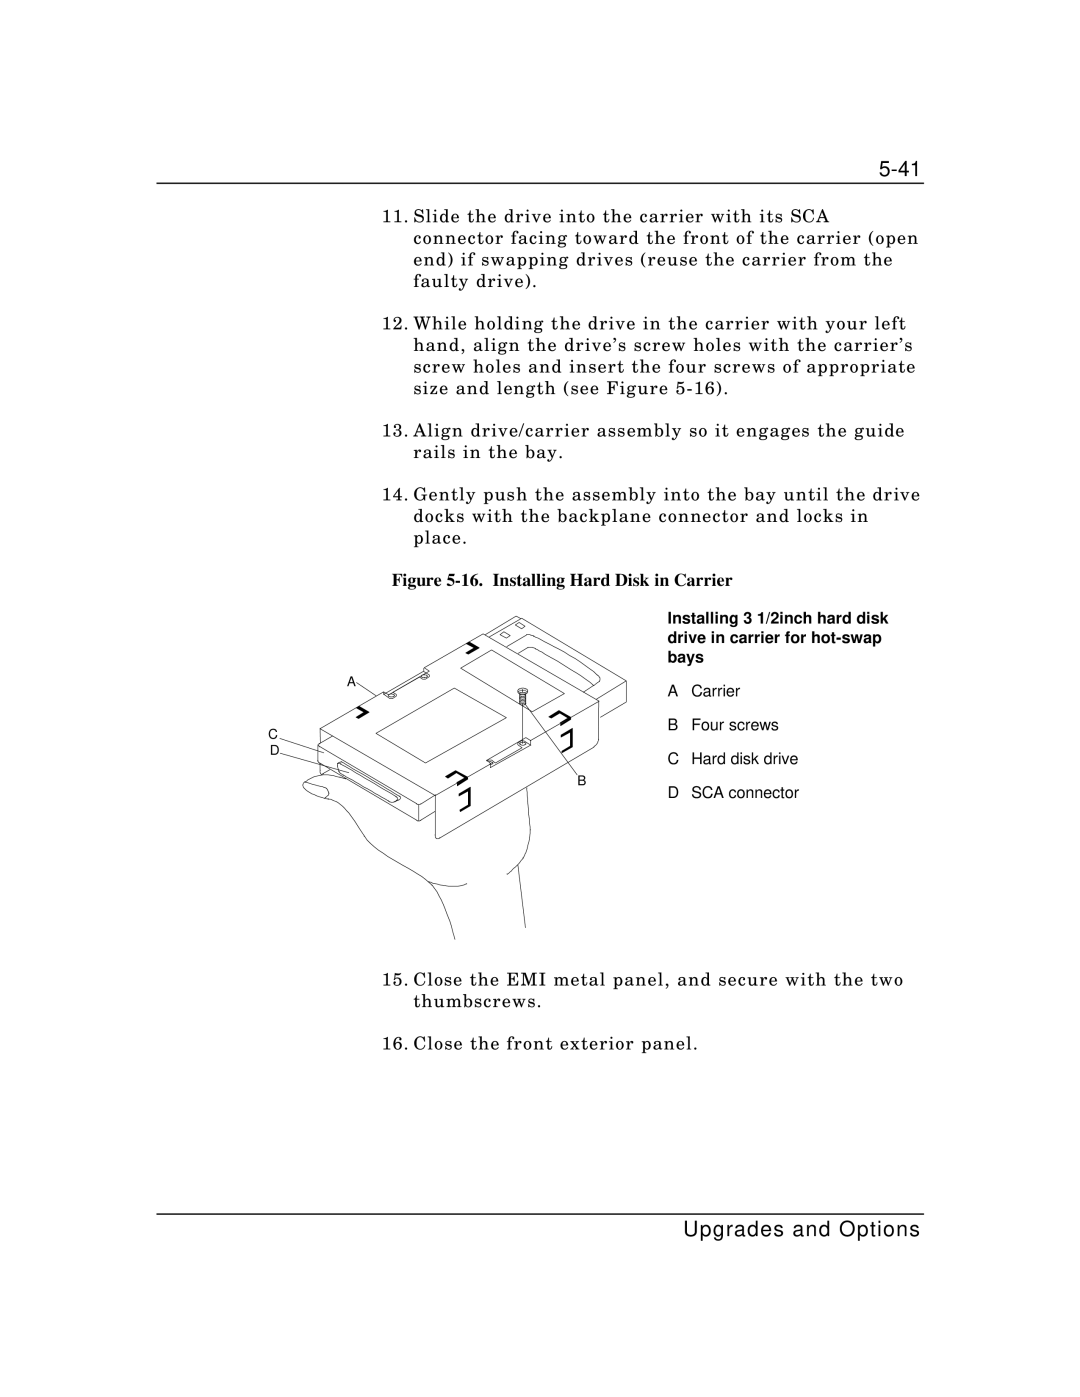
11.Slide the drive into the carrier with its SCA connector facing toward the front of the carrier (open end) if swapping drives (reuse the carrier from the faulty drive).
12.While holding the drive in the carrier with your left hand, align the drive’s screw holes with the carrier’s screw holes and insert the four screws of appropriate size and length (see Figure
13.Align drive/carrier assembly so it engages the guide rails in the bay.
14.Gently push the assembly into the bay until the drive docks with the backplane connector and locks in place.
Figure 5-16. Installing Hard Disk in Carrier
A
Installing 3 1/2inch hard disk drive in carrier for
A Carrier
C
B Four screws
D
C Hard disk drive
B
D SCA connector
15.Close the EMI metal panel, and secure with the two thumbscrews.
16.Close the front exterior panel.
