Installation
2. Place or Mount the Equipment
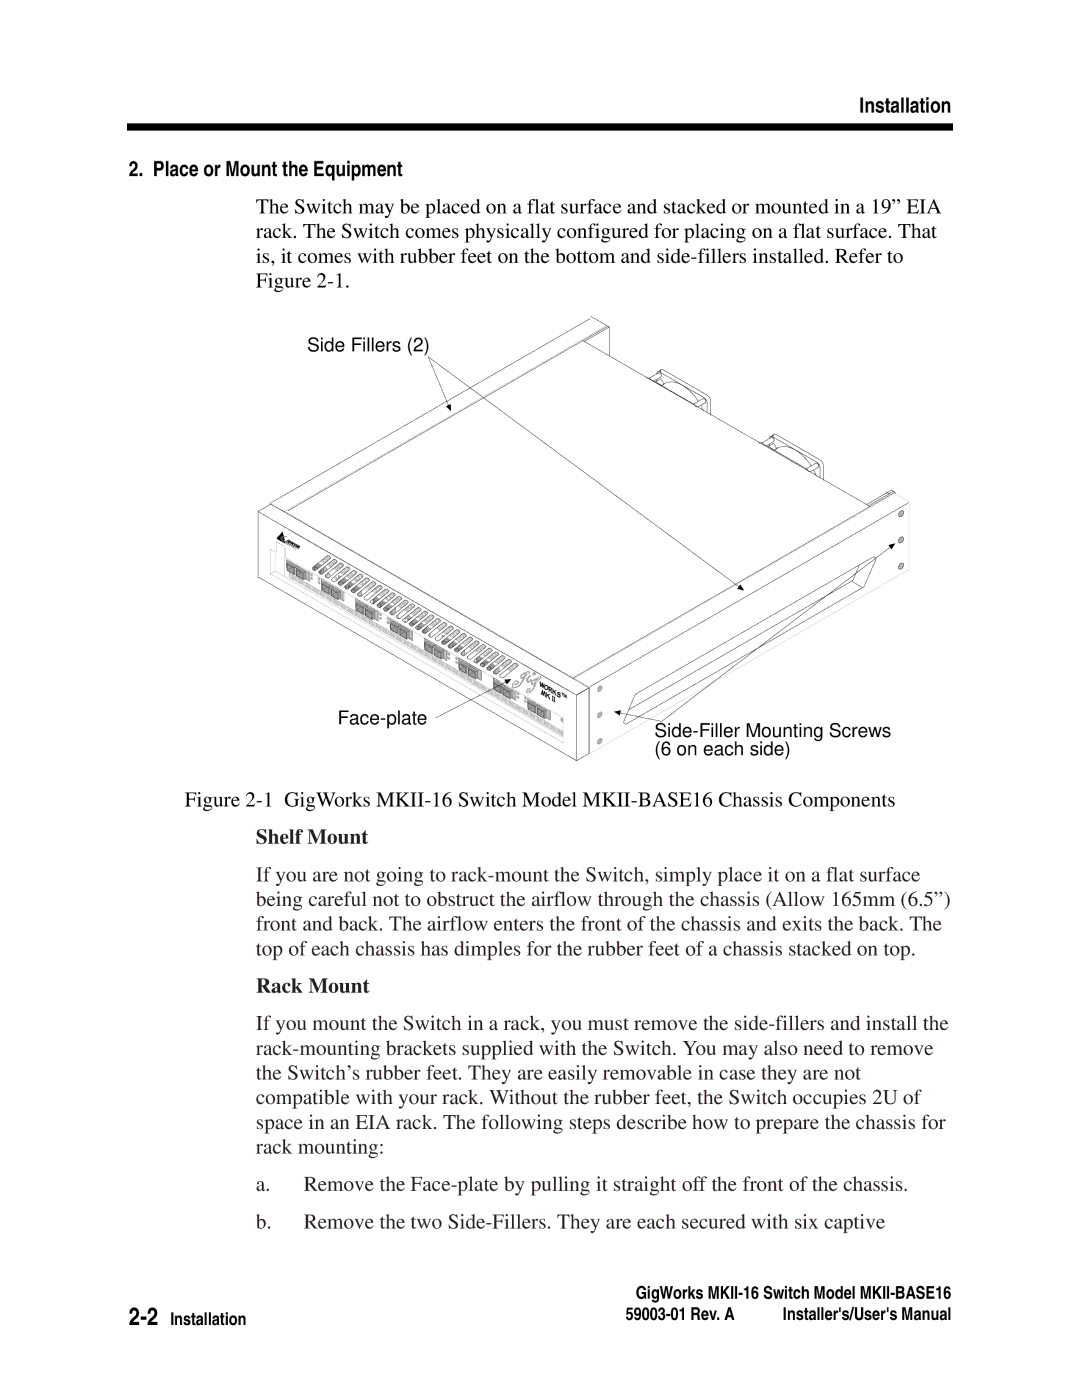
The Switch may be placed on a flat surface and stacked or mounted in a 19” EIA rack. The Switch comes physically configured for placing on a flat surface. That is, it comes with rubber feet on the bottom and side-fillers installed. Refer to Figure 2-1.
Side Fillers (2)
Face-plate 
Side-Filler Mounting Screws (6 on each side)
Figure 2-1 GigWorks MKII-16 Switch Model MKII-BASE16 Chassis Components
Shelf Mount
If you are not going to rack-mount the Switch, simply place it on a flat surface being careful not to obstruct the airflow through the chassis (Allow 165mm (6.5”) front and back. The airflow enters the front of the chassis and exits the back. The top of each chassis has dimples for the rubber feet of a chassis stacked on top.
Rack Mount
If you mount the Switch in a rack, you must remove the side-fillers and install the rack-mounting brackets supplied with the Switch. You may also need to remove the Switch’s rubber feet. They are easily removable in case they are not compatible with your rack. Without the rubber feet, the Switch occupies 2U of space in an EIA rack. The following steps describe how to prepare the chassis for rack mounting:
a.Remove the Face-plate by pulling it straight off the front of the chassis.
b.Remove the two Side-Fillers. They are each secured with six captive
2-2Installation | GigWorks MKII-16 Switch Model MKII-BASE16 |
59003-01 Rev. A | Installer's/User's Manual |