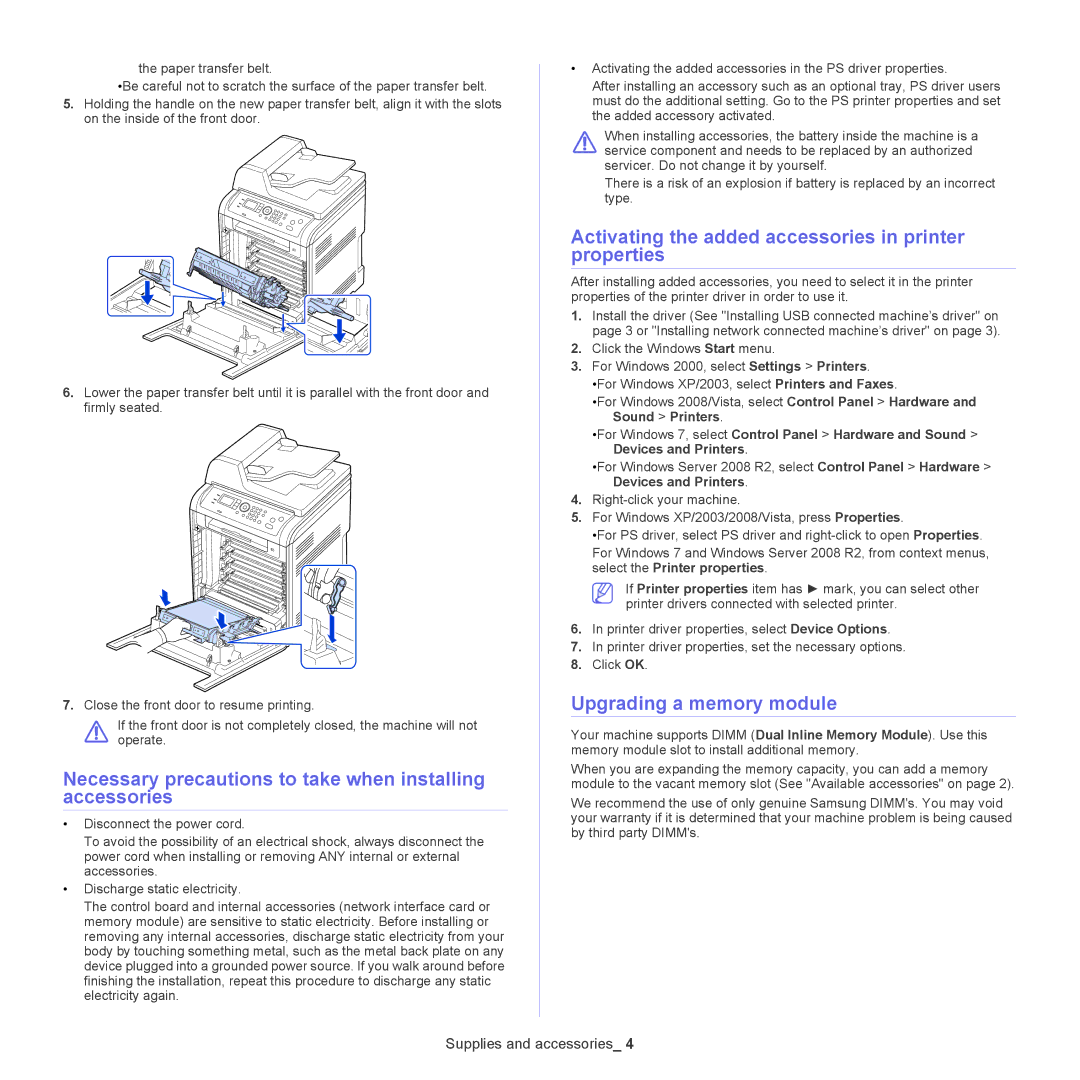
the paper transfer belt.
•Be careful not to scratch the surface of the paper transfer belt.
5.Holding the handle on the new paper transfer belt, align it with the slots on the inside of the front door.
6.Lower the paper transfer belt until it is parallel with the front door and firmly seated.
7.Close the front door to resume printing.
If the front door is not completely closed, the machine will not operate.
Necessary precautions to take when installing accessories
•Disconnect the power cord.
To avoid the possibility of an electrical shock, always disconnect the power cord when installing or removing ANY internal or external accessories.
•Discharge static electricity.
The control board and internal accessories (network interface card or memory module) are sensitive to static electricity. Before installing or removing any internal accessories, discharge static electricity from your body by touching something metal, such as the metal back plate on any device plugged into a grounded power source. If you walk around before finishing the installation, repeat this procedure to discharge any static electricity again.
•Activating the added accessories in the PS driver properties.
After installing an accessory such as an optional tray, PS driver users must do the additional setting. Go to the PS printer properties and set the added accessory activated.
When installing accessories, the battery inside the machine is a service component and needs to be replaced by an authorized servicer. Do not change it by yourself.
There is a risk of an explosion if battery is replaced by an incorrect type.
Activating the added accessories in printer properties
After installing added accessories, you need to select it in the printer properties of the printer driver in order to use it.
1.Install the driver (See "Installing USB connected machine’s driver" on page 3 or "Installing network connected machine’s driver" on page 3).
2.Click the Windows Start menu.
3.For Windows 2000, select Settings > Printers.
•For Windows XP/2003, select Printers and Faxes.
•For Windows 2008/Vista, select Control Panel > Hardware and Sound > Printers.
•For Windows 7, select Control Panel > Hardware and Sound > Devices and Printers.
•For Windows Server 2008 R2, select Control Panel > Hardware > Devices and Printers.
4.
5.For Windows XP/2003/2008/Vista, press Properties.
•For PS driver, select PS driver and
For Windows 7 and Windows Server 2008 R2, from context menus, select the Printer properties.
If Printer properties item has ► mark, you can select other printer drivers connected with selected printer.
6.In printer driver properties, select Device Options.
7.In printer driver properties, set the necessary options.
8.Click OK.
Upgrading a memory module
Your machine supports DIMM (Dual Inline Memory Module). Use this memory module slot to install additional memory.
When you are expanding the memory capacity, you can add a memory module to the vacant memory slot (See "Available accessories" on page 2).
We recommend the use of only genuine Samsung DIMM's. You may void your warranty if it is determined that your machine problem is being caused by third party DIMM's.