CONFIGURING THE SWITCH
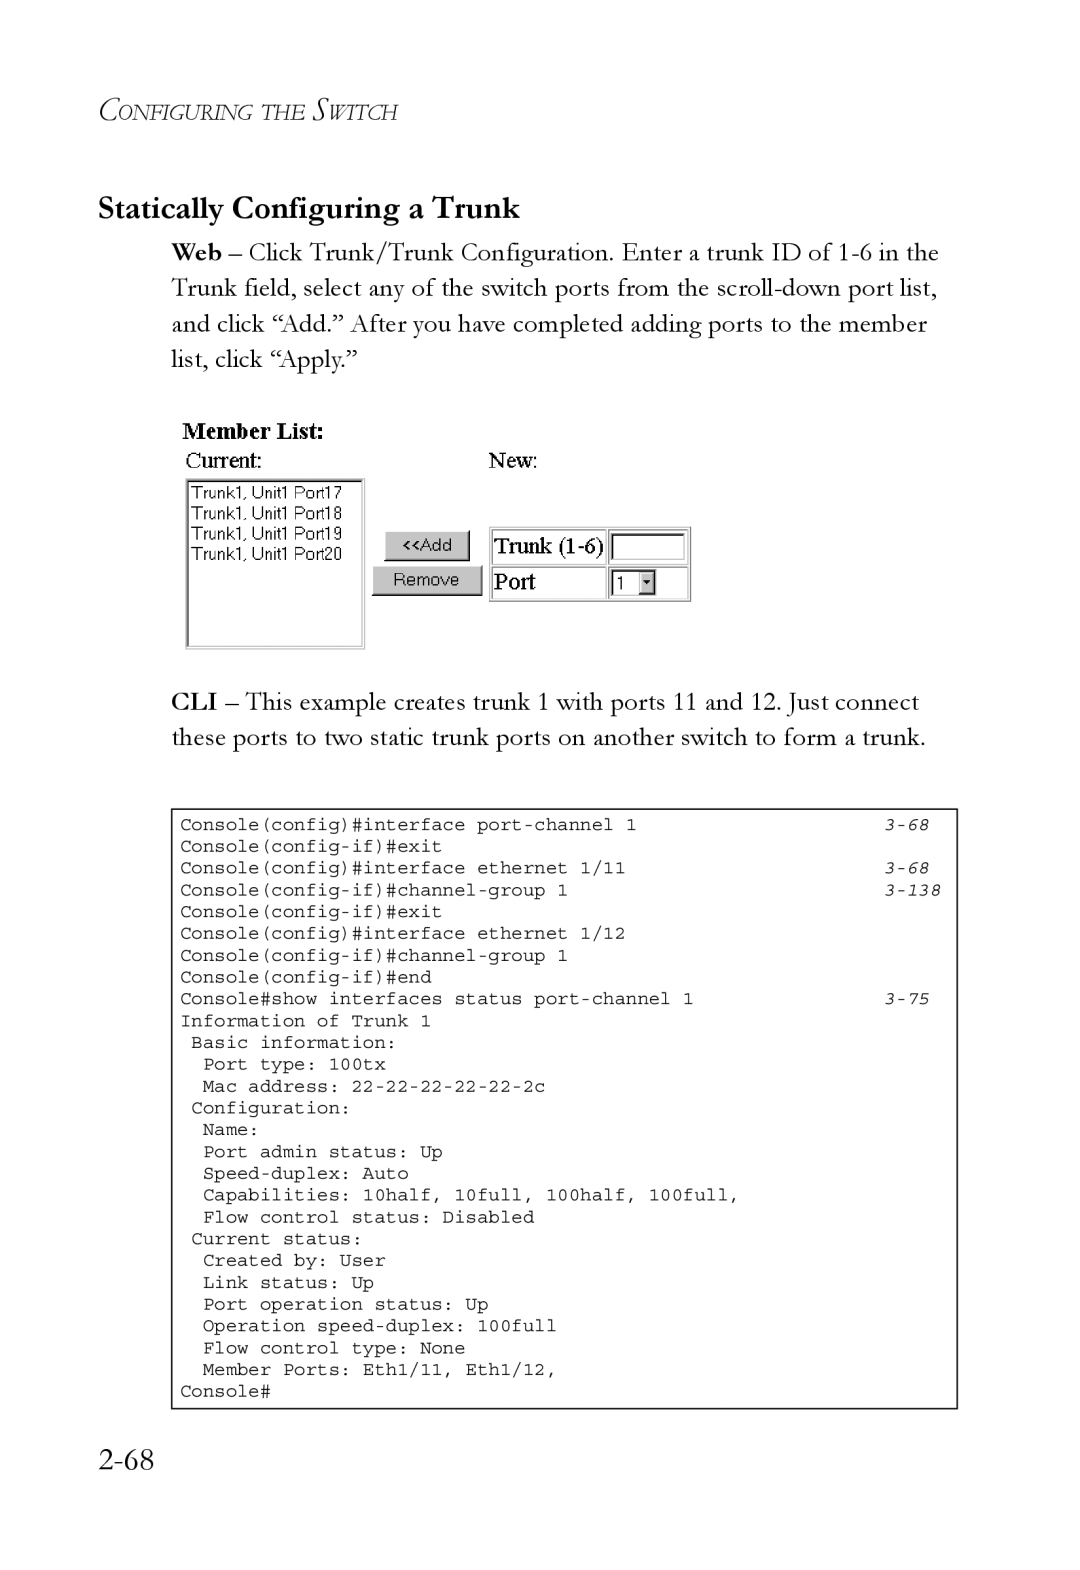
Statically Configuring a Trunk
Web – Click Trunk/Trunk Configuration. Enter a trunk ID of
CLI – This example creates trunk 1 with ports 11 and 12. Just connect these ports to two static trunk ports on another switch to form a trunk.
Console(config)#interface | |
| |
Console(config)#interface ethernet 1/11 | |
| |
| |
Console(config)#interface ethernet 1/12 |
|
| |
| |
Console#show interfaces status |
Information of Trunk 1
Basic information:
Port type: 100tx
Mac address:
Configuration:
Name:
Port admin status: Up
Capabilities: 10half, 10full, 100half, 100full,
Flow control status: Disabled
Current status:
Created by: User
Link status: Up
Port operation status: Up
Operation
Flow control type: None
Member Ports: Eth1/11, Eth1/12,
Console#