User’s Manual
5.3.4Camera Title
This item allows the user to change the title of each camera connected to the unit. By default, the titles of cameras are numbered from 1 through 16 respectively. The title is displayed on screen after the title changes are set.
Follow these steps to enter a new title for a camera.
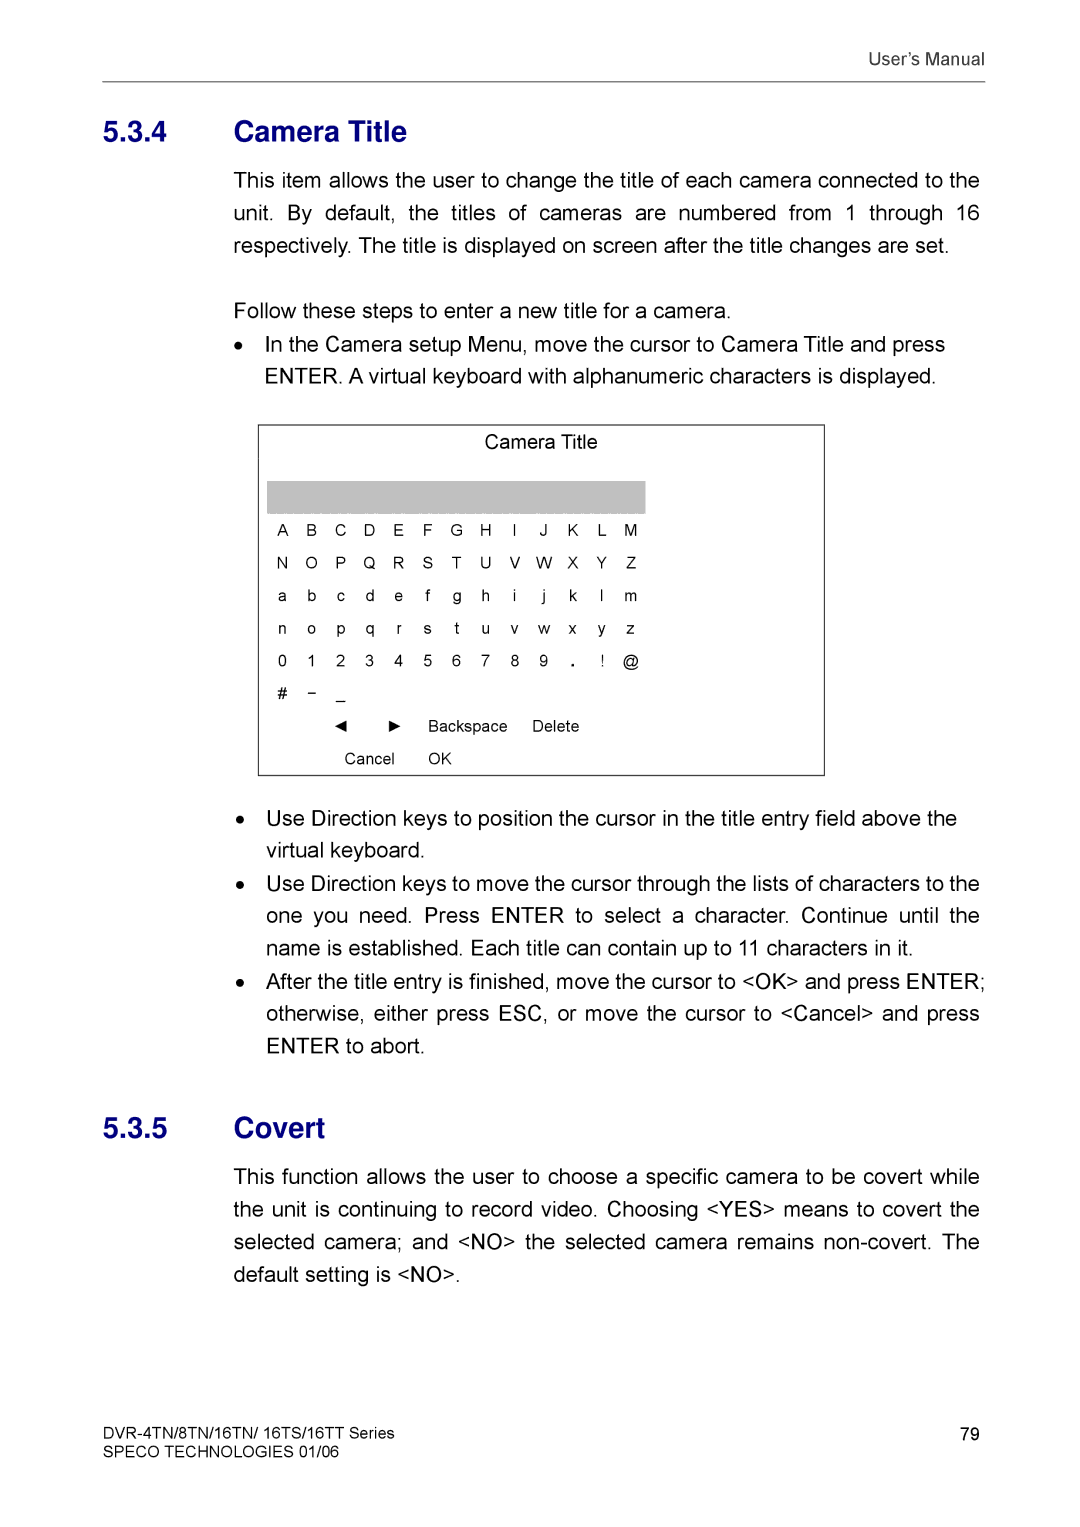
•In the Camera setup Menu, move the cursor to Camera Title and press ENTER. A virtual keyboard with alphanumeric characters is displayed.
Camera Title
A B C D E F G H I J K L M
N O P Q R S T U V W X Y Z
a b c d e f g h i j k l m
n o | p q | r s | t u v w x y z | |||
0 | 1 | 2 | 3 | 4 | 5 | 6 7 8 9 . ! @ |
# | − | _ |
|
|
|
|
|
| ◄ |
| ► | Backspace Delete | |
|
| Cancel | OK | |||
•Use Direction keys to position the cursor in the title entry field above the virtual keyboard.
•Use Direction keys to move the cursor through the lists of characters to the one you need. Press ENTER to select a character. Continue until the name is established. Each title can contain up to 11 characters in it.
•After the title entry is finished, move the cursor to <OK> and press ENTER; otherwise, either press ESC, or move the cursor to <Cancel> and press ENTER to abort.
5.3.5Covert
This function allows the user to choose a specific camera to be covert while the unit is continuing to record video. Choosing <YES> means to covert the selected camera; and <NO> the selected camera remains
79 | |
SPECO TECHNOLOGIES 01/06 |
|
