Removing the Stylus Holder
Follow these instructions to remove the stylus for adjusting, cleaning, or replacing.
Step 1: Turn the power off, then open the printer.
Step 2: Move the stylus holder mechanism to the center of the track, to make it easier to work with.
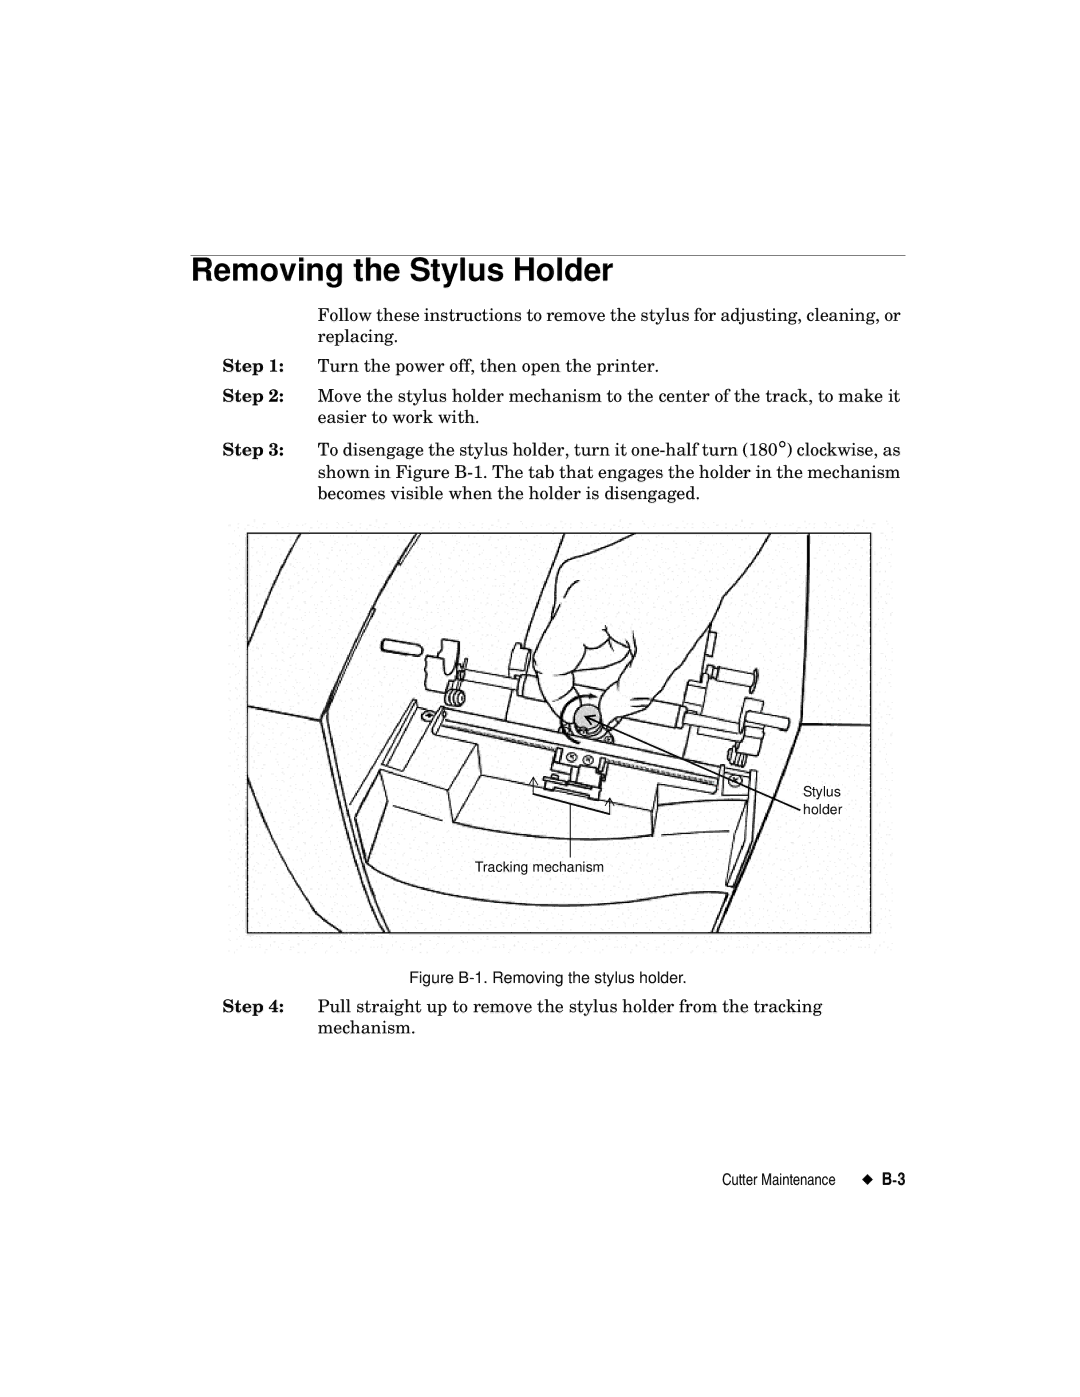
Step 3: To disengage the stylus holder, turn it
Stylus holder
Tracking mechanism
Figure B-1. Removing the stylus holder.
Step 4: Pull straight up to remove the stylus holder from the tracking mechanism.
Cutter Maintenance |
