Installing a tape cartridge
There are three simple steps to installing a tape cartridge: adjusting the tape cartridge receptacle to accommodate the width of the tape, dropping in the cartridge, and feeding the tape through the advance rollers.
Adjusting the printer tape receptacle
Since the printer accepts tape widths from .5 inches (25 mm) to 4 inches (102 mm), you must adjust the tape cartridge receptacle inside the printer for the cartridge you are installing.
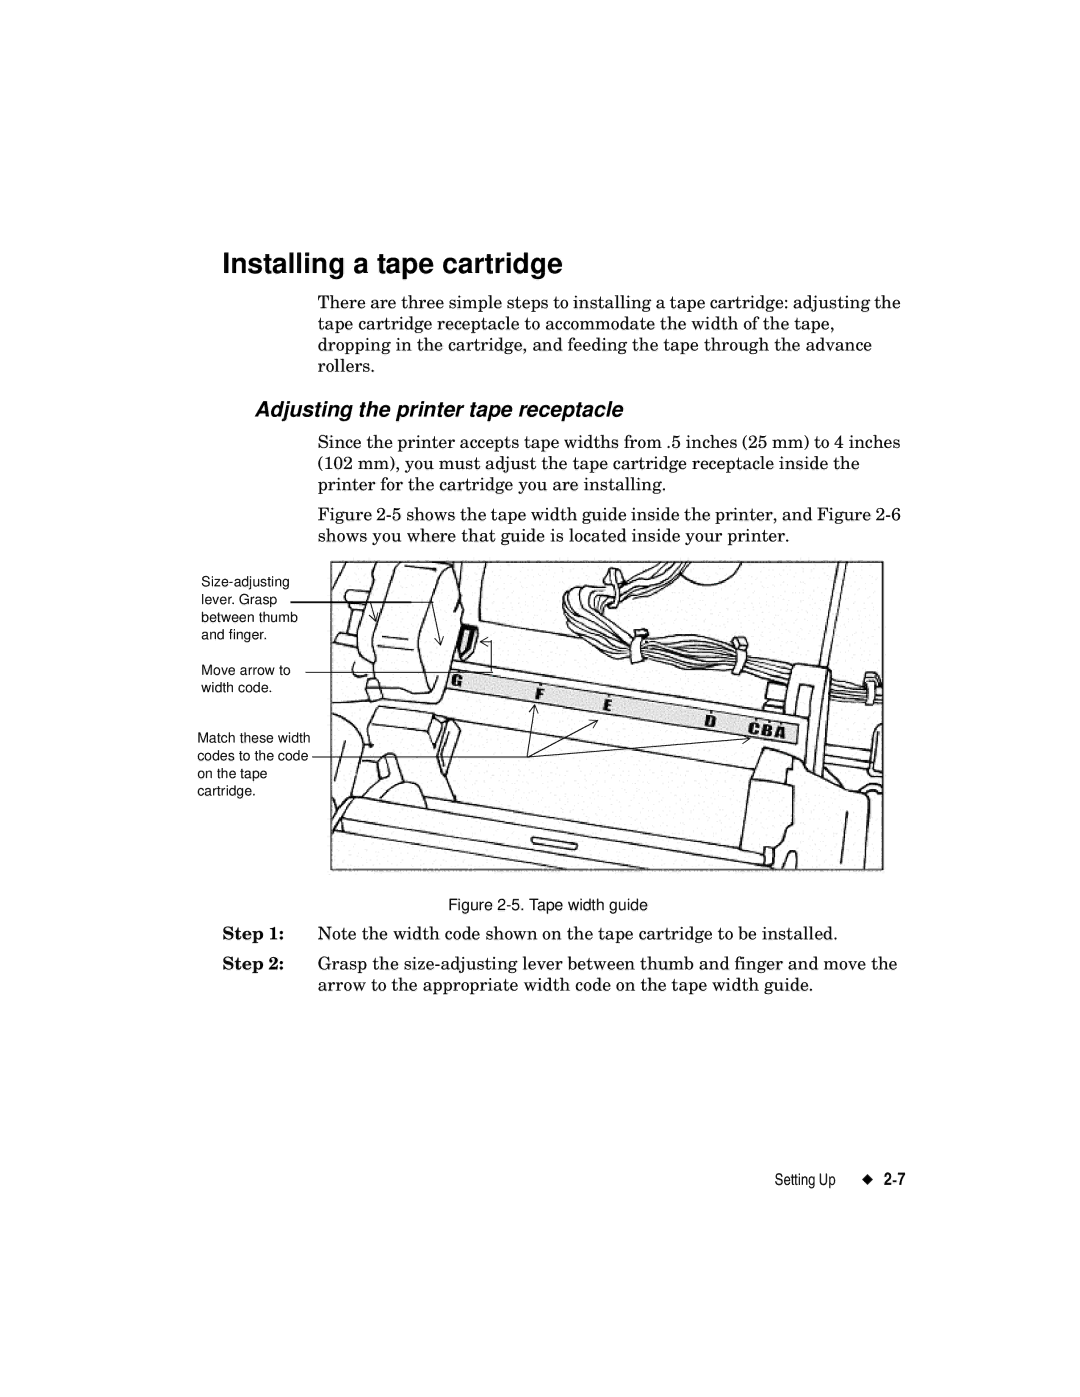
Figure 2-5 shows the tape width guide inside the printer, and Figure 2-6 shows you where that guide is located inside your printer.
Move arrow to width code.
Match these width codes to the code on the tape cartridge.
Figure 2-5. Tape width guide
Step 1: Note the width code shown on the tape cartridge to be installed.
Step 2: Grasp the
Setting Up |