Connecting Peripherals
This section describes how to get your system connected and powered up. You should have already unpacked your printer, using the instruction sheet included in the shipping box.
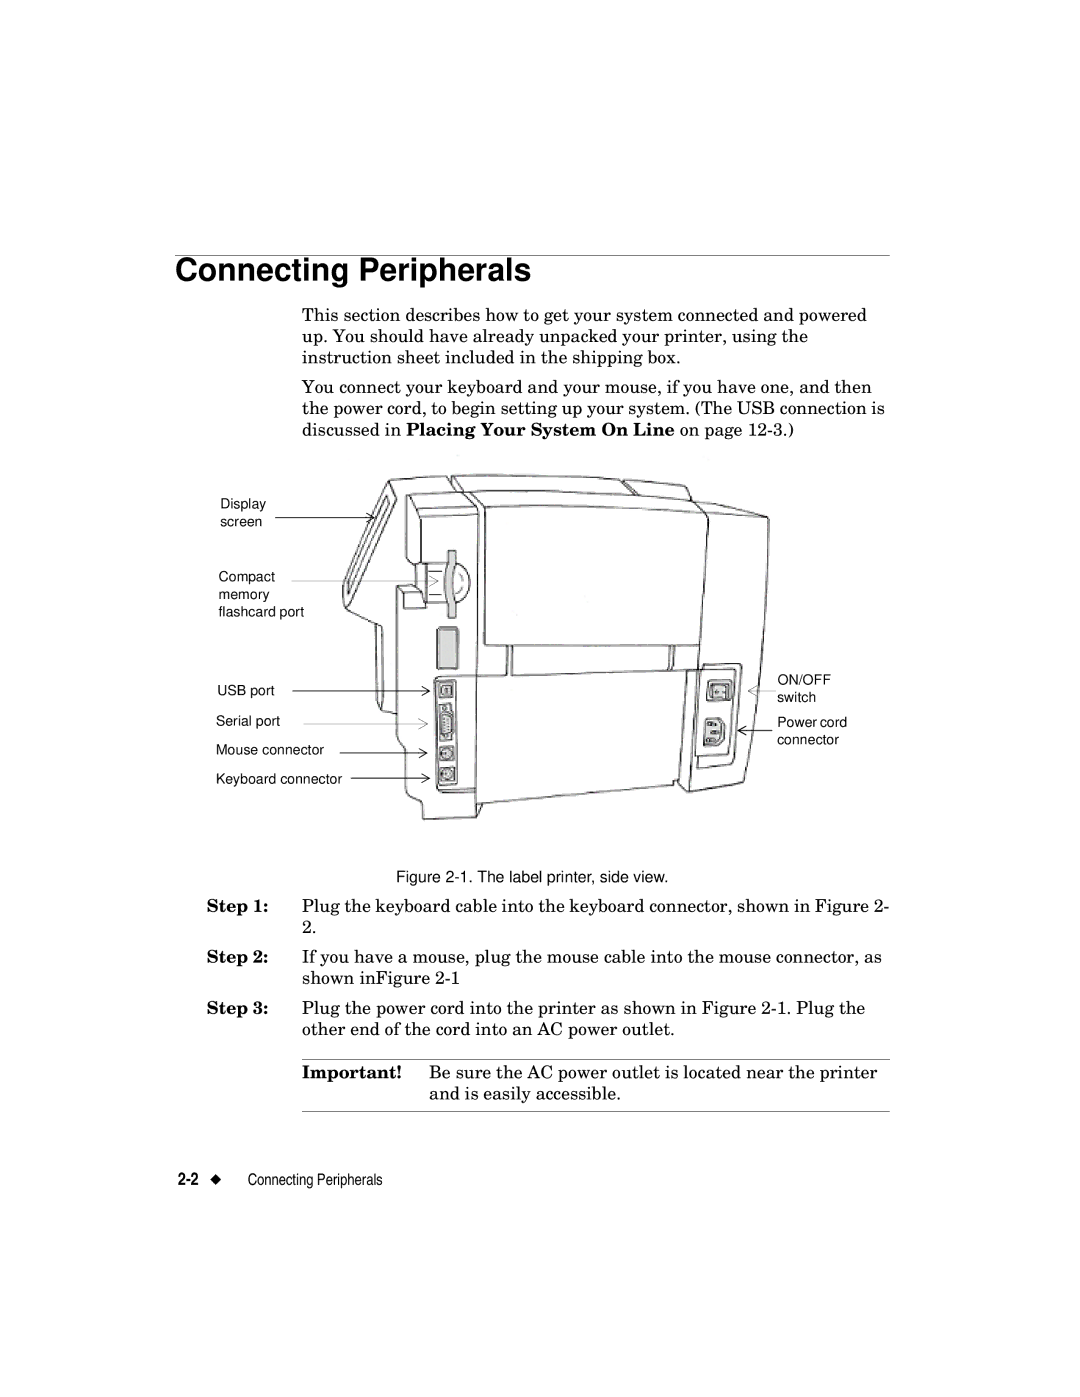
You connect your keyboard and your mouse, if you have one, and then the power cord, to begin setting up your system. (The USB connection is discussed in Placing Your System On Line on page
Display screen
Compact memory
flashcard port
USB port |
|
|
|
|
|
|
| ON/OFF |
|
|
| switch | |||||
|
| |||||||
|
|
|
|
|
|
|
| |
Serial port |
| Power cord | ||||||
Mouse connector |
|
|
|
|
|
| connector | |
|
|
|
|
|
|
| ||
|
|
|
| |||||
Keyboard connector |
|
|
|
|
| |||
|
|
| ||||||
Figure 2-1. The label printer, side view.
Step 1: Plug the keyboard cable into the keyboard connector, shown in Figure 2- 2.
Step 2: If you have a mouse, plug the mouse cable into the mouse connector, as shown inFigure
Step 3: Plug the power cord into the printer as shown in Figure
Important! Be sure the AC power outlet is located near the printer and is easily accessible.
