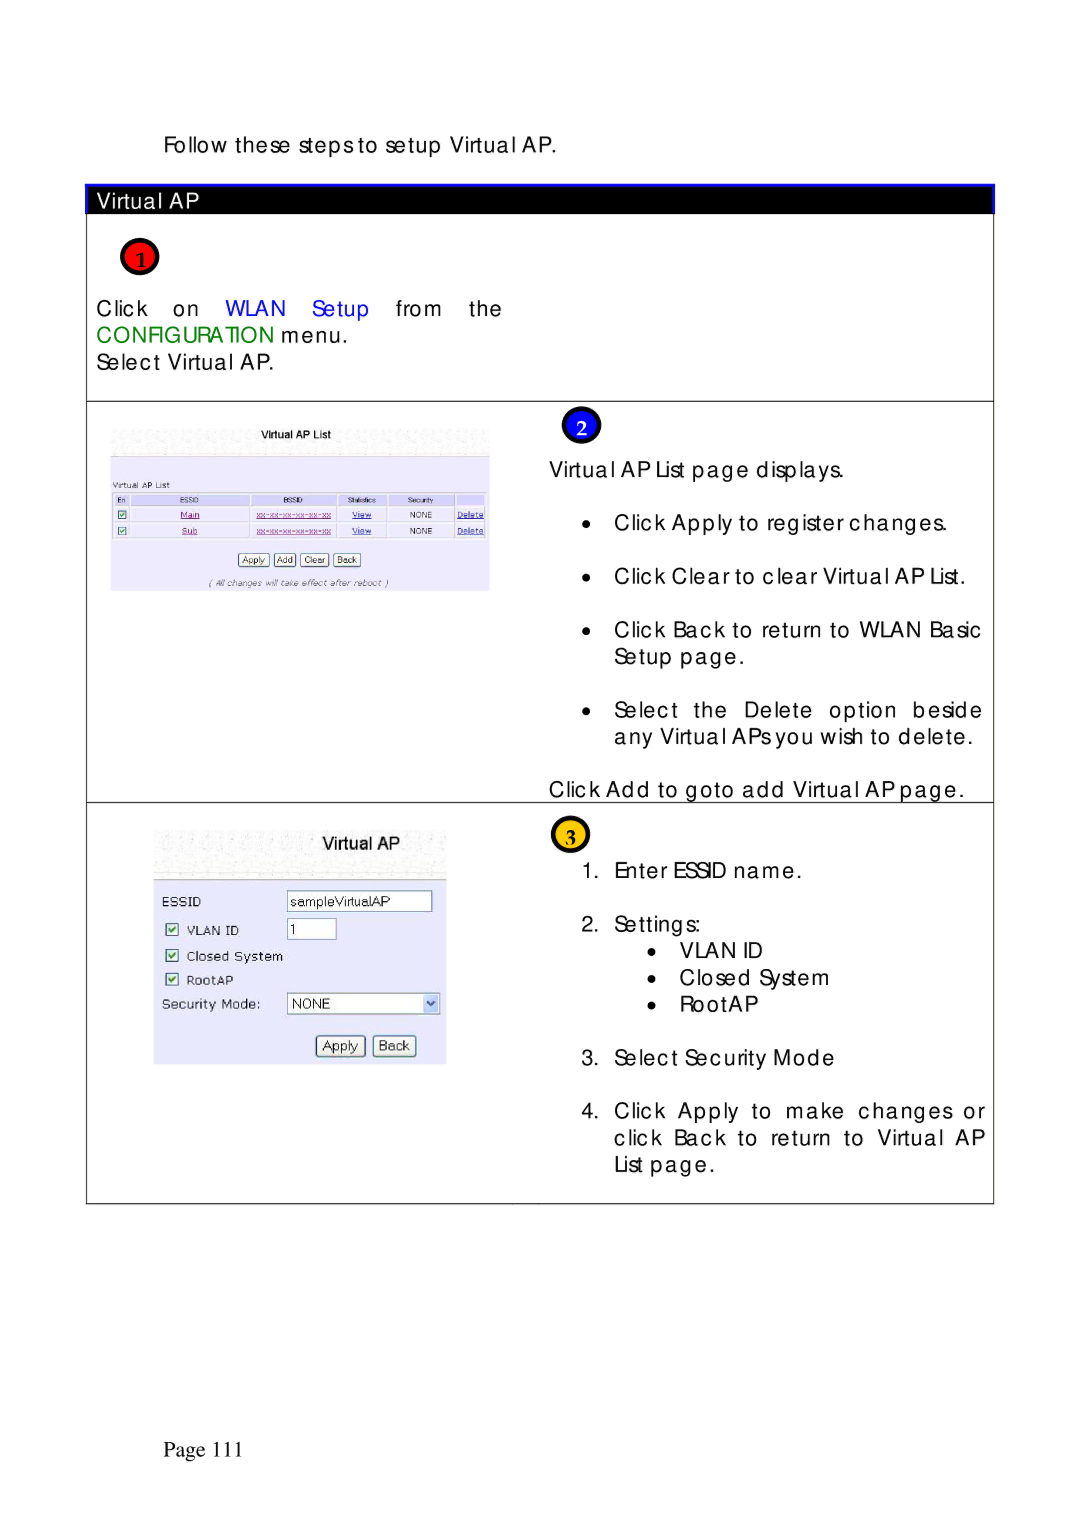
Follow these steps to setup Virtual AP.
Virtual AP
1
Click on WLAN Setup from the
CONFIGURATION menu.
Select Virtual AP.
2
Virtual AP List page displays.
• Click Apply to register changes.
• Click Clear to clear Virtual AP List.
• Click Back to return to WLAN Basic Setup page.
• Select the Delete option beside any Virtual APs you wish to delete.
Click Add to goto add Virtual AP page.
3
1. Enter ESSID name.
2. Settings:
• VLAN ID
• Closed System
• RootAP
3. Select Security Mode
4. Click Apply to make changes or click Back to return to Virtual AP List page.
Page 111