4.Tap Next.
5.Scroll and select the Internet
6.Enter your name and required account name and tap Next.
7.Enter the incoming mail server name and select the required account type, POP3 or IMAP4.
8.Specify the information requested in the next few screens and tap Finish.
You can also perform the following functions:
●Change the time intervals for downloading new messages.
●Download attachments.
●Limit the number of messages that are downloaded.
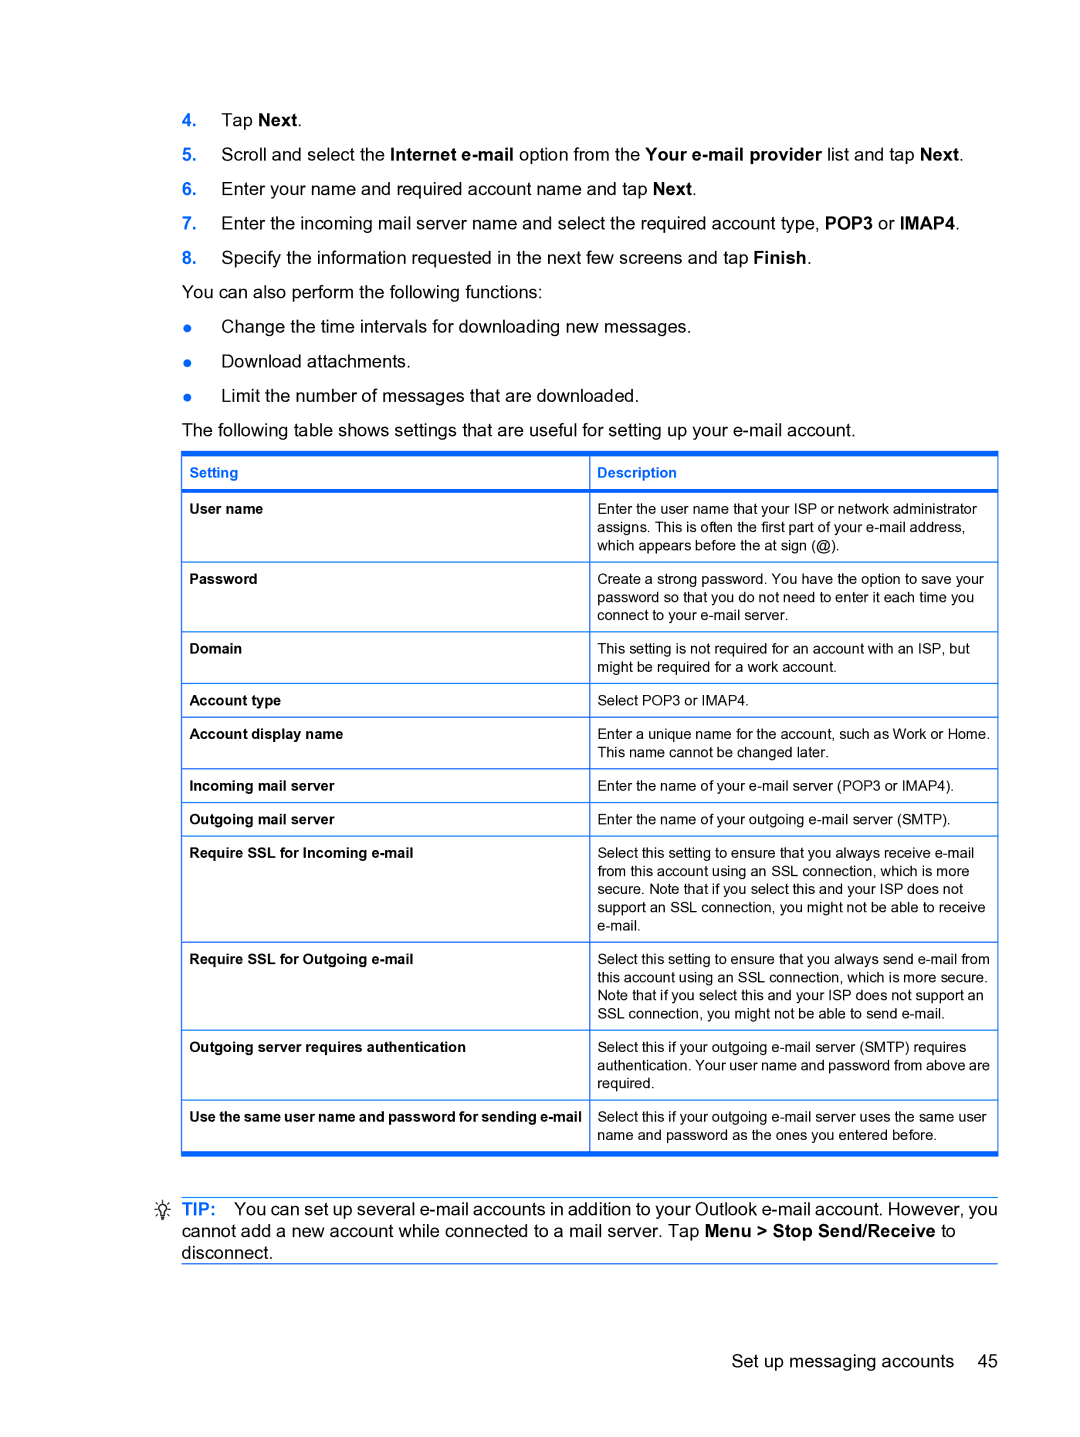
The following table shows settings that are useful for setting up your
Setting
User name
Password
Domain
Account type
Account display name
Incoming mail server
Outgoing mail server
Require SSL for Incoming
Require SSL for Outgoing
Outgoing server requires authentication
Use the same user name and password for sending
Description
Enter the user name that your ISP or network administrator assigns. This is often the first part of your
Create a strong password. You have the option to save your password so that you do not need to enter it each time you connect to your
This setting is not required for an account with an ISP, but might be required for a work account.
Select POP3 or IMAP4.
Enter a unique name for the account, such as Work or Home. This name cannot be changed later.
Enter the name of your
Enter the name of your outgoing
Select this setting to ensure that you always receive
Select this setting to ensure that you always send
Select this if your outgoing
Select this if your outgoing
![]() TIP: You can set up several
TIP: You can set up several
Set up messaging accounts 45