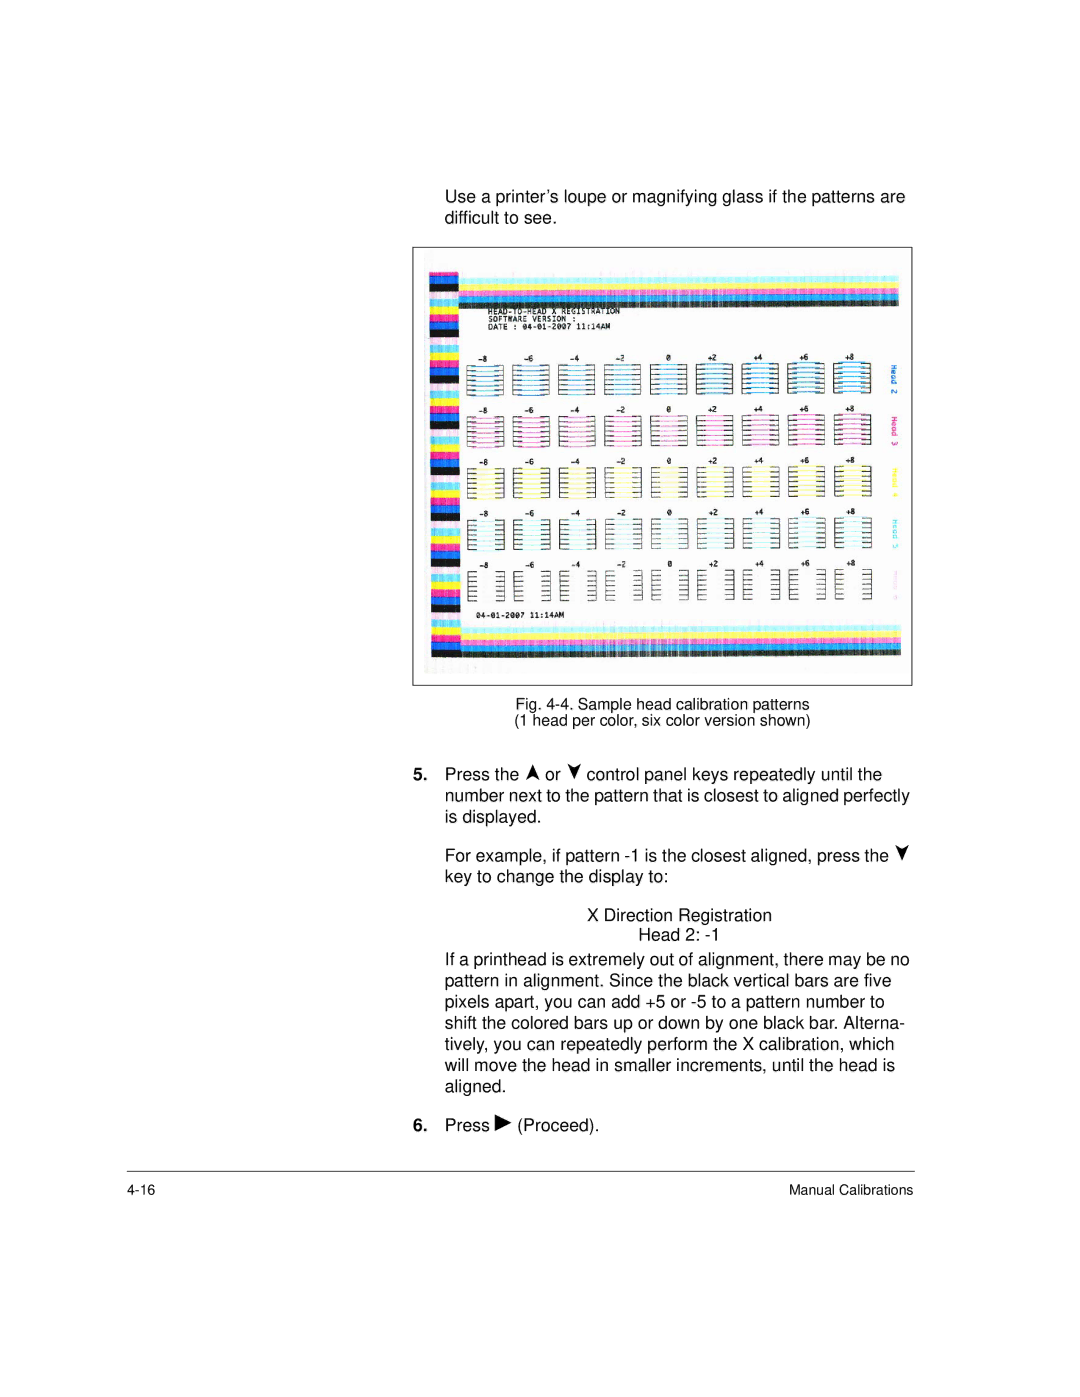
Use a printer’s loupe or magnifying glass if the patterns are difficult to see.
Fig. 4-4. Sample head calibration patterns (1 head per color, six color version shown)
5.Press the , or ) control panel keys repeatedly until the number next to the pattern that is closest to aligned perfectly is displayed.
For example, if pattern
X Direction Registration
Head 2:
If a printhead is extremely out of alignment, there may be no pattern in alignment. Since the black vertical bars are five pixels apart, you can add +5 or
6.Press ! (Proceed).
Manual Calibrations |