Installation and Configuration
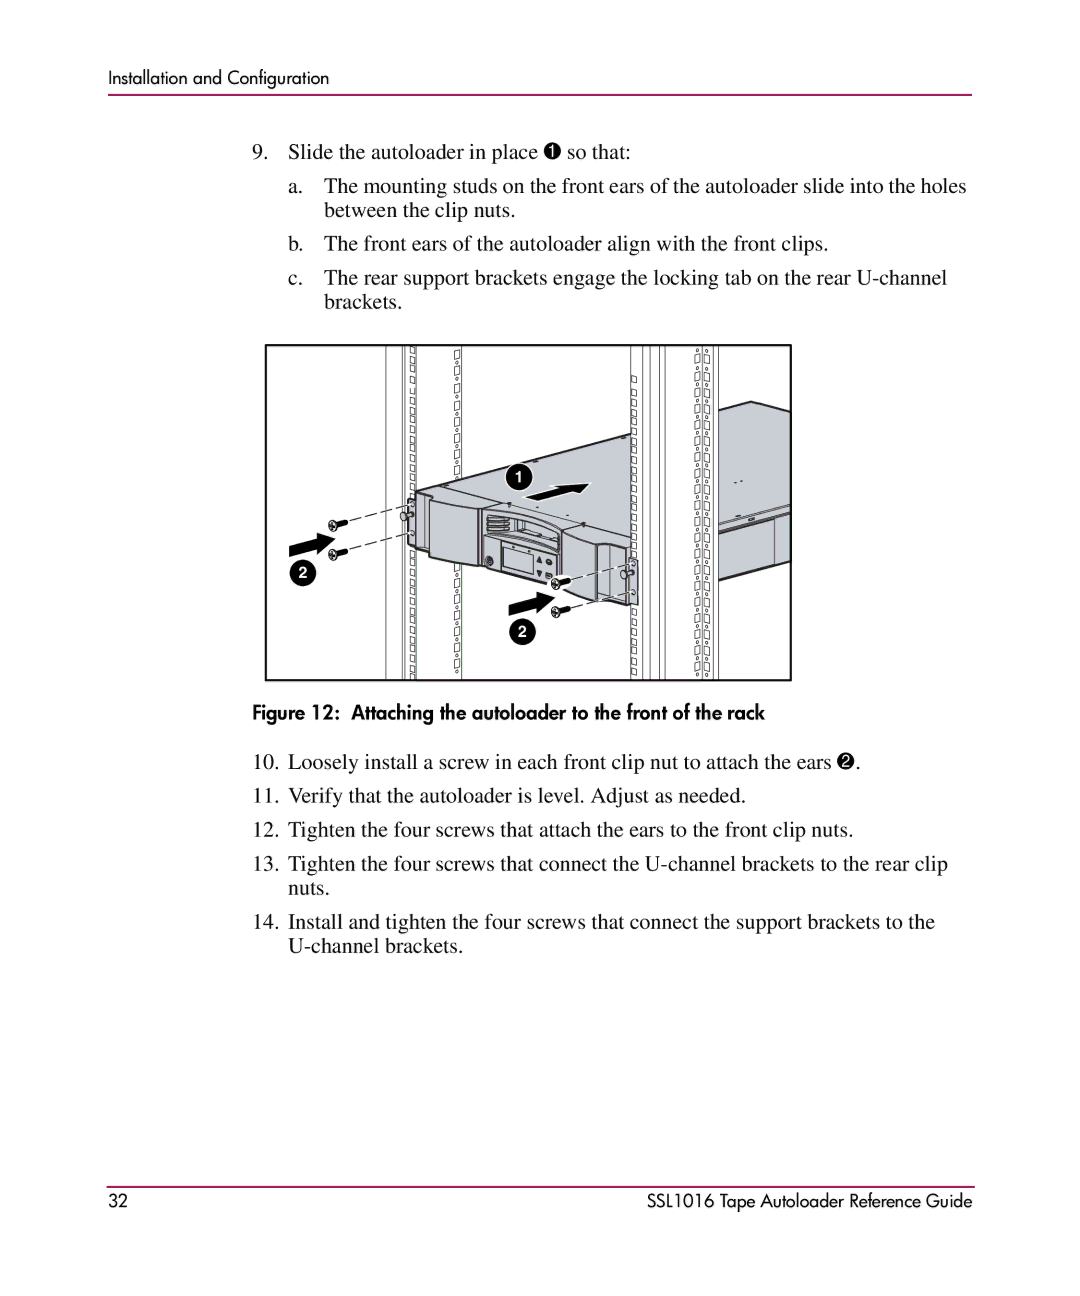
9.Slide the autoloader in place 1 so that:
a.The mounting studs on the front ears of the autoloader slide into the holes between the clip nuts.
b.The front ears of the autoloader align with the front clips.
c.The rear support brackets engage the locking tab on the rear
1
2
2
Figure 12: Attaching the autoloader to the front of the rack
10.Loosely install a screw in each front clip nut to attach the ears 2.
11.Verify that the autoloader is level. Adjust as needed.
12.Tighten the four screws that attach the ears to the front clip nuts.
13.Tighten the four screws that connect the
14.Install and tighten the four screws that connect the support brackets to the
32 | SSL1016 Tape Autoloader Reference Guide |