Installation and Configuration
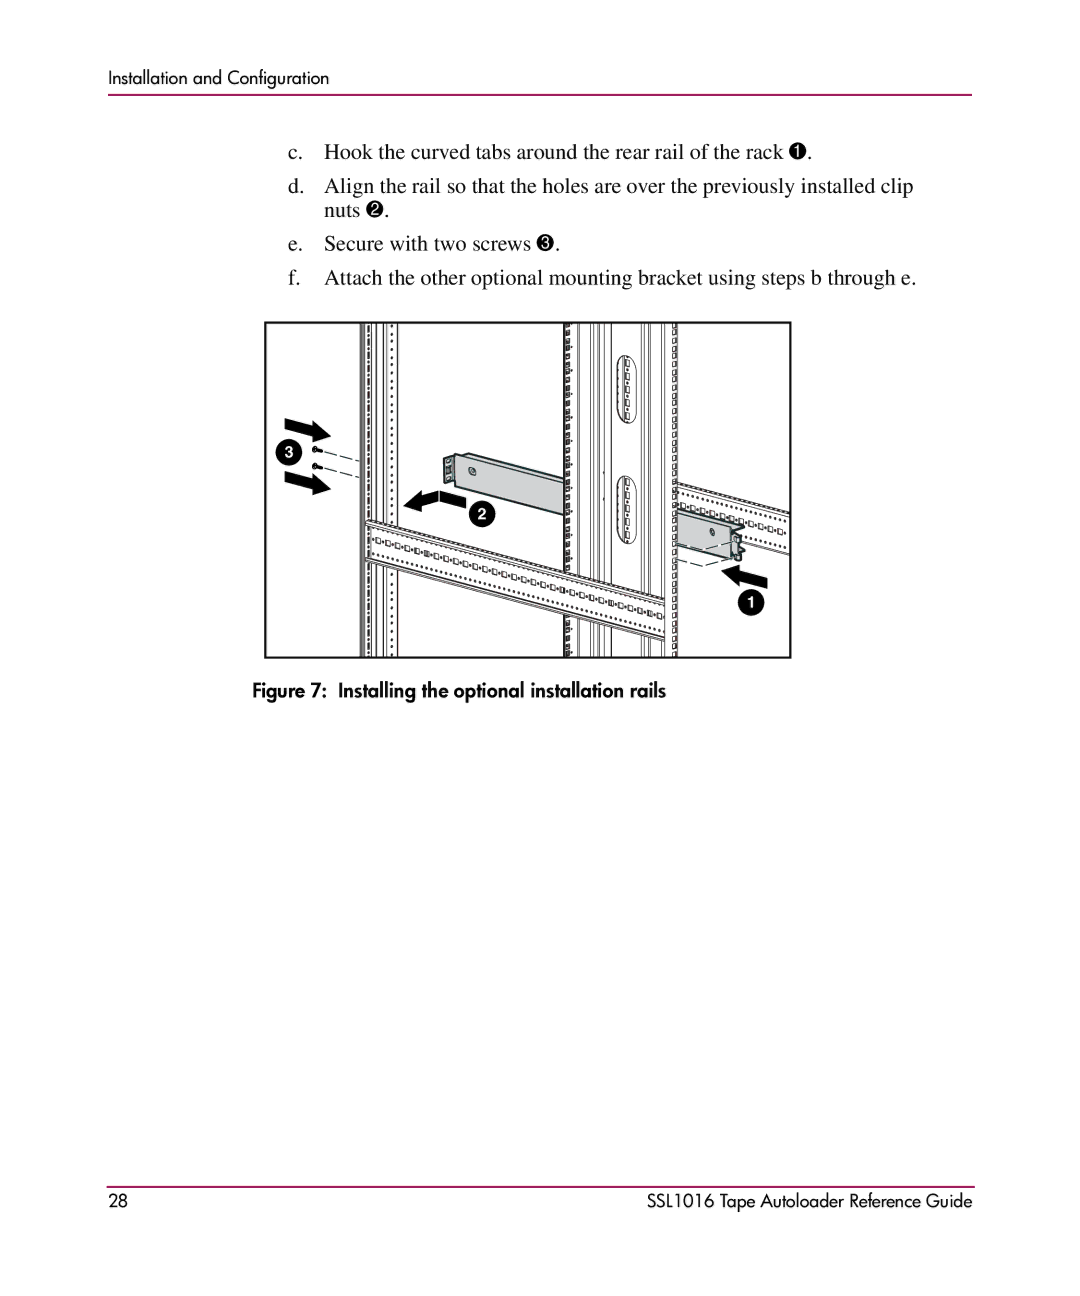
c.Hook the curved tabs around the rear rail of the rack 1.
d.Align the rail so that the holes are over the previously installed clip nuts 2.
e.Secure with two screws 3.
f.Attach the other optional mounting bracket using steps b through e.
3 |
2 |
1 |
Figure 7: Installing the optional installation rails
28 | SSL1016 Tape Autoloader Reference Guide |
