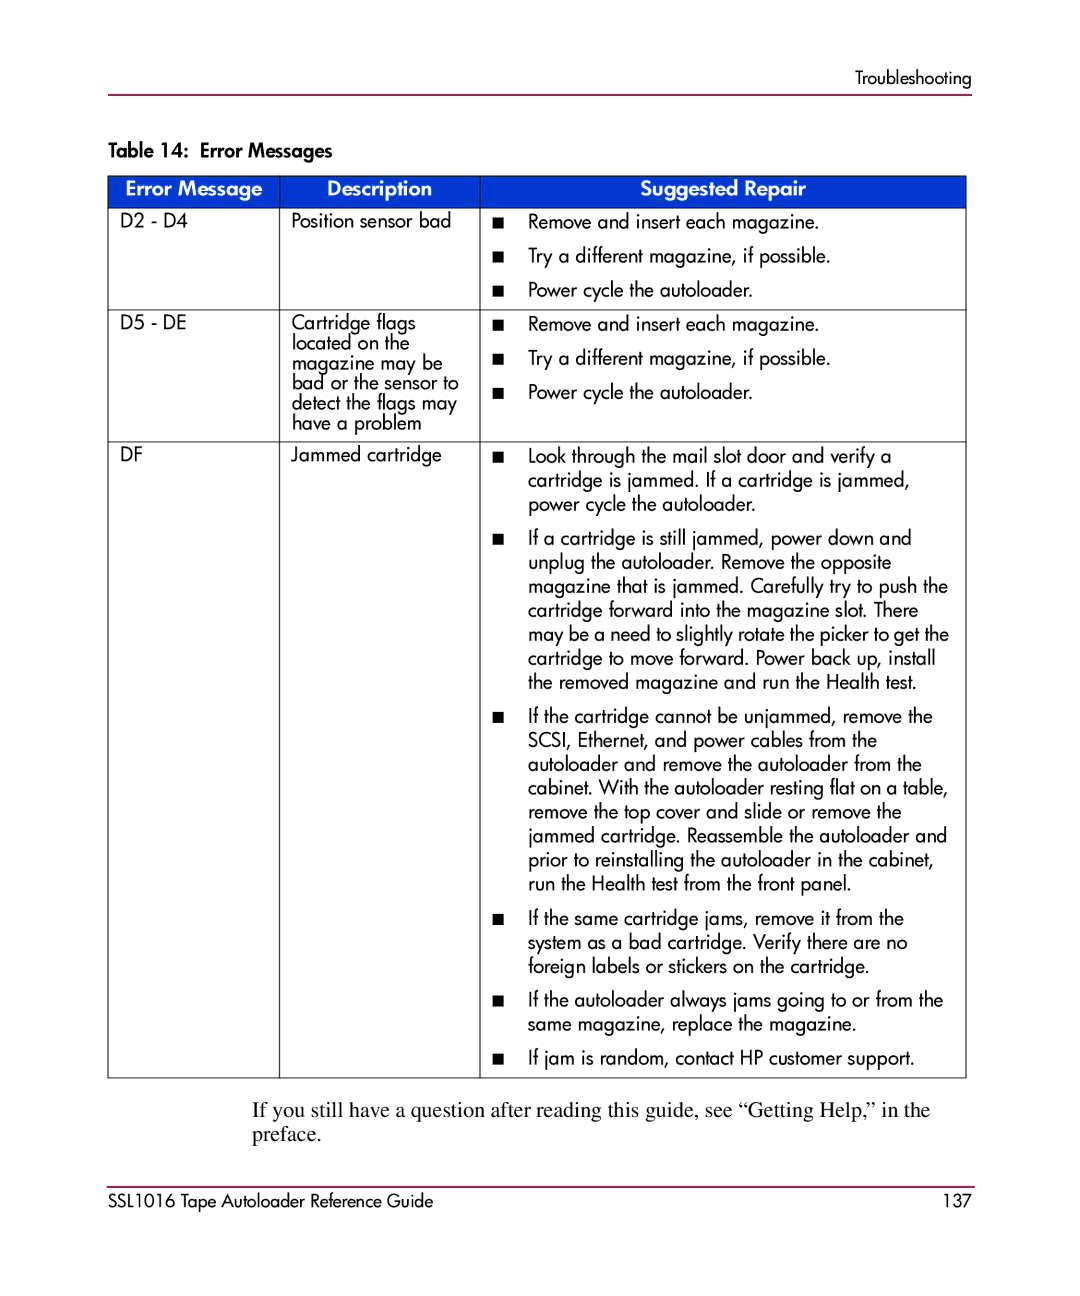
■ If a cartridge is still jammed, power down and unplug the autoloader. Remove the opposite magazine that is jammed. Carefully try to push the cartridge forward into the magazine slot. There may be a need to slightly rotate the picker to get the cartridge to move forward. Power back up, install the removed magazine and run the Health test.
■ If the cartridge cannot be unjammed, remove the SCSI, Ethernet, and power cables from the autoloader and remove the autoloader from the cabinet. With the autoloader resting flat on a table, remove the top cover and slide or remove the jammed cartridge. Reassemble the autoloader and prior to reinstalling the autoloader in the cabinet, run the Health test from the front panel.
■ If the same cartridge jams, remove it from the system as a bad cartridge. Verify there are no foreign labels or stickers on the cartridge.
■ If the autoloader always jams going to or from the same magazine, replace the magazine.
■ If jam is random, contact HP customer support.
If you still have a question after reading this guide, see “Getting Help,” in the preface.
Troubleshooting
Table 14: Error Messages |
|
|
| |
|
|
|
|
|
Error Message | Description |
| Suggested Repair |
|
D2 - D4 | Position sensor bad | ■ | Remove and insert each magazine. |
|
|
| ■ Try a different magazine, if possible. |
| |
|
| ■ Power cycle the autoloader. |
| |
|
|
|
|
|
D5 - DE | Cartridge flags | ■ | Remove and insert each magazine. |
|
| located on the |
| Try a different magazine, if possible. |
|
| magazine may be | ■ |
| |
| bad or the sensor to | ■ | Power cycle the autoloader. |
|
| detect the flags may |
| ||
|
|
|
| |
| have a problem |
|
|
|
|
|
|
|
|
DF | Jammed cartridge | ■ | Look through the mail slot door and verify a |
|
|
|
| cartridge is jammed. If a cartridge is jammed, |
|
|
|
| power cycle the autoloader. |
|
|
|
|
|
|
|
|
|
|
|