Configuration
2.Highlight the fields under Quality and press ![]() to set the recorded image quality for Time and Event recording. You can select from: Very High, High, Standard, and Basic.
to set the recorded image quality for Time and Event recording. You can select from: Very High, High, Standard, and Basic.
3.Select OK and press ![]() to load your default settings.
to load your default settings.
4.Save all of your changes to the schedule by highlighting Save and pressing ![]() . Select Cancel to exit the screen without saving the changes.
. Select Cancel to exit the screen without saving the changes.
Pre-Event Screen
Highlight ![]() . The
. The
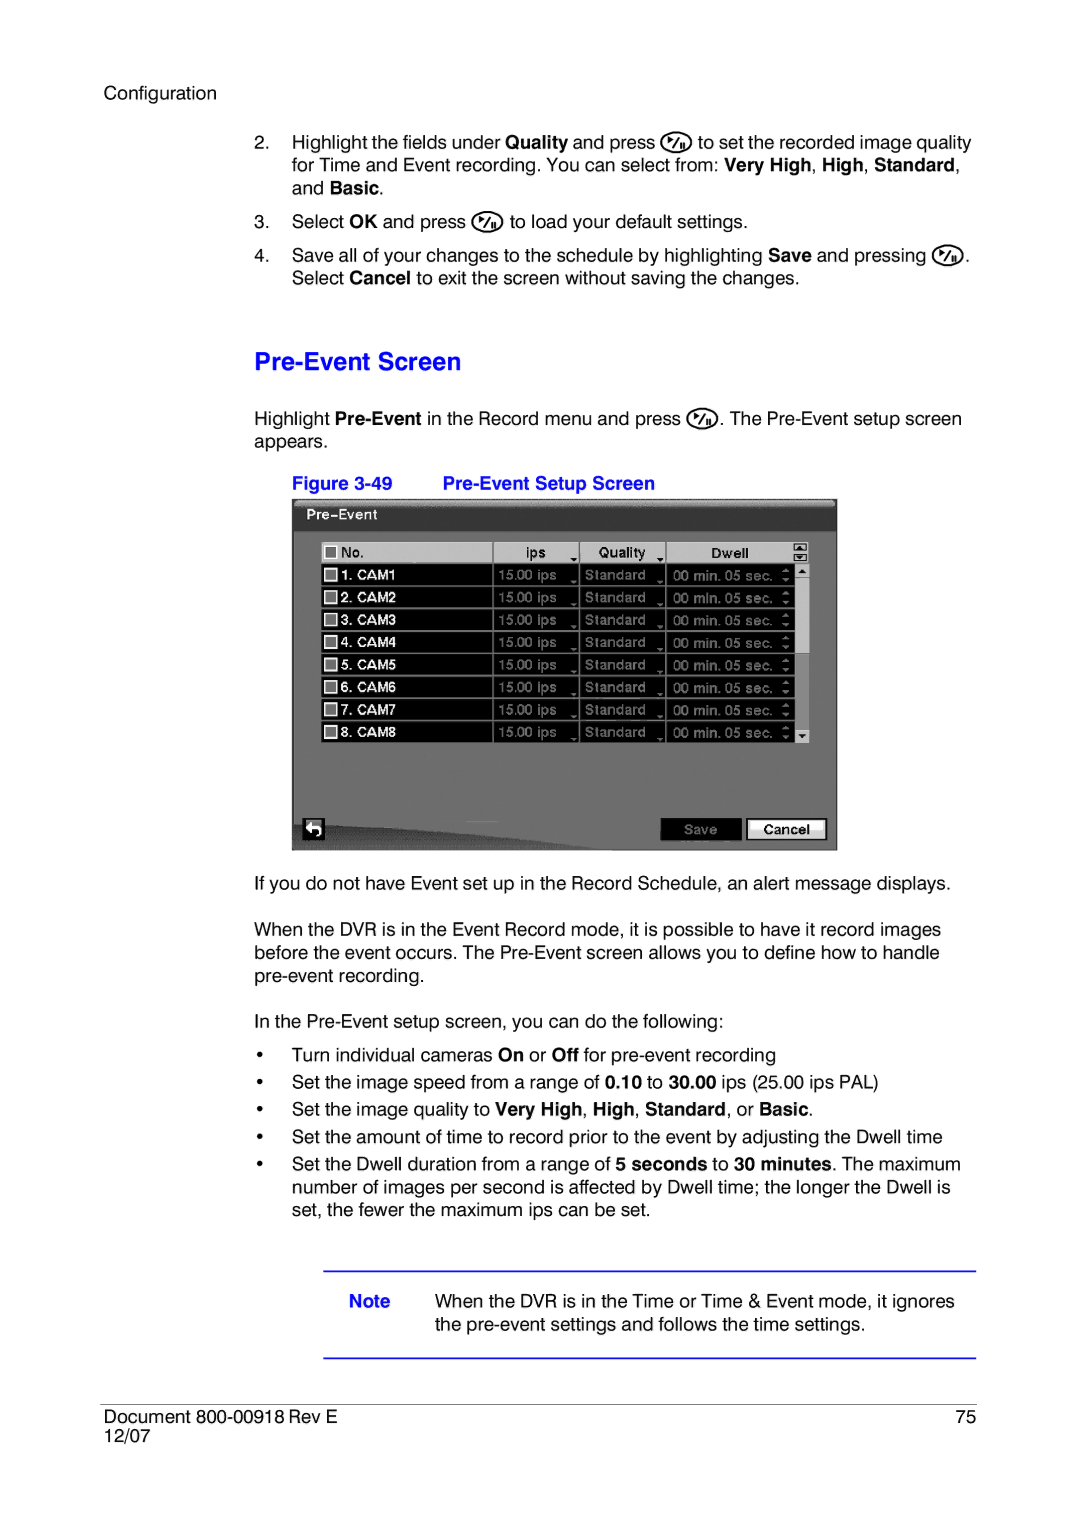
Figure 3-49 Pre-Event Setup Screen
If you do not have Event set up in the Record Schedule, an alert message displays.
When the DVR is in the Event Record mode, it is possible to have it record images before the event occurs. The
In the
•Turn individual cameras On or Off for
•Set the image speed from a range of 0.10 to 30.00 ips (25.00 ips PAL)
•Set the image quality to Very High, High, Standard, or Basic.
•Set the amount of time to record prior to the event by adjusting the Dwell time
•Set the Dwell duration from a range of 5 seconds to 30 minutes. The maximum number of images per second is affected by Dwell time; the longer the Dwell is set, the fewer the maximum ips can be set.
Note When the DVR is in the Time or Time & Event mode, it ignores
the
Document | 75 |
12/07 |
|