Operation
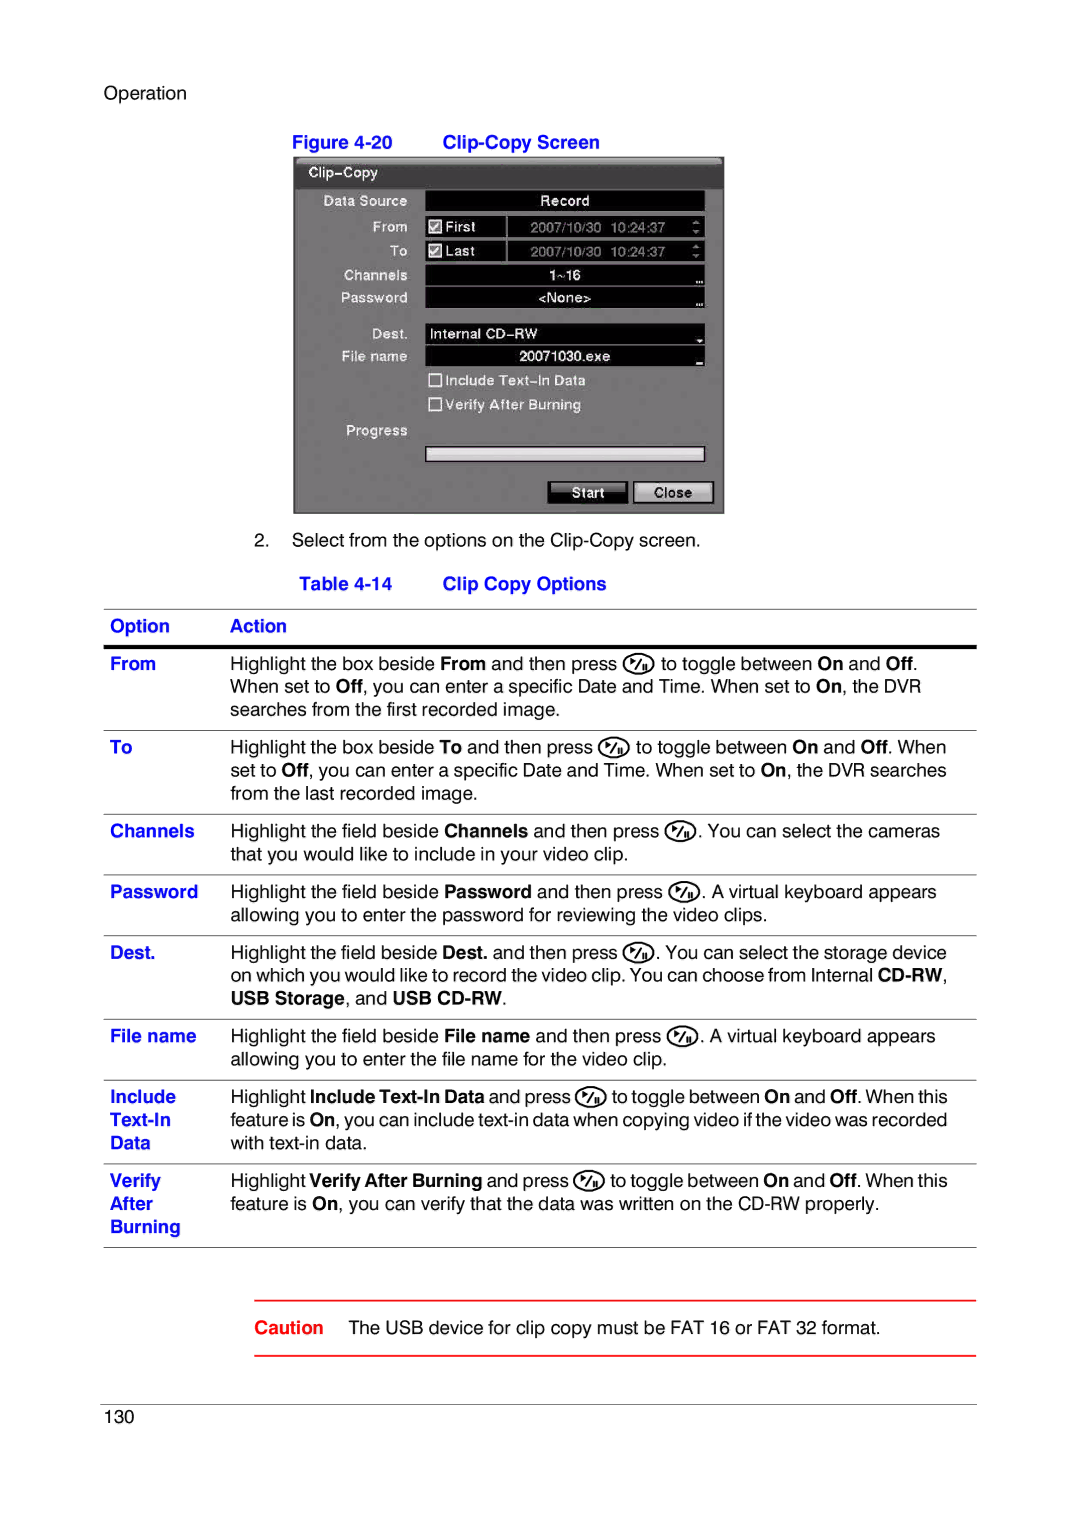
Figure 4-20 Clip-Copy Screen
2.Select from the options on the
Table 4-14 Clip Copy Options
Option | Action |
|
|
|
|
|
| ||
From | Highlight the box beside From and then press | to toggle between On and Off. | ||
| When set to Off, you can enter a specific Date and Time. When set to On, the DVR | |||
| searches from the first recorded image. |
|
|
|
|
|
|
| |
To | Highlight the box beside To and then press |
| to toggle between On and Off. When | |
| set to Off, you can enter a specific Date and Time. When set to On, the DVR searches | |||
| from the last recorded image. |
|
|
|
|
|
| ||
Channels | Highlight the field beside Channels and then press | . You can select the cameras | ||
| that you would like to include in your video clip. |
|
| |
|
|
| ||
Password | Highlight the field beside Password and then press | . A virtual keyboard appears | ||
| allowing you to enter the password for reviewing the video clips. | |||
|
|
| ||
Dest. | Highlight the field beside Dest. and then press | . You can select the storage device | ||
| on which you would like to record the video clip. You can choose from Internal | |||
| USB Storage, and USB |
|
|
|
|
|
| ||
File name | Highlight the field beside File name and then press | . A virtual keyboard appears | ||
| allowing you to enter the file name for the video clip. |
| ||
|
|
| ||
Include | Highlight Include | to toggle between On and Off. When this | ||
| feature is On, you can include | |||
Data | with |
|
|
|
|
|
| ||
Verify | Highlight Verify After Burning and press | to toggle between On and Off. When this | ||
After | feature is On, you can verify that the data was written on the | |||
Burning |
|
|
|
|
|
|
|
|
|
Caution The USB device for clip copy must be FAT 16 or FAT 32 format.
130
