STEP 3. Enter n. The software displays the Toolkit Screen Main Menu.
STEP 4. Select Enable LAN Service Port. The software displays the Enable LAN Service Port screen and prompts for network information.
STEP 5. As prompted, enter the IP address, subnet mask, and default gateway of the SP you connected to the serial port.
You recorded these parameters on your Administration Worksheet when you initially installed your
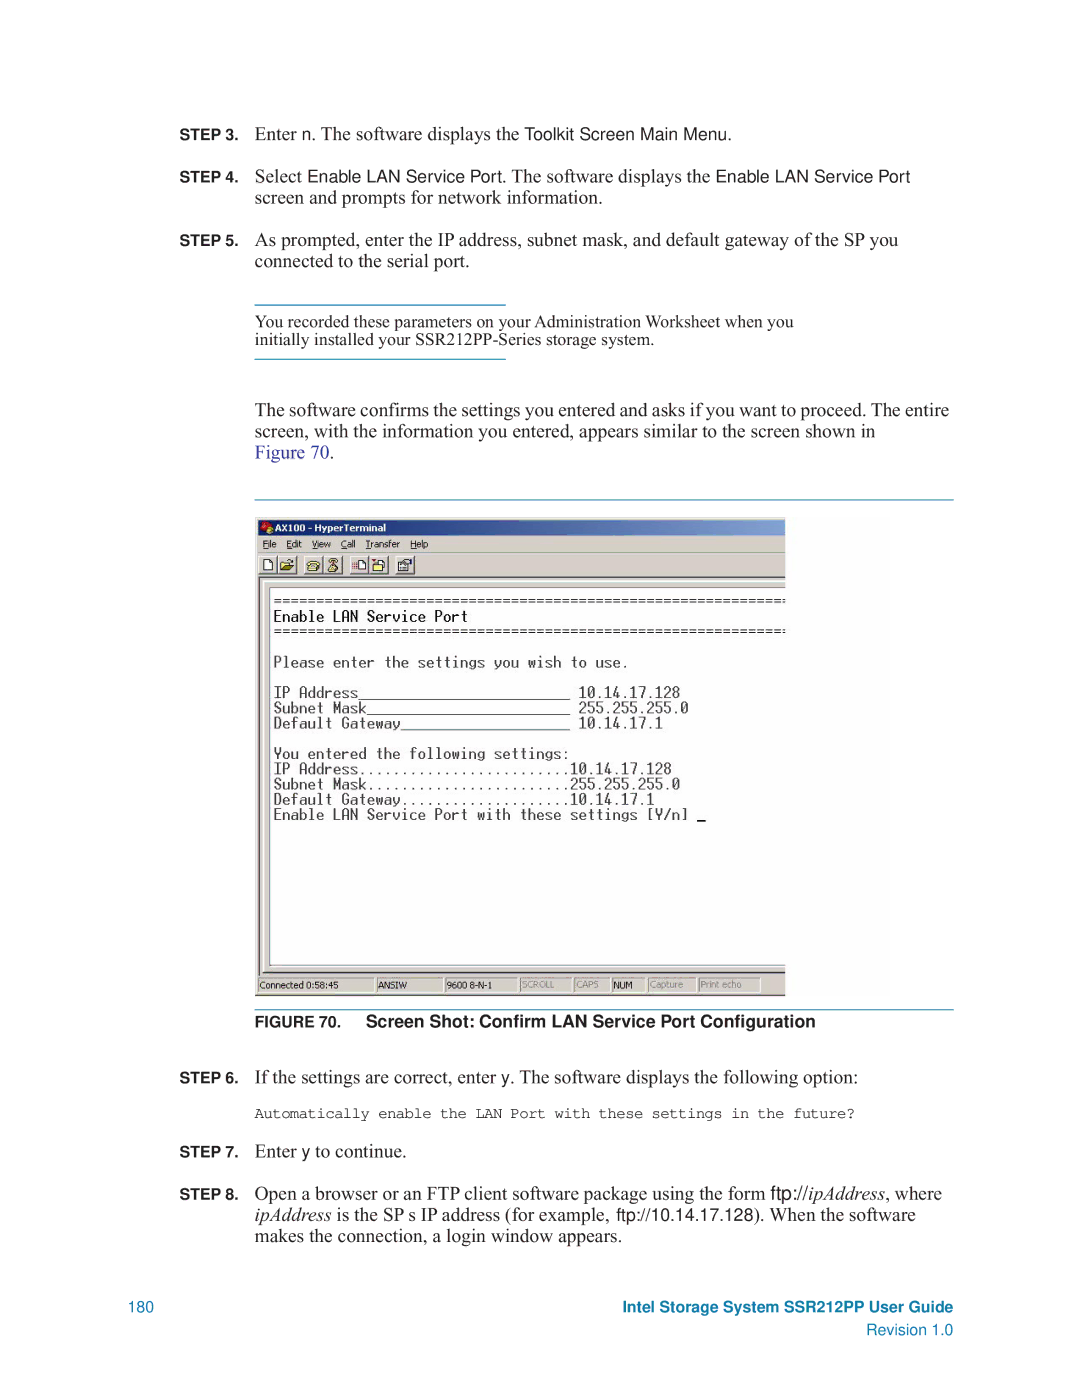
The software confirms the settings you entered and asks if you want to proceed. The entire screen, with the information you entered, appears similar to the screen shown in Figure 70.
FIGURE 70. Screen Shot: Confirm LAN Service Port Configuration
STEP 6. If the settings are correct, enter y. The software displays the following option:
Automatically enable the LAN Port with these settings in the future?
STEP 7. Enter y to continue.
STEP 8. Open a browser or an FTP client software package using the form ftp://ipAddress, where ipAddress is the SP s IP address (for example, ftp://10.14.17.128). When the software makes the connection, a login window appears.
180 | Intel Storage System SSR212PP User Guide |
| Revision 1.0 |