You may receive a second power supply that looks slightly different from the original, and/or different from the illustrations in this note. The two versions are functionally the same.
STEP 8. If you received disks modules that are not already installed in the storage system, follow the instructions in Procedure 13, "Installing a Disk Module," on page 87 to install them.
STEP 9. Connect the storage system to AC power.
Use Procedure 14, "Connecting AC Power to a
Use Procedure 15, "Connecting AC Power to a
STEP 10. Follow Procedure 16, "Connecting the Management Ports to the LAN," on page 99 to connect the management ports.
STEP 11. Install the Navisphere Storage System Initialization Utility. See Procedure 17, "Installing the Navisphere Storage System Initialization Utility," on page 103.
STEP 12. Verify that the storage system is powered up completely:
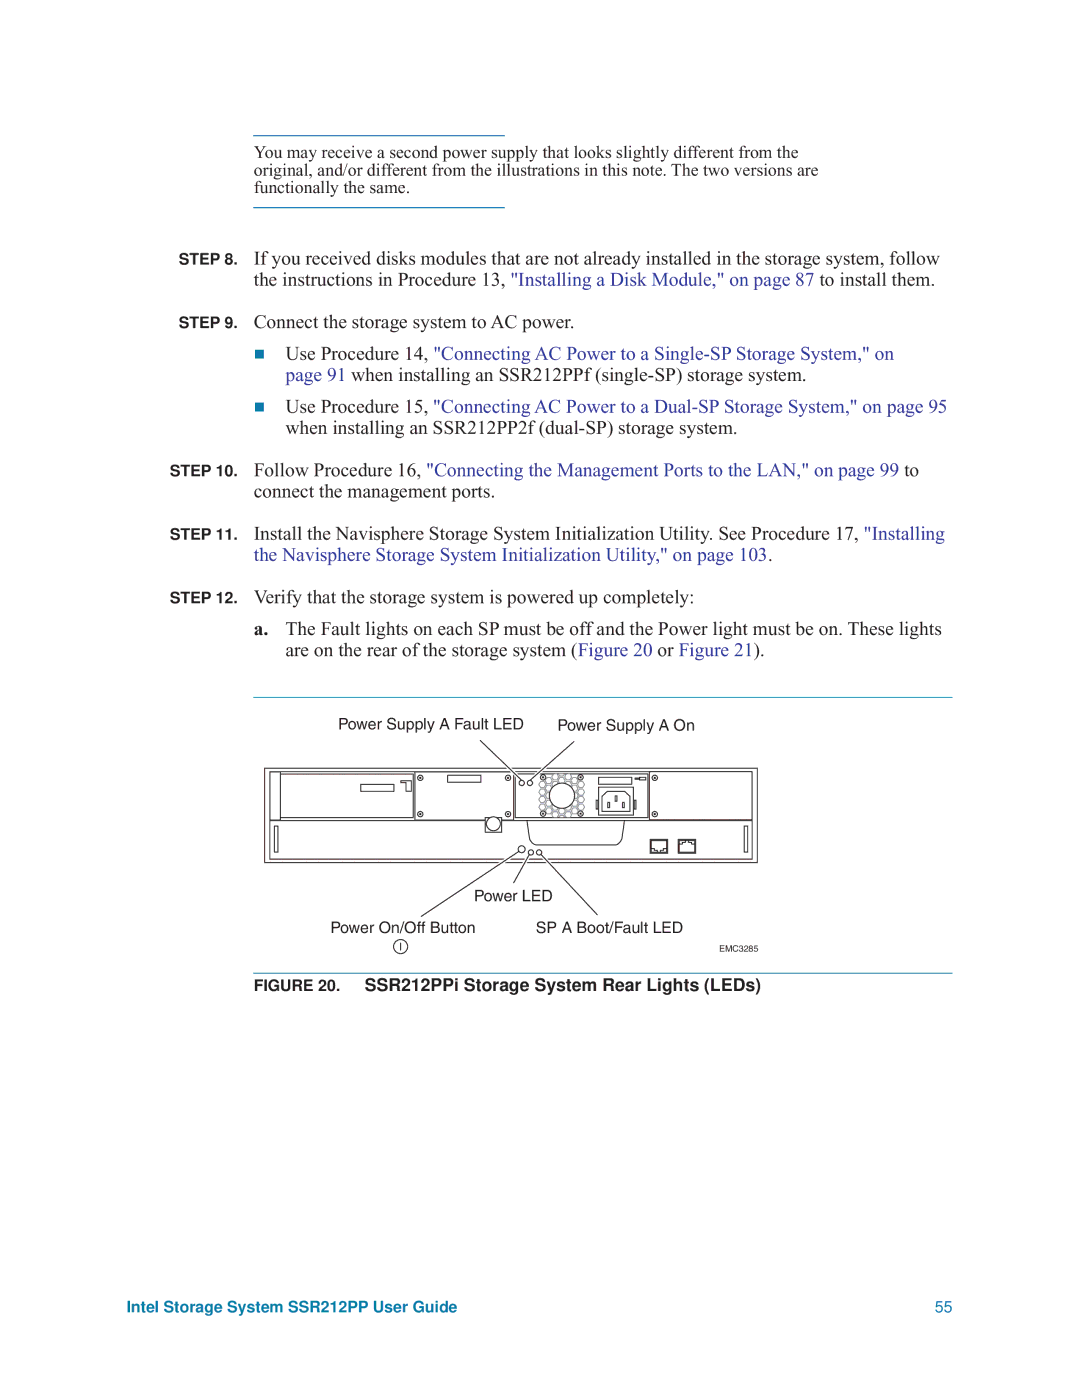
a.The Fault lights on each SP must be off and the Power light must be on. These lights are on the rear of the storage system (Figure 20 or Figure 21).
|
| Power Supply A Fault LED | Power Supply A On | |||||||||||||||||||||
|
|
|
|
|
|
|
|
|
|
|
|
|
|
|
|
|
|
|
|
|
|
|
|
|
|
|
|
|
|
|
|
|
|
|
|
|
|
|
|
|
|
|
|
|
|
|
|
|
|
|
|
|
|
|
|
|
|
|
|
|
|
|
|
|
|
|
|
|
|
|
|
|
|
|
|
|
|
|
|
|
|
|
|
|
|
|
|
|
|
|
|
|
|
|
|
|
|
|
|
|
|
|
|
|
|
|
|
|
|
|
|
|
|
|
|
|
|
|
|
|
|
|
|
|
|
|
|
|
|
|
|
|
|
|
|
|
|
|
|
|
|
|
|
|
|
|
|
|
|
|
|
|
|
|
|
|
|
|
|
|
|
|
|
|
|
|
|
|
|
|
|
|
|
|
Power LED
Power On/Off Button | SP A Boot/Fault LED |
EMC3285
FIGURE 20. SSR212PPi Storage System Rear Lights (LEDs)
Intel Storage System SSR212PP User Guide | 55 |