2Is print too light?
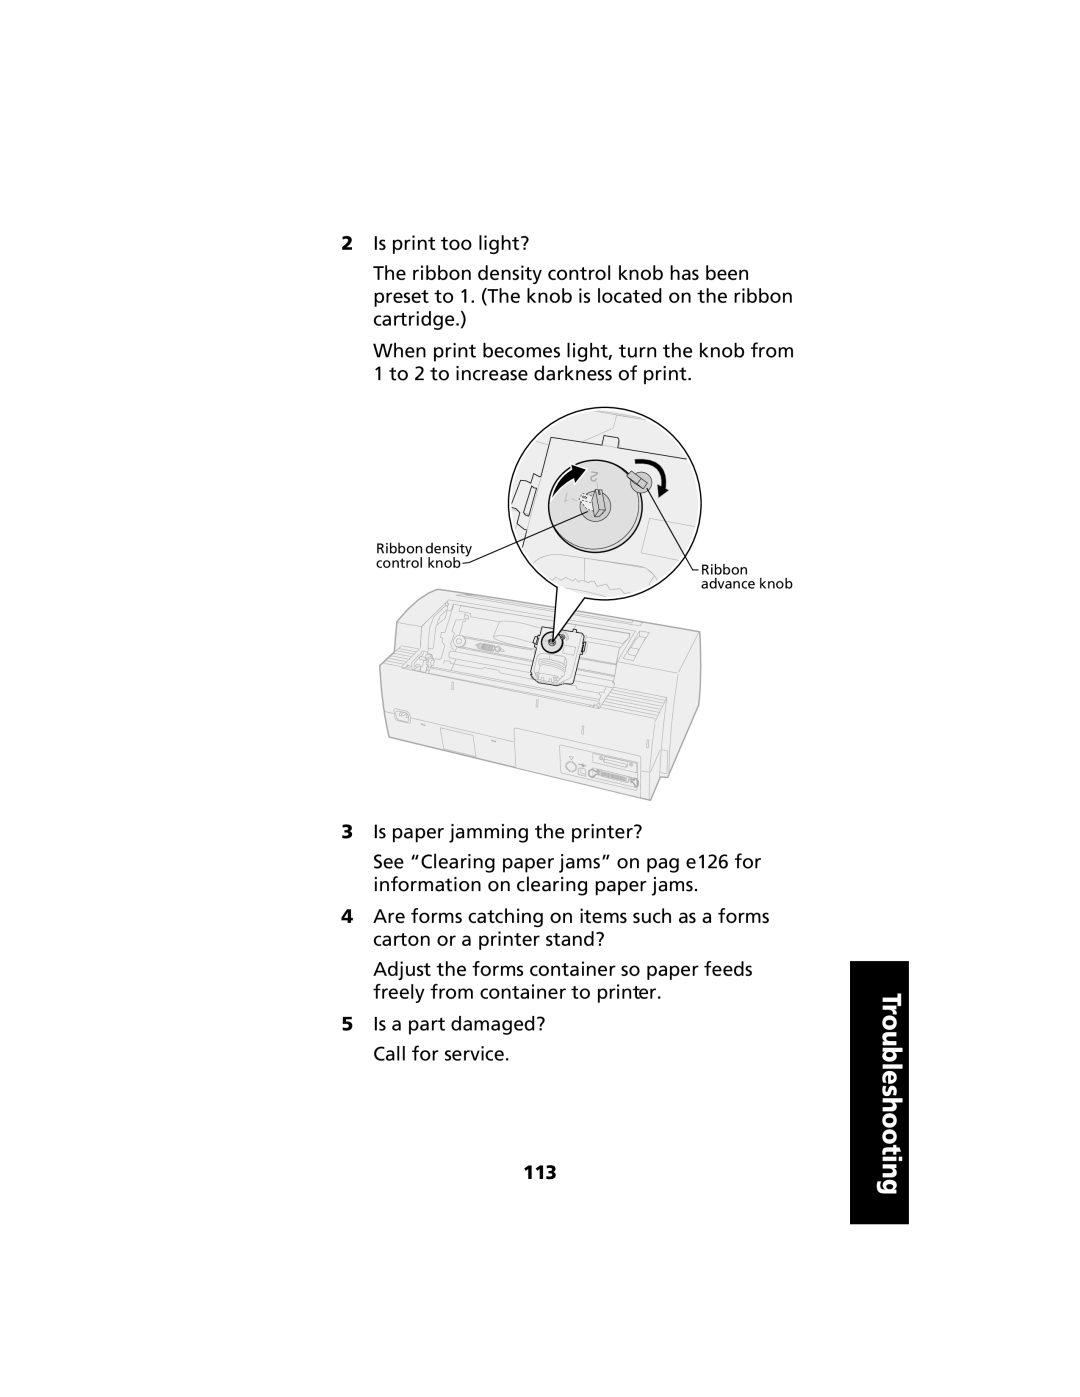
The ribbon density control knob has been preset to 1. (The knob is located on the ribbon cartridge.)
When print becomes light, turn the knob from 1 to 2 to increase darkness of print.
Ribbon density control knob![]()
![]() Ribbon advance knob
Ribbon advance knob
3Is paper jamming the printer?
See “Clearing paper jams” on pag e126 for information on clearing paper jams.
4Are forms catching on items such as a forms carton or a printer stand?
Adjust the forms container so paper feeds freely from container to printer.
5Is a part damaged? Call for service.
113
Troubleshooting