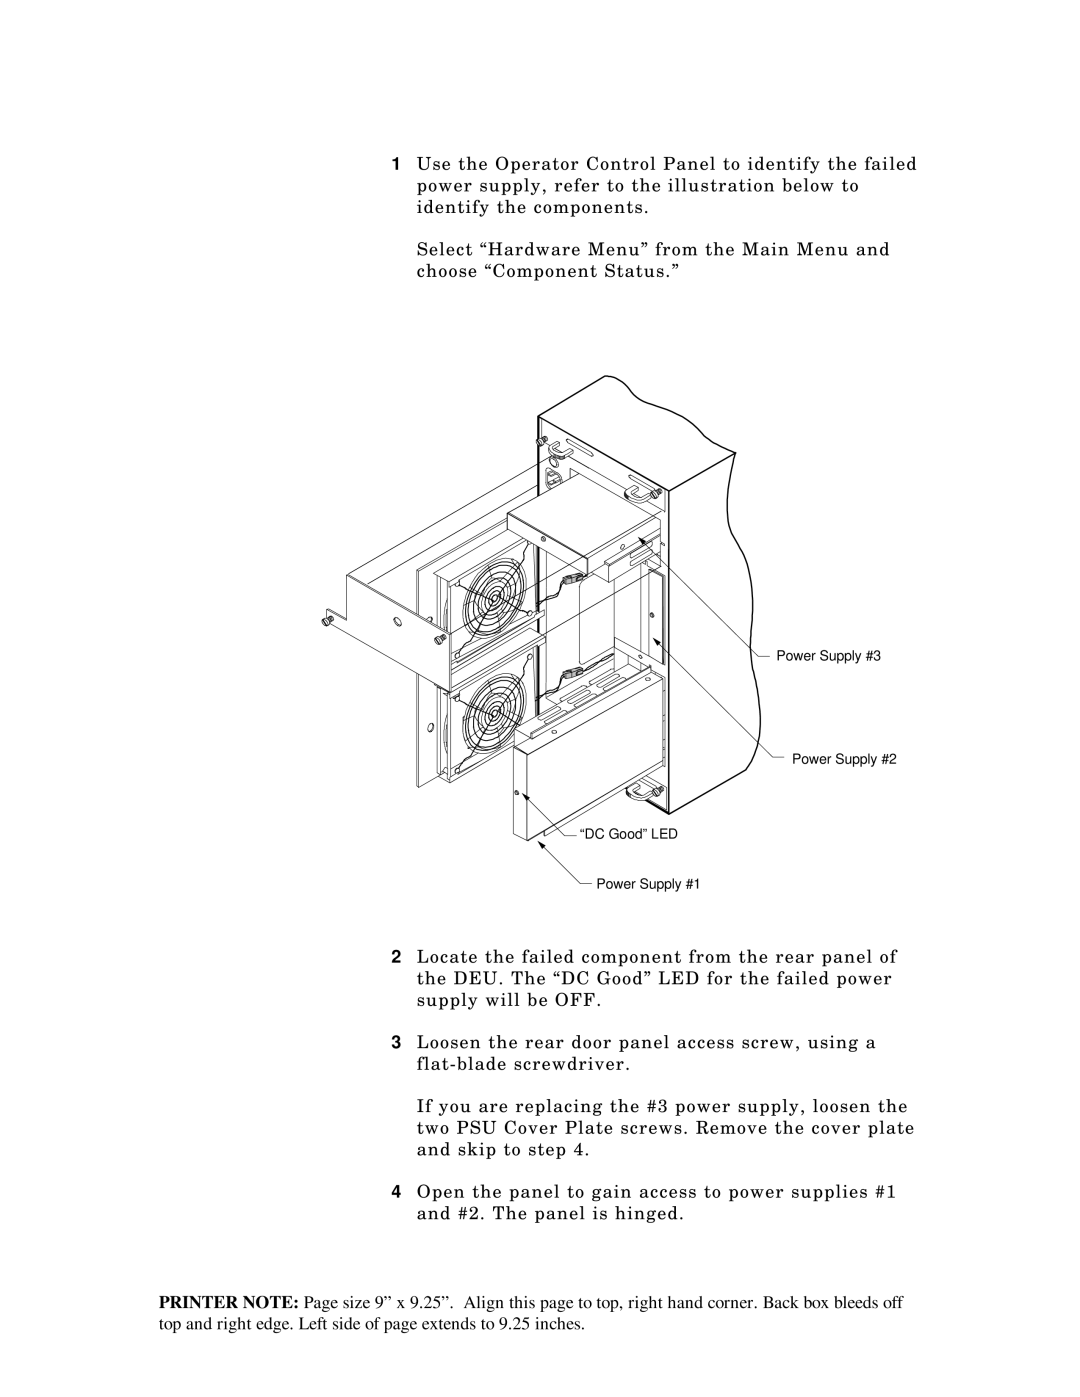
1Use the Operator Control Panel to identify the failed power supply, refer to the illustration below to identify the components.
Select “Hardware Menu” from the Main Menu and choose “Component Status.”
 Power Supply #3
Power Supply #2
“DC Good” LED
Power Supply #1
2Locate the failed component from the rear panel of the DEU. The “DC Good” LED for the failed power supply will be OFF.
3Loosen the rear door panel access screw, using a
If you are replacing the #3 power supply, loosen the two PSU Cover Plate screws. Remove the cover plate and skip to step 4.
4Open the panel to gain access to power supplies #1 and #2. The panel is hinged.
PRINTER NOTE: Page size 9” x 9.25”. Align this page to top, right hand corner. Back box bleeds off top and right edge. Left side of page extends to 9.25 inches.