Q
3 – Getting Started with SANbox SSP Setting Up SANbox SSP
■Mounting instructions included with kit, if ordered
■Warranty card
NOTE: All rack mount kits, including slide, direct, and shelf mount kits for the SANbox SSP are ordered separately.
3.3
Setting Up SANbox SSP
The SANbox SSP has two serviceable panels: port side and fan side.
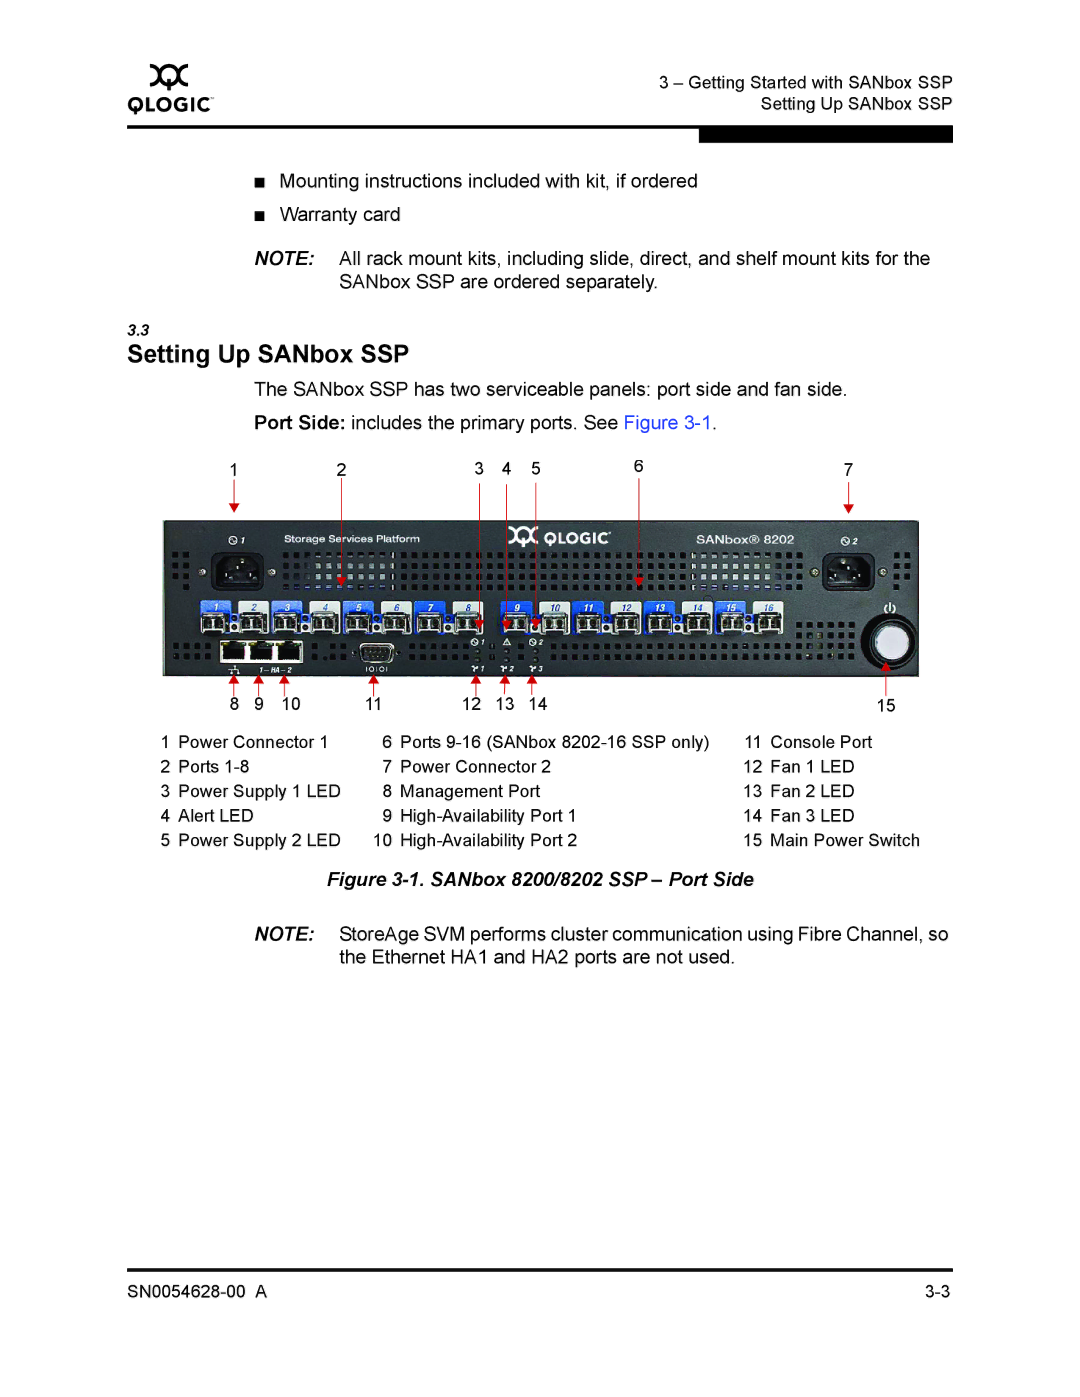
Port Side: includes the primary ports. See Figure
1 | 2 | 3 | 4 | 5 | 6 | 7 |
|
|
|
|
|
|
|
|
|
|
|
|
|
|
|
|
|
|
|
|
|
|
|
|
|
|
|
|
|
|
|
|
|
|
| 8 | 9 | 10 | 11 | 12 | 13 | 14 |
| 15 | |||||||
1 | Power Connector 1 | 6 | Ports | (SANbox | 11 | Console Port | ||||||||||
2 | Ports |
|
|
|
| 7 | Power Connector 2 | 12 | Fan 1 LED | |||||||
3 | Power Supply 1 LED | 8 | Management Port | 13 | Fan 2 LED | |||||||||||
4 | Alert LED |
|
|
|
| 9 | 14 | Fan 3 LED | ||||||||
5 | Power Supply 2 LED | 10 | 15 | Main Power Switch | ||||||||||||
Figure 3-1. SANbox 8200/8202 SSP – Port Side
NOTE: StoreAge SVM performs cluster communication using Fibre Channel, so the Ethernet HA1 and HA2 ports are not used.
