3 – Getting Started with SANbox SSP Connecting to the SAN
Q
3.4.2
Connecting SANbox SSPs to the SAN
For
■Can access all storage ports.
■Is connected to both SVM appliances through the
To connect SANbox SSPs to the SAN:
1.Using a standard
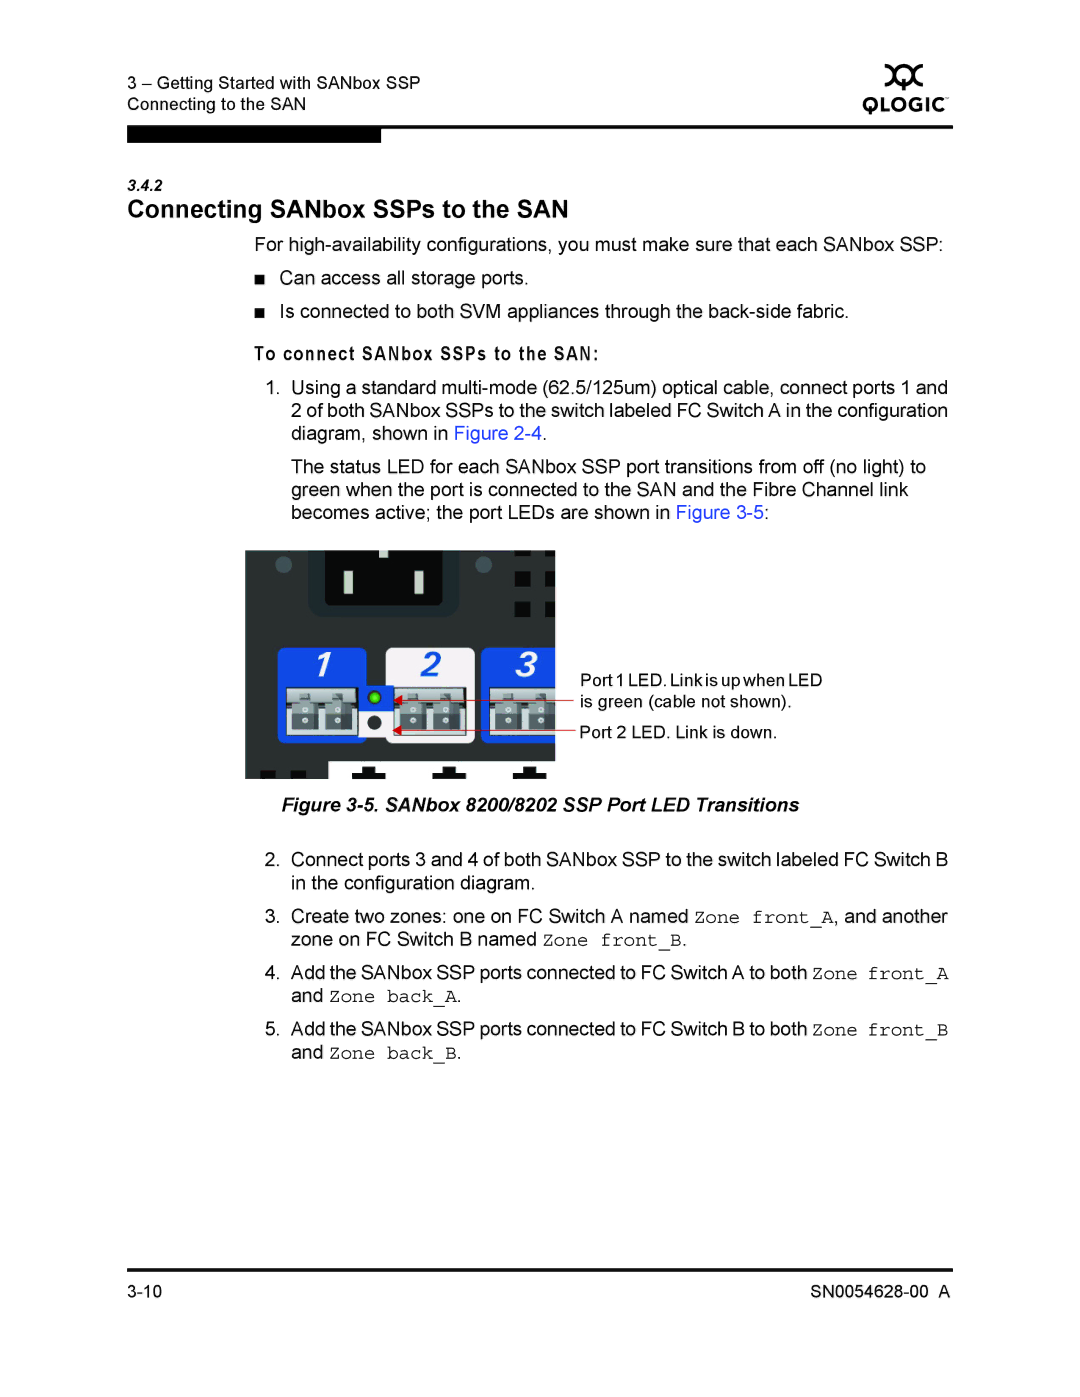
The status LED for each SANbox SSP port transitions from off (no light) to green when the port is connected to the SAN and the Fibre Channel link becomes active; the port LEDs are shown in Figure
Port 1 LED. Link is up when LED
![]() is green (cable not shown).
is green (cable not shown).
Port 2 LED. Link is down.
Figure 3-5. SANbox 8200/8202 SSP Port LED Transitions
2.Connect ports 3 and 4 of both SANbox SSP to the switch labeled FC Switch B in the configuration diagram.
3.Create two zones: one on FC Switch A named Zone front_A, and another zone on FC Switch B named Zone front_B.
4.Add the SANbox SSP ports connected to FC Switch A to both Zone front_A and Zone back_A.
5.Add the SANbox SSP ports connected to FC Switch B to both Zone front_B and Zone back_B.