3 – Getting Started with SANbox SSP Setting Up SANbox SSP
Q
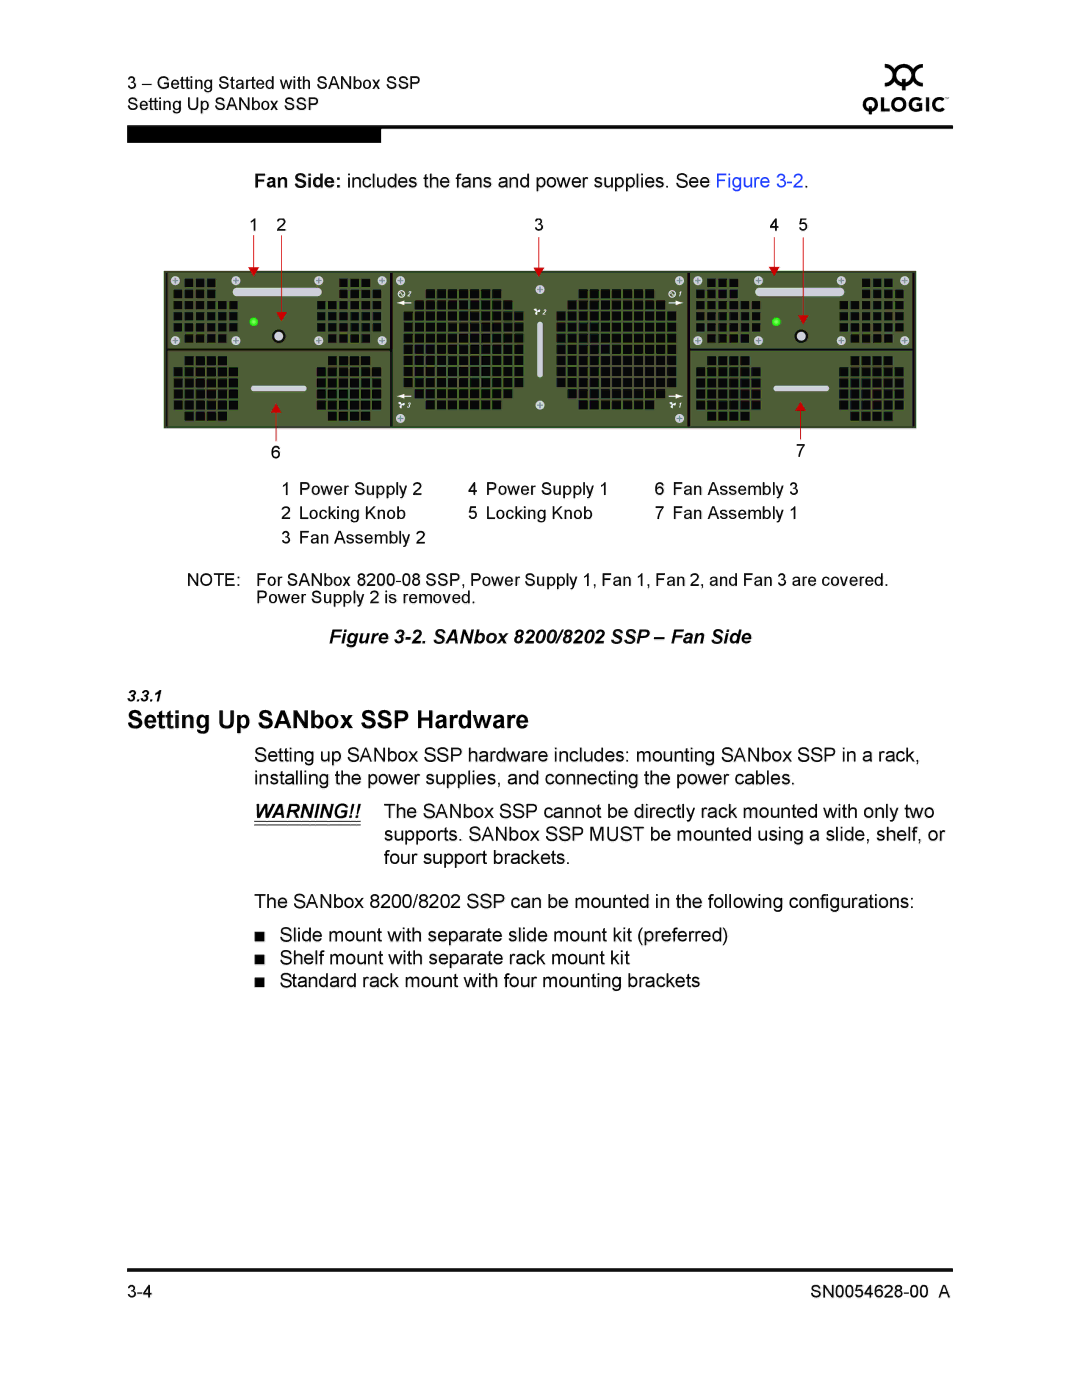
Fan Side: includes the fans and power supplies. See Figure
1 | 2 | 3 | 4 | 5 |
| 2 |
| 1 |
|
|
| 2 |
|
|
![]() 3
3 ![]()
![]()
![]()
![]()
![]()
![]()
![]()
![]()
![]()
![]()
![]()
![]()
![]()
![]()
![]()
![]() 1
1
|
|
|
|
|
|
|
|
|
|
|
|
|
|
|
|
|
|
|
|
|
|
|
|
|
|
|
|
|
|
|
|
|
|
|
|
|
|
|
6 |
|
|
|
|
|
| 7 | |||||
1 | Power Supply 2 | 4 | Power Supply 1 | 6 | Fan Assembly 3 | |||||||
2 | Locking Knob | 5 | Locking Knob | 7 | Fan Assembly 1 | |||||||
3 | Fan Assembly 2 |
|
|
|
|
|
|
|
| |||
NOTE: For SANbox
Figure 3-2. SANbox 8200/8202 SSP – Fan Side
3.3.1
Setting Up SANbox SSP Hardware
Setting up SANbox SSP hardware includes: mounting SANbox SSP in a rack, installing the power supplies, and connecting the power cables.
WARNING!! The SANbox SSP cannot be directly rack mounted with only two supports. SANbox SSP MUST be mounted using a slide, shelf, or four support brackets.
The SANbox 8200/8202 SSP can be mounted in the following configurations:
■Slide mount with separate slide mount kit (preferred)
■Shelf mount with separate rack mount kit
■Standard rack mount with four mounting brackets