112
The first occurs if you have written a program to be printed in one graphics mode and now want to print it in another. If you have used concatenation to store your graphics command in one short character string, that will not be difficult. You can simply change the mode number or alternate code in the definition of the character string.
A second time you can make good use of the redefining code occurs when you want to change a program in which you have not concatenated the graphics codes. Using the (ESC) “?” se- quence allows you to change every instance of your graphics command by entering only one line.
■
In the early part of this chapter, we said that the bottom pin of the print head is not normally used in the graphics modes. That’s because most computers communicate with
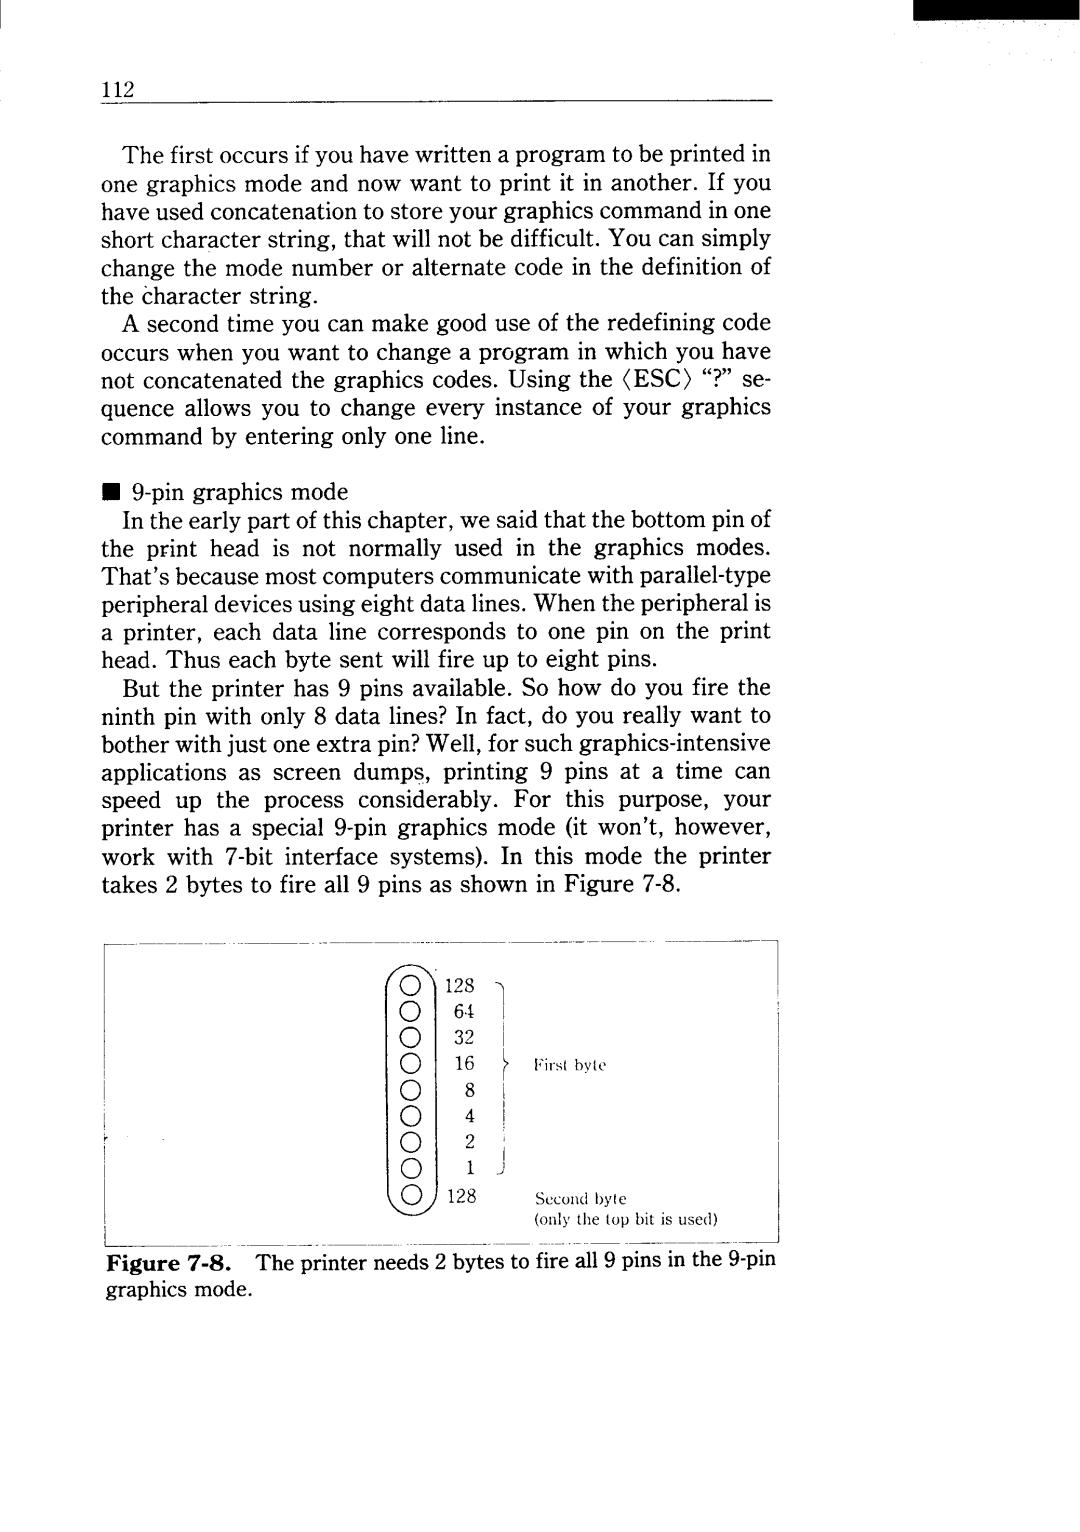
But the printer has 9 pins available. So how do you fire the ninth pin with only 8 data lines? In fact, do you really want to bother with just one extra pin? Well, for such
12s64 1~
32 I
16 ~ [Jits( hy[e
8 i
4 i
2 j
1 )
128 SKOIKIbyte
(oIIlj,the (OIJ bit is used)